Prerequisites
If you don’t already have a domain name, you will need to purchase one from a domain name registrar, and have the ability to update your domain’s DNS. We highly recommend using Cloudflare’s DNS service for this purpose.
Creating a New DigitalOcean Droplet for Your Web Server
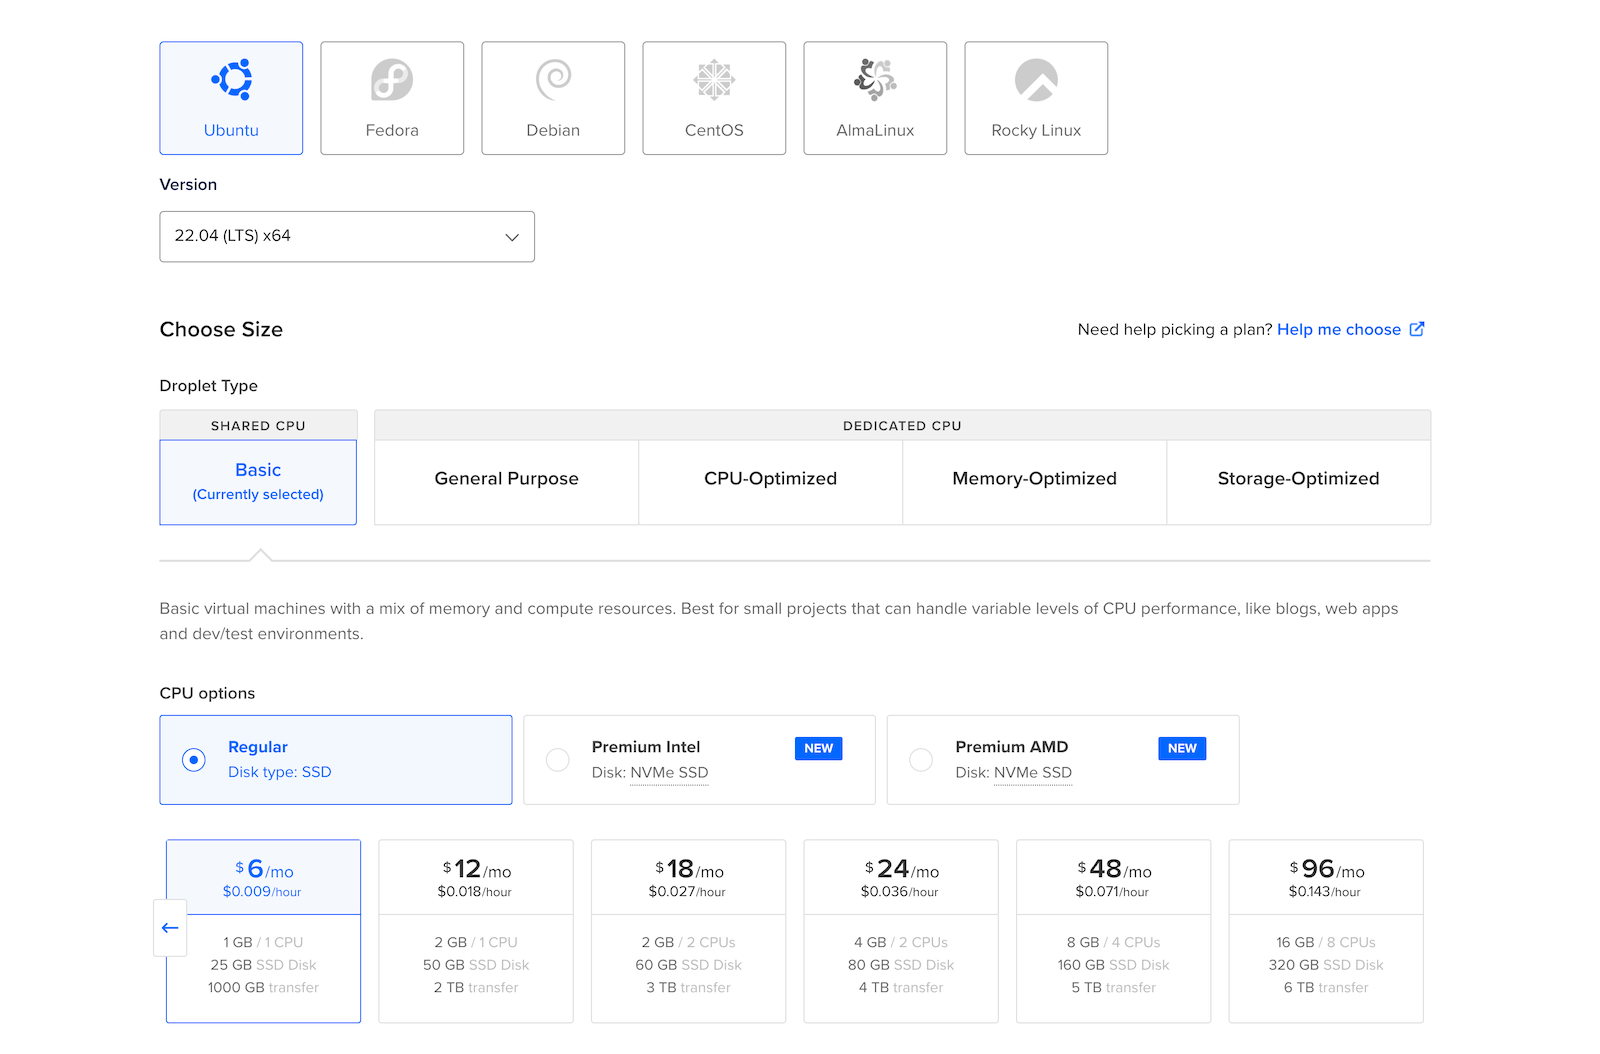
In this tutorial I’m not going to go into detail on the initial VPS creation process, as DigitalOcean has their own doc. However, when creating your new DigitalOcean Droplet you should choose Ubuntu 22.04 LTS as your Linux distribution:

You should select a region that is closest to the majority of your base audience so that the requests to your new droplet will be faster for your audience. I would also recommend that you enable the ‘Monitoring’ option. DigitalOcean’s built-in monitoring tools will come in very handy once you are hosting a WordPress site, and no need to worry about pricing. DigitalOcean’s monitoring is provided at no additional cost.
Finally, we recommend selecting the Password option under the “Authentication” section, so that you can log in to your server as the root user. DigitalOcean lists a few password requirements you should follow to ensure you create a secure password. Later on, we’ll be disabling the root user and password-based authentication as well as setting up SSH key authentication, which is more secure. For now though, creating a secure root user password is the quickest way to get access to your server, to start installing things.
First Login
Before we can install the web server software (e.g., PHP, MySQL database, etc) required for a WordPress installation, we first need to configure a few things on the server. We’ll start by logging into the server via SSH. You’ll be asked to enter the password you chose at the previous step.
ssh root@178.62.***.***
ashley@localhost:~$ ssh root@178.62.***.***
Welcome to Ubuntu 22.04 LTS (GNU/Linux 5.15.0-41-generic x86_64)

 * Documentation:  https://help.ubuntu.com
 * Management:  https://landscape.canonical.com
 * Support:     https://ubuntu.com/advantage

  System information as of Tue Aug 30 18:48:33 UTC 2022

  System load:  0.9072265625    Users logged in:    0
  Usage of /:   6.3% of 24.05GB   IPv4 address for eth0: 178.62.***.***
  Memory usage: 23%             IPv4 address for eth0: 10.20.0.11
  Swap usage:   0%              IPv4 address for eth1: 10.118.0.8
  Processes:    99

0 updates can be applied immediately.

The list of available updates is more than a week old.
To check for new updates run: sudo apt update
If you’re on a Mac or Linux operating system, you should be able to do all this through your default terminal application. If you are on Windows, you can install SSH software called Putty.
Setting the Hostname
Now that you’re logged into the server, let’s set the hostname and fully qualified domain name (FQDN). The hostname should be unique but doesn’t require any relationship to the sites that will be hosted, for example, some people opt to name their servers after astronomical objects.
Correctly setting the hostname and FQDN will make connecting to your server much easier in the future as you won’t have to remember the IP address each time. To set the hostname, issue the following commands (altered for your chosen domain name):
echo "pluto.ashleyrich.com" > /etc/hostname
hostname -F /etc/hostname
In order to connect to the server using your hostname you need to update your domain name’s DNS settings. Log into your DNS control panel and create a new A record:

Make sure that the A record matches the hostname you configured on your web server and that the IP address of the web server is associated with your domain name. You may need to wait a while for the DNS settings to propagate.
If you’re using Cloudflare for your DNS, make sure to toggle OFF the proxy switch.
Once the DNS settings have propagated, if you exit out of the current SSH session you should be able to connect to the server using the new hostname.
ssh root@pluto.ashleyrich.com
Setting the Timezone
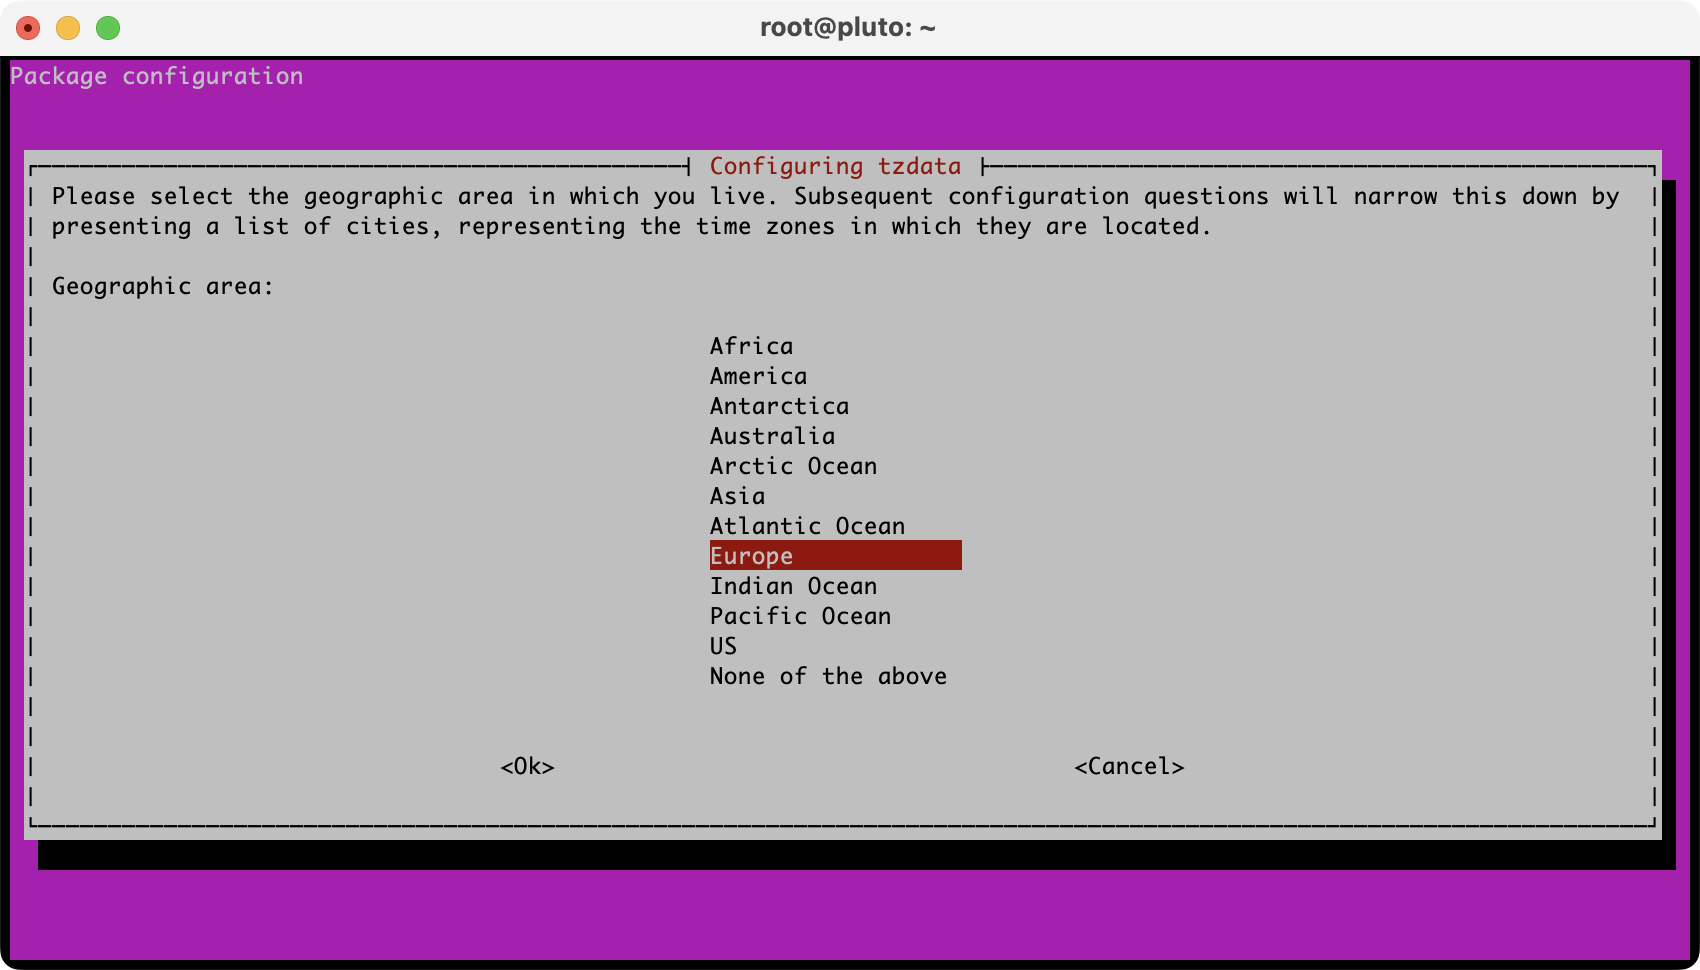
DigitalOcean will default the new server setup to the same timezone as the data center region. To set the server timezone you must configure the tzdata package. This will ensure that the system log files show the correct date and time. The following command will allow you to configure the tzdata package:
dpkg-reconfigure tzdata
A simple GUI will be displayed, allowing you to select your geographic area and time zone:

Once completed, the newly selected timezone will be displayed along with the current time and date:
root@pluto.ashleyrich.com:~$ dpkg-reconfigure tzdata
Current default time zone: 'Europe/London'
Local time is now:      Fri Sep  2 18:45:05 BST 2023.
Universal Time is now:  Fri Sep  2 17:45:05 UTC 2023.
Installing Software Updates
Although you have only just provisioned your new server, it is likely that some software packages are out of date. Let’s ensure you are using the latest software by pulling in updated package lists:
apt update
Once completed, let’s update all of the currently installed packages. You will be prompted with how much space the updates will take.
apt upgrade
When the upgrades have completed you will be shown which packages have been installed, and also which packages are no longer required by the system.
You can remove the outdated packages by issuing the following command:
apt autoremove
If you get a message that a system restart is required, run the following command:
reboot now
This will disconnect you from the server. You will need to wait until the server reboots before you can connect again via SSH.
Automatic Security Updates
It’s vitally important that you keep your server software updated so that software vulnerabilities are patched. Thankfully, Ubuntu can automatically perform software updates, keeping your server secure. It’s important to remember that this convenience can be quite dangerous and it’s recommended that you only enable security updates. This will automatically patch new vulnerabilities as they are discovered.
Non-essential software updates should be tested on a staging server before installing them so as not to introduce breaking changes, which could inadvertently take your Wordpress websites offline.
On some systems, this feature may automatically be enabled. If not, or you’re unsure, follow the steps below:
Step 1, Install the unattended-upgrades package:
apt install unattended-upgrades
Step 2, Create the required configuration files:
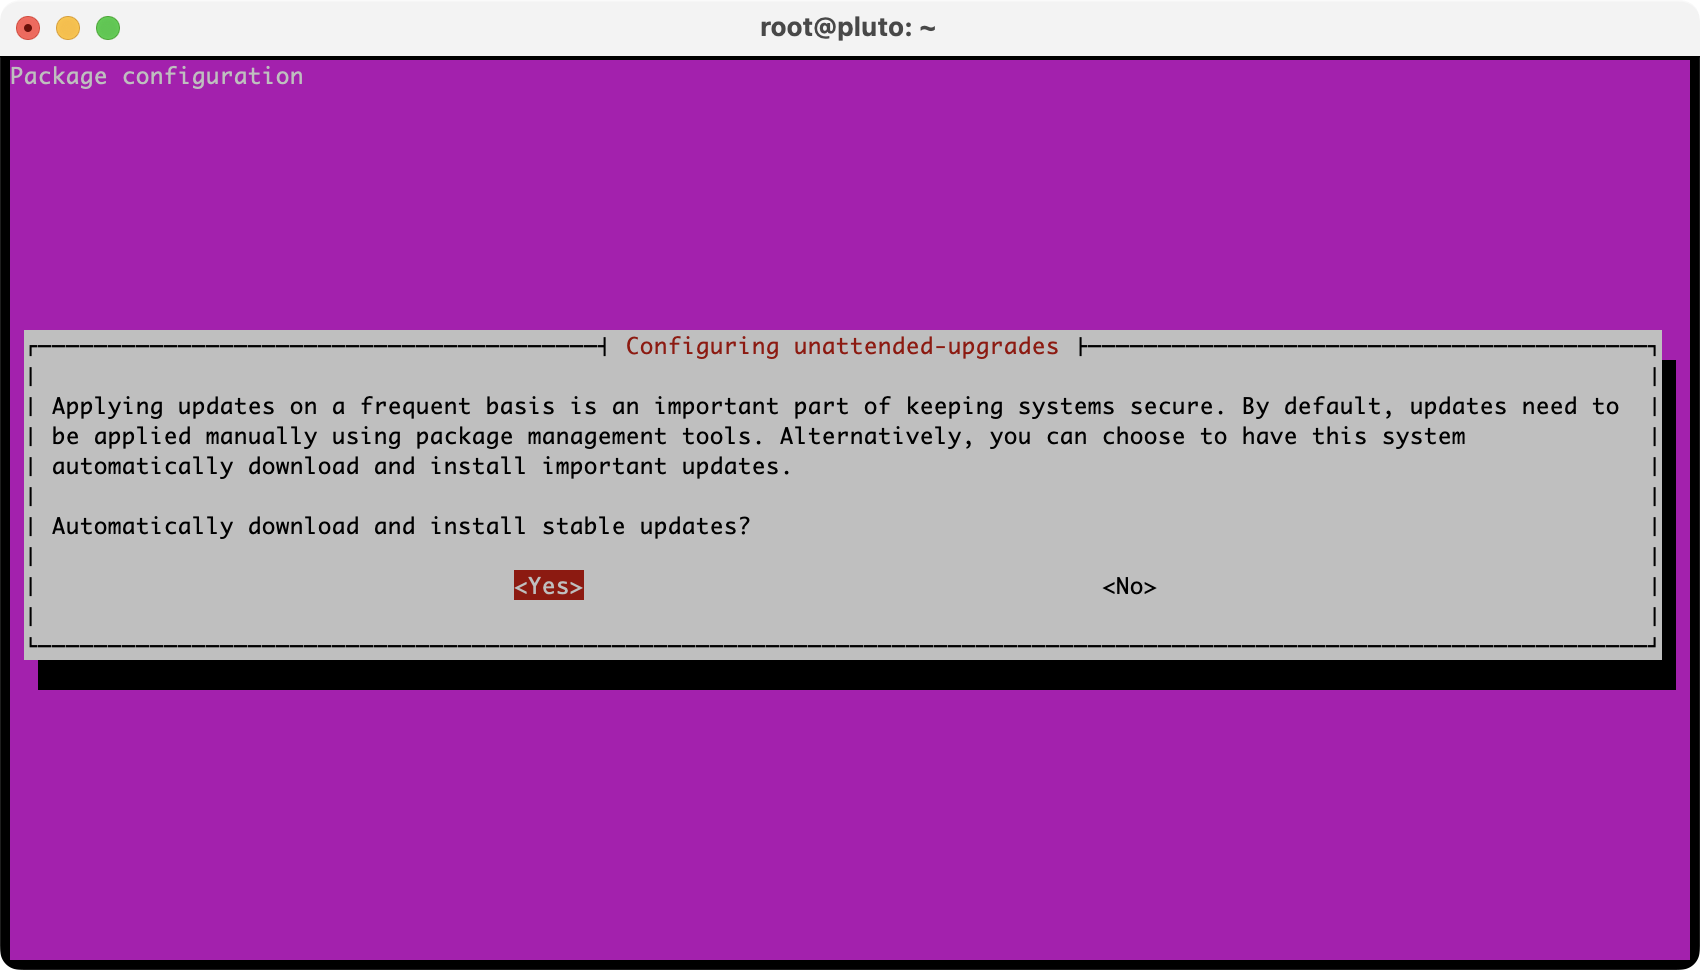
dpkg-reconfigure unattended-upgrades
You should see the following screen:

Step 3, Choose “Yes” and hit Enter. Then, edit the configuration file:
nano /etc/apt/apt.conf.d/50unattended-upgrades
Step 3, ensure that the security origin is allowed and that all others are removed or commented out:
// Automatically upgrade packages from these (origin:archive) pairs
//
// Note that in Ubuntu security updates may pull in new dependencies
// from non-security sources (e.g. chromium). By allowing the release
// pocket these get automatically pulled in.
Unattended-Upgrade::Allowed-Origins {
    "${distro_id}:${distro_codename}";
            "${distro_id}:${distro_codename}-security";
            // Extended Security Maintenance; doesn't necessarily exist for
            // every release and this system may not have it installed, but if
            // available, the policy for updates is such that unattended-upgrades
            // should also install from here by default.
            "${distro_id}ESMApps:${distro_codename}-apps-security";
            "${distro_id}ESM:${distro_codename}-infra-security";
//      "${distro_id}:${distro_codename}-updates";
//      "${distro_id}:${distro_codename}-proposed";
//      "${distro_id}:${distro_codename}-backports";
};
You may also wish to configure whether or not the system should automatically restart if it’s required for an update to take effect. The default behavior is to restart the server immediately after installing the update, but you can specify a time or disable it completely by supplying "false":
Unattended-Upgrade::Automatic-Reboot-Time "04:00";
If your server does restart you must remember to start all critical services. By default Nginx, PHP and MySQL will automatically restart, but check out this Stack Overflow thread on how to add additional services if needed.
Finally for step 5, set how often the automatic updates should run:
nano /etc/apt/apt.conf.d/20auto-upgrades
Ensure that Unattended-Upgrade is in the list.
APT::Periodic::Unattended-Upgrade "1";
The number indicates how often the upgrades will be performed in days. A value of 1 will run upgrades every day.
Creating a New User
We’ve finished configuring the web server basics and security updates. The next step in this tutorial is adding a new user to your server. This is done for two reasons:
- Later in this chapter we are going to disable SSH access for the root user, which means you need another user account in order to access your server
- The root user contains very broad privileges which will allow you to execute potentially destructive commands. Therefore it’s advised to create a new user account with more limited permissions for day-to-day use.
This new user will be added to the sudo group so that you can execute commands which require heightened permissions, but only when required.
First, create the new user:
adduser ashley
You’ll be prompted to enter some basic user information and to select a password. As mentioned previously, this password should be complex:
root@pluto.ashleyrich.com:~$ sudo adduser ashley
Adding user `ashley ...
Adding new group `ashley' (1000) ...
Adding new user `ashley' (1000) with group `ashley' ...
Creating home directory `/home/ashley' ...
Copying files from `/etc/skel' ...
New password:
Retype new password:
passwd: password updated successfully
Changing the user information for ashley
Enter the new value, or press ENTER for the default
    Full Name []: Ashley Rich
    Room Number []:
    Work Phone []:
    Home Phone []:
    Other []:
Is the information correct? [Y/n]
Next, you need to add the new user to the sudo group:
usermod -a -G sudo ashley
Now ensure your new account is working by logging out of your current SSH session and initiating a new one:
logout
Then login with the new account:
ssh ashley@pluto.ashleyrich.com
Generating a Key Pair
At this point, your new user is ready to use. For enhanced security, you are going to add public key authentication. As you are planning to configure WordPress on this server, it means it’s going to be publicly accessible, and therefore a possible target for attackers. I’m not going to go into detail on how to create an SSH key pair (DigitalOcean have an informative article on the process), but if you don’t already have one, enter the following command on your local machine:
ssh-keygen -t rsa -b 4096 -C "your_email@example.com"
Replace “your_email@example.com” with something to help you identify this SSH key (it doesn’t have to be an email address).
You should receive a message as I have below, just hit return to accept the default location. You’ll then be prompted to enter a passphrase (optional), which will require you to enter a password every time you log in with this key pair:
ashley@Ashleys-MBP:~$ ssh-keygen -t rsa -b 4096 -C "ashley@Ashleys-MBP"
Generating public/private rsa key pair.
Enter file in which to save the key (/Users/ashley/.ssh/id_rsa):
Enter passphrase (empty for no passphrase):
Enter same passphrase again:
Your identification has been saved in /Users/ashley/.ssh/id_rsa
Your public key has been saved in /Users/ashley/.ssh/id_rsa.pub
The key fingerprint is:
SHA256:ExXkryUmNE5m/k6LC3MXKBlh9cGDx237Jo+2cKZpiII ashley@Ashleys-MBP
The key's randomart image is:
+---[RSA 4096]----+
|      o..==o     |
|     . ..+=.o    |
|      . B.oo .   |
|       X + ..    |
|      o S + o.   |
|       . = =. o  |
|   .  o...* o=   |
|  E . .+.=.Bo .  |
|     .  oo=...   |
+----[SHA256]-----+
Windows users can follow this tutorial on how to generate an SSH key pair using PuTTYgen.
Copying the Public Key
Now that you have your SSH key pair, you need to copy the public key to your server. Assuming you saved the key in the default location, the following command will copy the key to your clipboard:
cat ~/.ssh/id_rsa.pub | pbcopy
Go back to your SSH session, ensuring you are logged in with the newly created user. Now create the .ssh directory and set the correct permissions:
mkdir   ~/.ssh
chmod 700 ~/.ssh
Within the .ssh directory create a new file called authorized_keys which contains the public key you copied from your local machine:
nano ~/.ssh/authorized_keys
Save the file using CTRL + X and then Y. Finally, set the correct permissions on the file:
chmod 600 ~/.ssh/authorized_keys
Now if you log out of the current SSH session and try reconnecting, you should no longer have to enter your user password. Remember, if you set a passphrase when creating the SSH key, you will need to enter it when prompted.
For the rest of this tutorial, you’ll notice I’m using sudo in front of each command, to heighten privileges for this command. This allows my ‘normal’ user to make ‘root’ user level changes.
SSH Configuration
With your new user created, it’s time to further secure the server by configuring SSH. The first thing you are going to do is disable SSH access for the root user, which will no longer let you log into the server via SSH using the root user. Open the SSH configuration file using nano :
sudo nano /etc/ssh/sshd_config
Find the line that reads PermitRootLogin yes and change it to PermitRootLogin no. Hit CTRL + X then Y to save the changes. In order for the changes to take effect you must restart the SSH service:
sudo service ssh restart
Now if you exit out of the current SSH session and try connecting with the root user you should receive a permission denied error message.
The final step to securing SSH is to disable user login using a password. This ensures that you need your private SSH key to log into the server. Remember, if you lose your private key you will be locked out of the server, so keep it safe! Most virtual machine server providers like DigitalOcean do have other means of logging in, but it’s best not to rely on those methods:
sudo nano /etc/ssh/sshd_config
Find the line that reads #PasswordAuthentication yes and change it to PasswordAuthentication no. Hit CTRL + X then Y to save the changes. Once again, you must restart the SSH service for the changes to take effect.
sudo service ssh restart
Now, before you log out of your server, you should test your new configuration. To do this open a new terminal window, without closing the current SSH session and attempt to connect:
ssh ashley@pluto.ashleyrich.com
You should log in to the server successfully. To further test that password authentication is disabled I like to temporarily rename the SSH key located in my .ssh directory. When attempting to log into the server this time you should receive a Permission denied (publickey) error.
Uncomplicated Firewall
The firewall provides an additional transport layer of security to your server by blocking inbound network traffic. I’m going to demonstrate the iptables firewall, which is the most commonly used across Linux and is installed by default. In order to simplify the process of adding rules to the firewall, I like to use a package called ufw, which stands for Uncomplicated Firewall. The ufw package is usually installed by default, but if it isn’t go ahead and install it using the following command:
sudo apt install ufw
Now that you have access to ufw you can begin adding to the default rules, which deny all incoming traffic and allow all outgoing traffic. For now, add the ports for SSH (22), HTTP (80), and HTTPS (443):
sudo ufw allow ssh
sudo ufw allow http
sudo ufw allow https
To review which rules will be added to the firewall, enter the following command:
sudo ufw show added
ashley@pluto.ashleyrich.com:~$ sudo ufw show added
Added user rules (see 'ufw status' for running firewall):
ufw allow 22/tcp
ufw allow 80/tcp
ufw allow 443/tcp
Before enabling the firewall rules, ensure that the port for SSH is in the list of added rules – otherwise, you won’t be able to connect to your server! The default port is 22. If everything looks correct, go ahead and enable the configuration:
sudo ufw enable
To confirm that the new rules are active, enter the following command:
sudo ufw status verbose
You will see that all inbound traffic is denied by default except on ports 22, 80, and 443 for both IPv4 and IPv6, which is a good starting point for most servers.
ashley@pluto.ashleyrich.com:~$ sudo ufw status verbose
Status: active
Logging: on (low)
Default: deny (incoming), allow (outgoing), disabled (routed)
New profiles: skip
To                         Action      From
--                         ------      ----
22/tcp                     ALLOW IN    Anywhere
80/tcp                     ALLOW IN    Anywhere
443/tcp                    ALLOW IN    Anywhere
22/tcp (v6)                ALLOW IN    Anywhere (v6)
80/tcp (v6)                ALLOW IN    Anywhere (v6)
443/tcp (v6)               ALLOW IN    Anywhere (v6)
Fail2ban
Fail2ban is a tool that works alongside your firewall. It functions by monitoring intrusion attempts to your server and blocks the offending host for a set period of time. It does this by adding any IP addresses that show malicious activity to your firewall rules. It’s highly recommended to install something like Fail2ban on your servers that will be running a WordPress configuration in order to secure and protect your web hosting, especially if you intend to install any third-party plugins.
The Fail2ban program isn’t installed by default, so let’s install it now:
sudo apt install fail2ban
The default configuration should suffice, which will ban a host for 10 minutes after 6 unsuccessful login attempts via SSH. To ensure the fail2ban service is running enter the following command:
sudo service fail2ban start
Job done! You now have a good platform to begin building your WordPress web server and have taken the necessary steps to prevent unauthorized access. However, it’s important to remember that security is an ongoing process and you should keep in mind the following points:
- Install software required for WordPress (e.g., Nginx or Apache, PHP, MySQL/MariaDB) only from trusted sources
- Regularly install software updates and security fixes
- Enforce strong passwords using a tool such as 1Password
- Think about how you would gain access to the server if you were locked out
That’s all for chapter 1. Later on in this guide, we’ll cover things like obtaining a Let’s Encrypt SSL certificate and setting up automated remote backups among other things. However, in the next chapter, I will guide you through installing Nginx, PHP-FPM, and MySQL.


