


While the WordPress core project still uses SVN for version control, it’s pretty safe to say that the vast majority of serious WordPress developers use Git on their own projects. That being the case, it’s somewhat of a surprise that there aren’t more git-based tools like WP Pusher that help developers integrate some of their git workflow into their WordPress development workflow, as it greatly simplifies the deployment of your git managed themes and plugins.
Setup
You can’t download WP Pusher from the WordPress plugin repository. It is, however, free to use if your code is open source and hosted in a public repository, so head over to WP Pusher to download and try it out on one of your open repos.
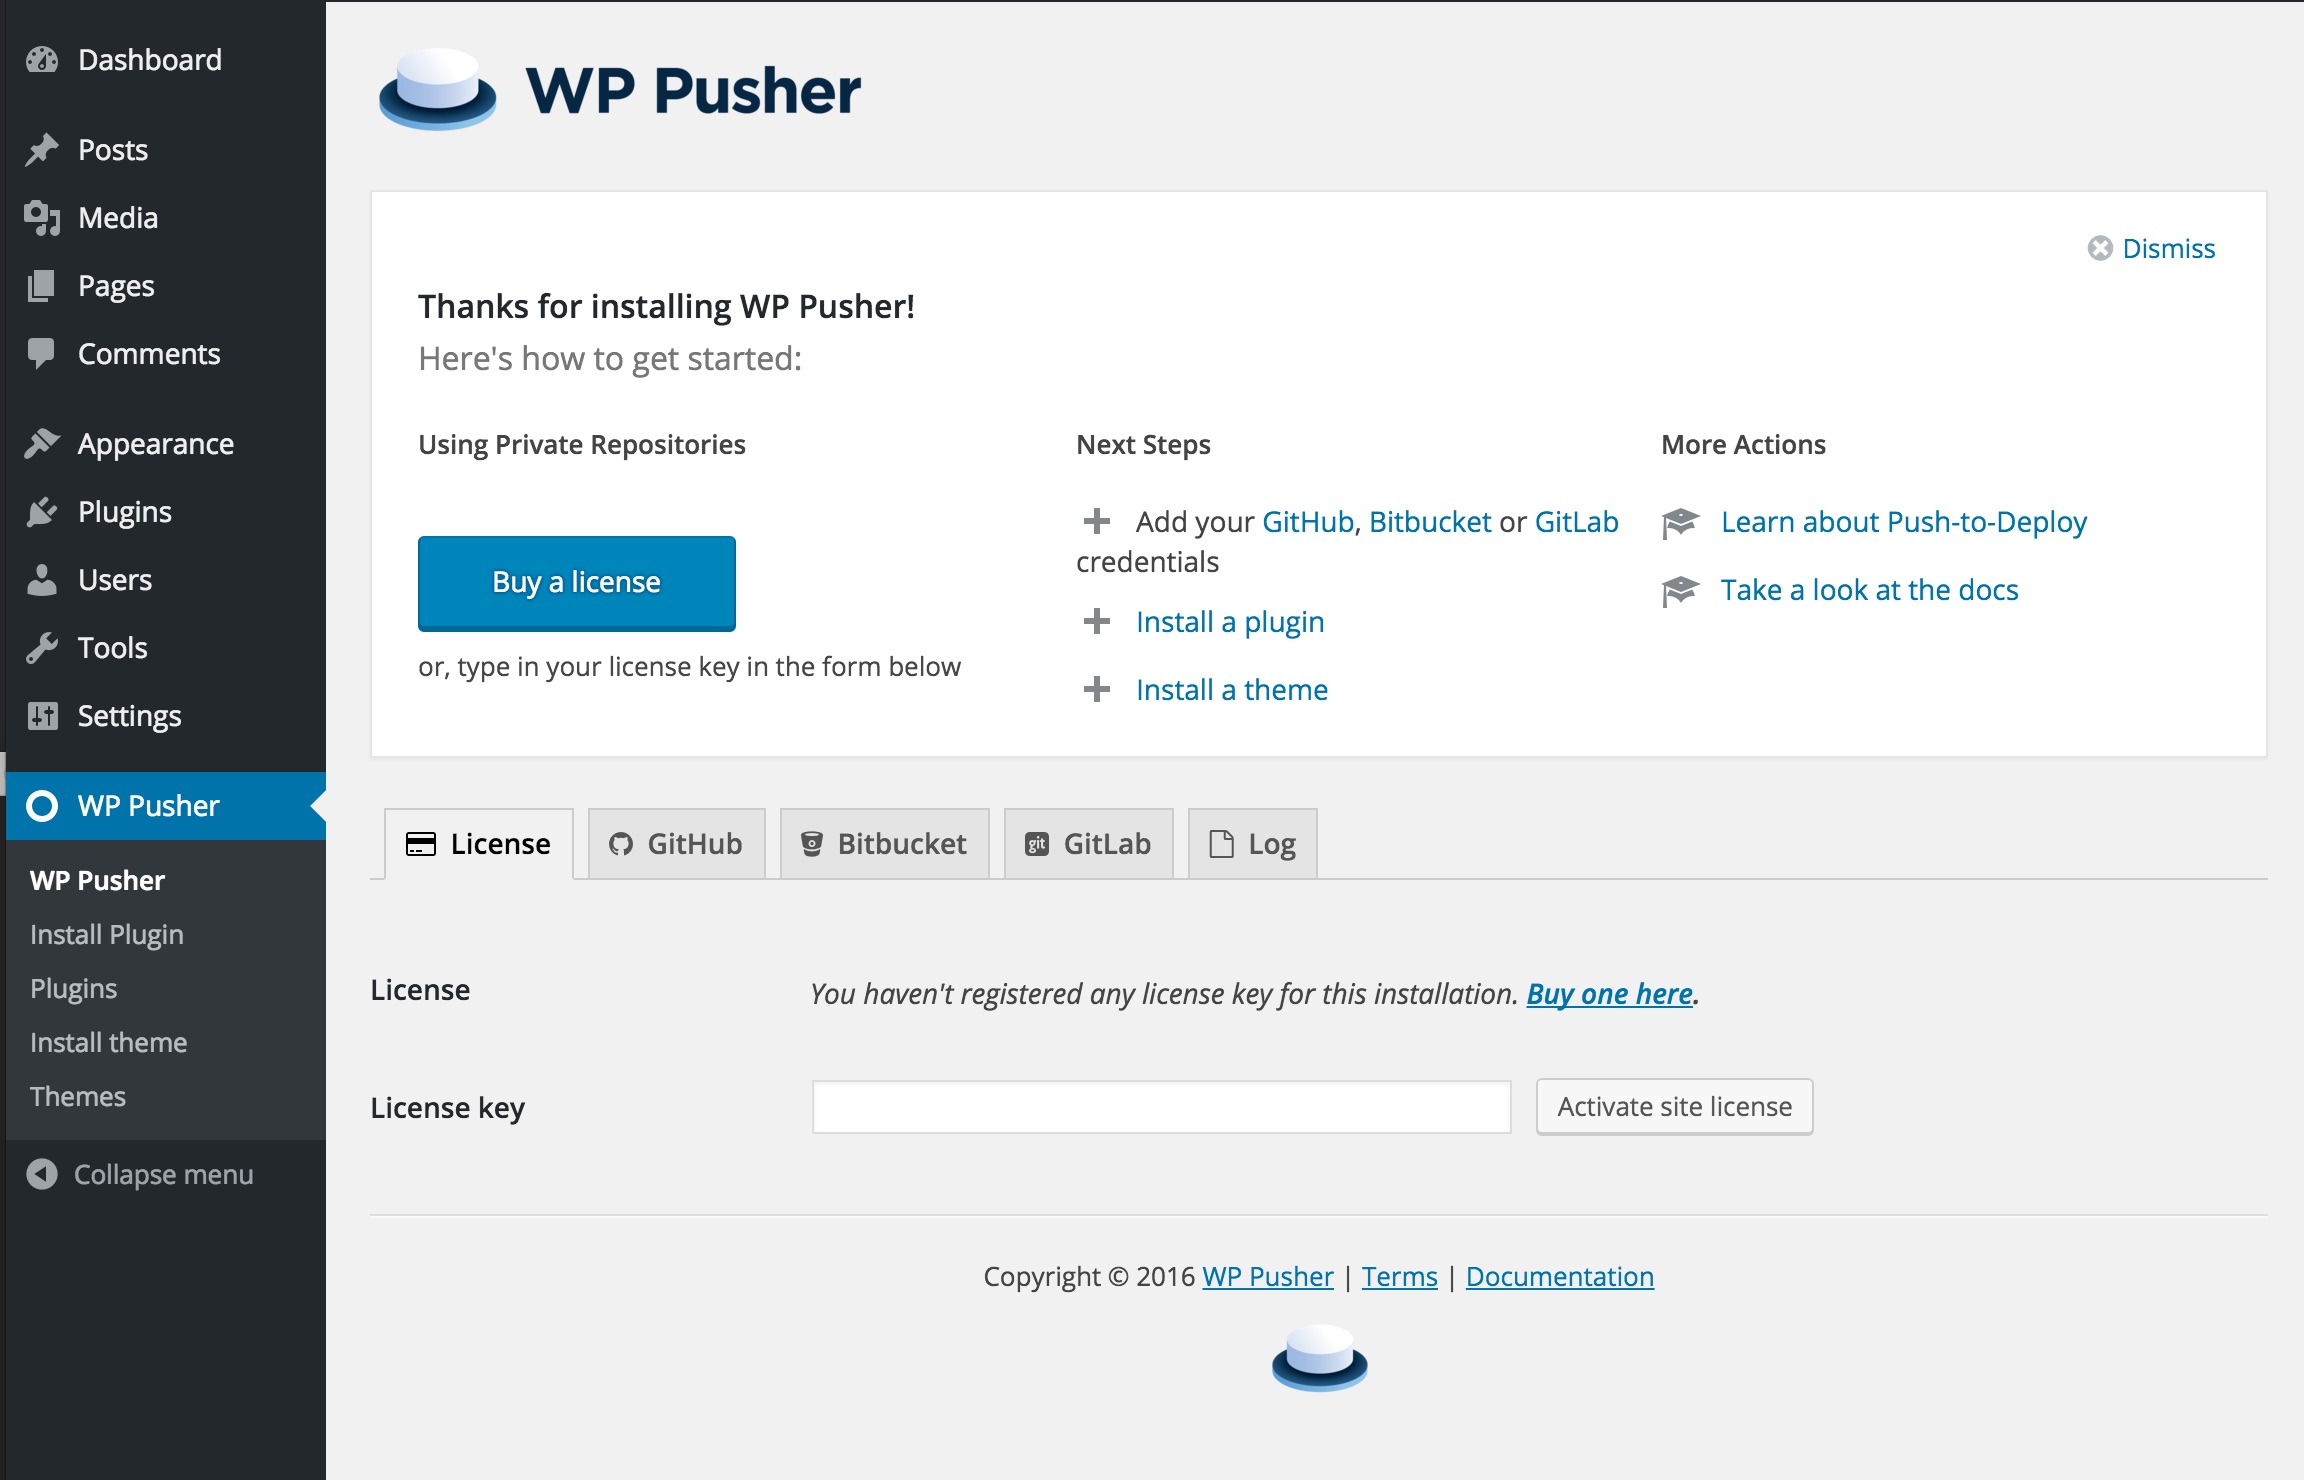
Once you’ve downloaded and installed the plugin on your site, you can start adding theme and plugin repositories by clicking on the WP Pusher menu item that has been added to the admin menu. Since we’re using WP Pusher’s free level, the main settings page actually doesn’t apply much to us, as this is where you’d input your license key and credentials for private repos.
Adding plugin and theme repositories is exactly the same process and only requires a few bits of information. You’ll need the path component of your repo’s GitHub, BitBucket or GitLab URL, and then you can specify a specific branch or folder to grab the code from.

The ability to select a specific branch and folder to update code from is particularly useful if you’re a WordPress site developer. This means that you can keep your custom theme and plugins for a project all in the same repository and even keep separate branches for staging and production while WP Pusher keeps things straight and up-to-date for you.
Once you’ve set up a plugin or theme with WP Pusher, it will automatically install and (optionally) activate the plugin or theme. This alone is a very pleasant way to install your own themes and plugins on a site that you’re working on, but the real magic happens when you need to push changes.
After you’ve made some changes to your theme or plugin, all you need to do is push those changes to your Github, Bitbucket, or GitLab repository. At that point, you can visit your wp-admin, click on “plugins” or “themes” under WP Pusher, and click the update button for that plugin or theme. Changes are downloaded and applied almost instantly, and it feels like the first time you auto-updated a plugin way back when 2.5 was released.
Something to note at this point: A lot of folks recommend that you don’t commit your compiled or minified Less, Sass, JavaScript, etc. This could lead to some issues when using WP Pusher though, since it’s just pulling the code that’s in your repo and won’t run any preprocessors for you. If you have assets in your repo that need to be processed somehow, you’ll either need to start committing the processed assets or set your server up to watch for changes and process them for you.
Push to Deploy
By default, WP Pusher requires you to click a button to update a theme or plugin which is so 2008. WP Pusher really shines when you enable its “Push-to-Deploy” feature. After you enable push-to-deploy on a repository in WP Pusher, you can copy its push-to-deploy URL into your Github, Bitbucket, or GitLab repository’s webhooks. Once that’s set up, all you have to do is git push any changes and your plugin or theme will be updated almost instantly by WP Pusher. In my tests of this feature, it’s really impressive how quickly changes go through. It makes testing code on remote sites just as easy as testing locally.
Nitpicks and Feature Requests
Overall, WP Pusher is a simple and powerful plugin that solves a real problem for WordPress developers, but there are a few parts of the user experience that could be improved:
When enabling push-to-deploy, you aren’t immediately presented with the webhook URL. You either turn on push-to-deploy when first adding a plugin or theme or later on in its edit screen. However, the only place to get the URL is from the screens that list your WP Pusher installed plugins or themes.

What makes this even more confusing is the fact that the push-to-deploy URL is shown as a disabled text box, regardless of whether or not the feature is enabled. Overall, this adds a few clicks and a fair amount of confusion when trying to set up this flagship feature. Ideally, the display of the push-to-deploy URL would make it clear whether or not the feature was enabled, make it easy to copy by auto-selecting the text in the text area, and provide you with an opportunity to copy the URL at the time that you’ve enabled it without having to click to another screen.
Another thing that kind of bothered me was the fact that you never actually know when an update is available or when an update has been applied. In a single-developer workflow this might be less important, but if you’re working with a team it could be imperative to know when changes are available or have been automatically applied via push-to-deploy.
Finally, I’d love to see some improvements to how plugins and themes are actually installed with WP Pusher. At the moment, you have to copy and paste the repo information in for each plugin/theme you’d like to install, there’s no bulk option. Ideally, I’d love to be able to provide my Github information and select repositories from my account, provide some sort of config file with a list of plugin and theme repos, or even use WP-CLI to add new plugin and theme repos from the command line.
Playing Nice with WP Migrate DB Pro
At first blush, WP Pusher seems like it would be a great companion for WP Migrate DB Pro, especially for site developers. While WP Migrate DB Pro will handle moving all of your data and media files (if you’re using the Media Files addon), WP Pusher will help you keep your theme and plugins up-to-date.
While testing how WP Migrate DB Pro and WP Pusher work together, the first thing I found out is that blindly pushing your database from one site to another will overwrite the wppusher_token option and effectively disable any push-to-deploy webhooks that you have set up. In most cases, you shouldn’t need WP Pusher installed on your local site, but if you do run into this, just head to your repository host and update the webhook url. At that point the two tokens should remain the same, so you’ll only need to worry about it once. If, for some reason, you need to have WP Pusher installed on your local site in addition to your remote, here’s what I’d do to avoid any unexpected plugin surprises:
- Add
wppusher_tokento WP Migrate DB Pro’spreserved_optionsfilter - Check the option in WP Migrate DB Pro to not migrate the active plugin setting.
- Exclude WP Pusher’s
wp_wppusher_packagescustom table from migrations.
Other than that minor bit of conflict, WP Pusher and WP Migrate DB Pro play quite nicely together and could be a deadly combo for certain development workflows. For example, let’s say that I’m developing a client site and using a functionality plugin to handle things like adding features and short codes. While I’m developing, I want to keep the staging site in perfect parity with my local dev site so that the client can follow along, so I’ll be pushing both database and code changes quite a bit. Wouldn’t it be nice to just push my database every time I push my code changes?
Push All The Things!
By setting up a git hook that will trigger a WP Migrate DB Pro migration using WP-CLI and our CLI addon every time I push my repo, I can update my remote site’s (or many remote sites all at once) custom plugins, theme, and database by simply typing git push!
First, I’ll create a migration profile via WP Migrate DB Pro’s UI. I prefer using the UI because it requires less typing at the prompt that I could mess up and I can change options, such as what tables to migrate or backup, without having to modify the command or script. So I’ve created a profile that happens to have a profile ID of 1 that will push my whole database, minus WP Pusher’s packages table, and backup the remote just to be safe.
Next, I’ll just head to my project root and open the .git/hooks/ folder to set up a pre-push hook. I create a new file called pre-push, make it executable by running chmod +x pre-push and then paste in the following code:
#!/bin/sh
wp --path=/Users/jrgweb/Sites/pusher.local migratedb profile 1 2>&1 >/dev/null &
exit 0
This is a really simple bash script that will always exit with a code of 0 so that it doesn’t prevent the push from happening. I’m calling the wp migratedb command, but I’m using WP-CLI’s --path argument to make sure that the command is run for the correct site, and I’m just telling it to run the profile with an ID of 1. Finally, I’m sending all of the output from the wp migratedb command to /dev/null which just makes it disappear, but you could easily replace >/dev/null with >>/path/to/a/log.log to log the output and check for any errors down the line.
Now typing git push becomes a pretty magical experience. Not only does my plugin instantly update on the remote site, but my database shows up very shortly afterwards, all for less than 10 keystrokes.
To test how powerful this is, let’s imagine that I’ve received an urgent request from a client. They want to be able to litter their posts and pages with gifs of Gary Busey using a shortcode, and they want me to update the homepage with a Busey gif a well. This request is serious Buseyness, so I get right to work and add the following code to my functionality plugin that’s already set up on the local and remote sites:
function busey_me() {
    $response = wp_remote_get( 'http://api.giphy.com/v1/gifs/random?api_key=dc6zaTOxFJmzC&tag=Gary+Busey' );
    if ( is_wp_error( $response ) ) {
        return;
    }
    $response = json_decode( $response['body'], true );
    $gif = $response['data']['image_url'];
    return "<img src='{$gif}' alt='Utah, gimme two!' />";
}
add_shortcode( 'busey-me', 'busey_me' );
I then update the home page post with the [busey-me] shortcode. I check the homepage and see that everything’s working, so I pop into the terminal and type the following commands:
$ git commit -am "added busey-me shortcode"
$ git push
I then head over to the live site and see Mr. Busey’s magnificent face smiling back at me; confirmation that both the database and plugin changes have gone through.

Wrapping Up
That last example might be a bit silly, but it shows how powerful this workflow can be. Switching contexts from coding to managing sites via the UI can cost time and lead to distraction, so being able to do more from the CLI is always a win. WP Pusher facilitates this magnificently, while encouraging you to use git and to regularly commit and push changes which might be an improvement to your workflow.
If you’re thinking about picking up a WP Pusher license for yourself, make sure to use the code MIGRATE at checkout for 25% off until February 2nd, 2016.