
Every month the team here at Delicious Brains have a “WP Core Contrib Day”, a day to give back to WordPress Core. This is an important day for us as we make our living from premium WordPress plugins. Using our skills to help keep WordPress core awesome just feels right. Also, all of us contributing a work day per month to WordPress Core is very close to the 5% contribution that Matt Mullenweg talks about in his 5 for the Future post.
In this article I’ll discuss the basics for finding things to work on, how to handle the WordPress source code, how to submit your work and what you might expect to happen from there. This article is very much targeted towards PHP developers that already know how to set up a normal WordPress installation, but are looking to dive in and contribute back to WordPress Core.
As we’re all developers at Delicious Brains, on our WP Core Contrib Days we endeavour to find tickets for WordPress Core that we can contribute to by committing code. I’ll be focusing on that type of contribution, but there are many other ways to contribute and anything you can do is appreciated.
Where To Find Tickets
When we first started our contrib days last November the first big hurdle we encountered was where to find tickets to work on. Here’s a few places we’ve gravitated to for finding good tickets.
Good First Bugs
https://core.trac.wordpress.org/tickets/good-first-bugs
The “Good First Bugs” report is a collection of curated tickets that are considered to be good for developers new to contributing to WordPress. I’ve personally found a few tickets through this report and recommend it as a first stop when starting out.
The first section of the report titled “Unclaimed — jump right in!” is usually a good place to find tickets that have been newly given the “good-first-bug” keyword, and can cover all kinds of development, testing and documentation needs. Sometimes tickets look as though they are well under way, but often they simply need their patches refreshed which is generally an easy thing to tackle (see Applying a Patch and Creating a Patch).
The introduction to this report has some very handy links to areas of the Core Contributor Handbook that I urge you to read. The WordPress Coding Standards are a must read before you start development, and hopefully you’re already familiar with the WordPress codebase. It’s worth reading the “how we use our bug tracker” article to get familiar with the terminology and process flow.
No Patch
https://core.trac.wordpress.org/tickets/no-patch
The “No Patch” or “Needs patch, but has none” report is great for finding tickets to work on that still need a patch. It could be that no-one has tackled the ticket yet or that an existing patch has problems and a new clean patch is required.
There is usually a “Next Release” section to this report that I encourage you to tackle tickets from if you want to try and get some “props” sooner rather than later. Tickets on that list are naturally more likely to be reviewed and tested quicker as they have been prioritized for the next release. It’s always a good feeling to see your name mentioned in one of the WordPress Core Weekly posts, and will encourage you to tackle more tickets in the future.
Needs Unit Tests
https://core.trac.wordpress.org/tickets/needs-unit-tests
Are you handy with Unit Tests? Maybe you’re looking to explore WordPress Core and contribute at the same time? Then the “Needs Unit Tests” report is just the ticket!
Next Major and Next Minor Release
https://core.trac.wordpress.org/tickets/major/workflow https://core.trac.wordpress.org/tickets/minor/workflow
These “catch-all” reports are a great way to target your efforts on tickets assigned to the next couple of releases. The above links are versions of the Next Major and Next Minor release reports grouped by Workflow Status, I prefer these as it is much easier to find tickets that match your skills (development, testing etc).
Bug Reports
https://make.wordpress.org/core/reports/
This report has a mis-leading title, it’s more of a Tickets Dashboard and gives you a great jumping off point to various ticket reports. It’s the place to go to when you want to browse a little.
There’s a nice “Tickets by Topic” section that gives you quick access to the Components and Focus Areas for WordPress. For us, a natural pick is the “Plugins” Component area.
There’s also a “Me” section that is very useful for tracking tickets you’ve created, commented on or favourited. You can also see any tickets that you have outstanding patches on.
Ask In Slack #core
If you are unsure about whether a ticket is good to start working on, or have any questions about how to go about addressing a WordPress Core ticket, don’t procrastinate, ask on the Slack #core channel!
There is more information on how to get started with the WordPress Slack channels at https://make.wordpress.org/chat/.
Setting Up a Development Site
Ok, let’s say you’ve found a ticket to investigate. To get any further you need to download the WordPress Core source code, build WordPress, configure your local development site, and give it a spin before diving in to development.
Download The Source
The WordPress Core source is very different to the WordPress software you download to set up a new instance of WordPress. It has a different directory structure to help with development and is stored in a Subversion (SVN) repository. As such, you should use SVN to obtain your copy of trunk.
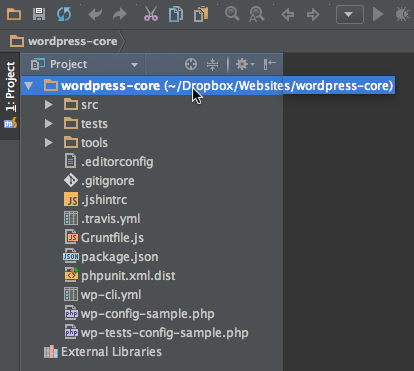
$ svn co https://develop.svn.wordpress.org/trunk wordpress-core
You should see a directory structure similar to the following:
Build WordPress
To ensure any changes you make to WordPress will build and run properly, it is best to run your development site from the build directory created when WordPress is built rather than directly from src. This does however require a few tools.
Required tools:
To build WordPress Core, you’ll need to install Grunt and its CLI. If your preferred development tools don’t include Grunt yet, there’s a very simple Getting Started guide for setting up Grunt and its dependencies: Node.js and npm.
Change to the directory you just created when checking out the WordPress Core source, install the npm modules and run the default Grunt job.
$ cd wordpress-core
$ npm install
$ grunt
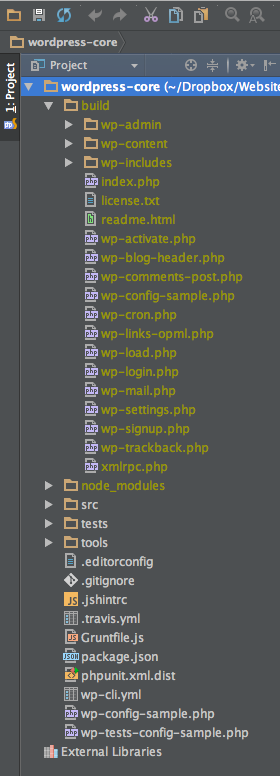
You should now see a couple of new directories in the WordPress Core check out: node_modules and build.
From now on, any time you make a change to the WordPress source code found under the src directory you can simply run grunt in the root directory again to update the contents of the build directory. We talk more about that later in the Keep It Clean section.
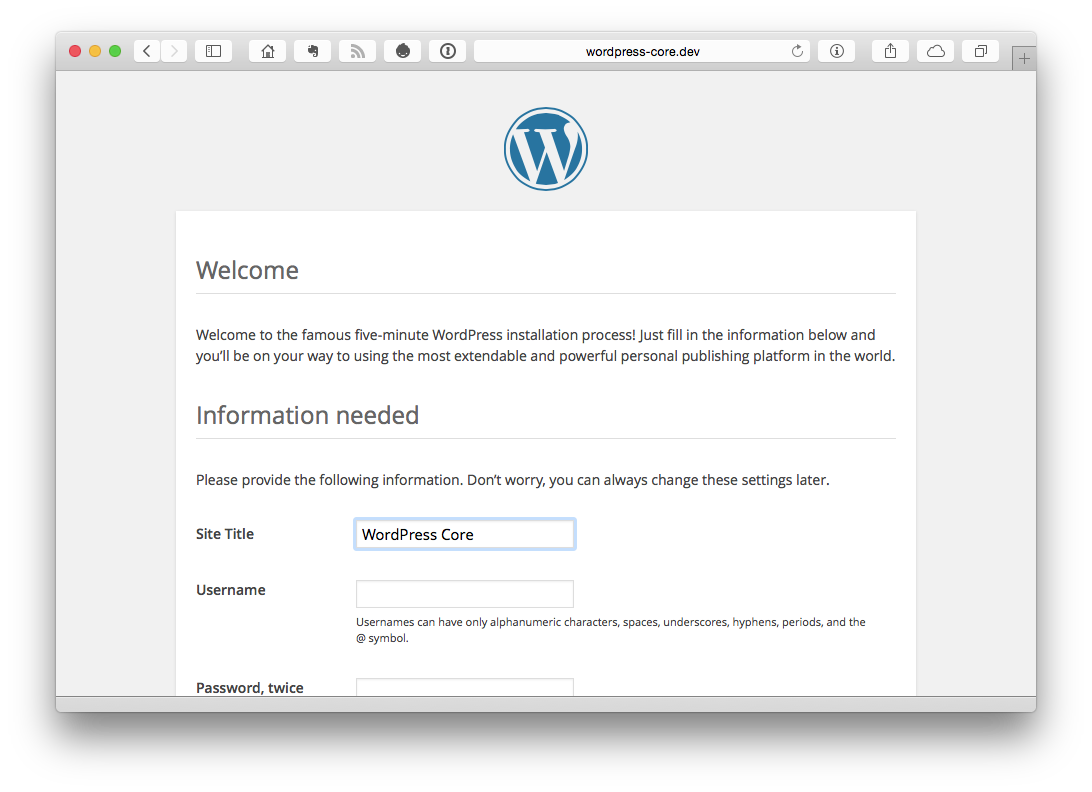
Configure Your Local Site
WordPress has a neat feature that lets you put your wp-config.php file in the parent directory of the directory you’re serving the site from. In this case, we can put the wp-config.php in the root directory even though our site will be served from the build directory. It will still pick it up.
Copy the supplied wp-config-sample.php to wp-config.php and update it to include the database details for a new MySQL database you have created locally.
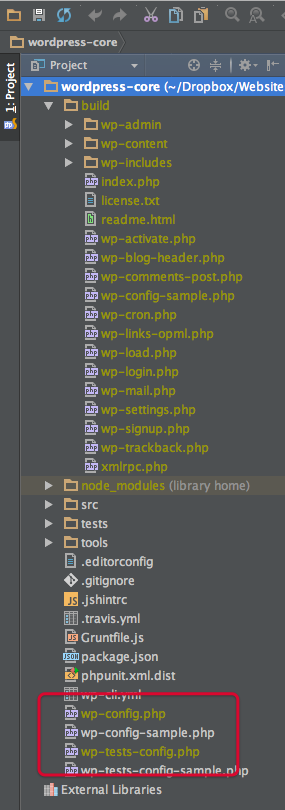
While you’re at it, why not copy the wp-tests-config-sample.php file to wp-tests-config.php and update it with the database details for another database you’ve also created locally so that you can run the unit tests too? It’s important to use a separate database for the unit tests as the database is completely refreshed during a unit tests run.
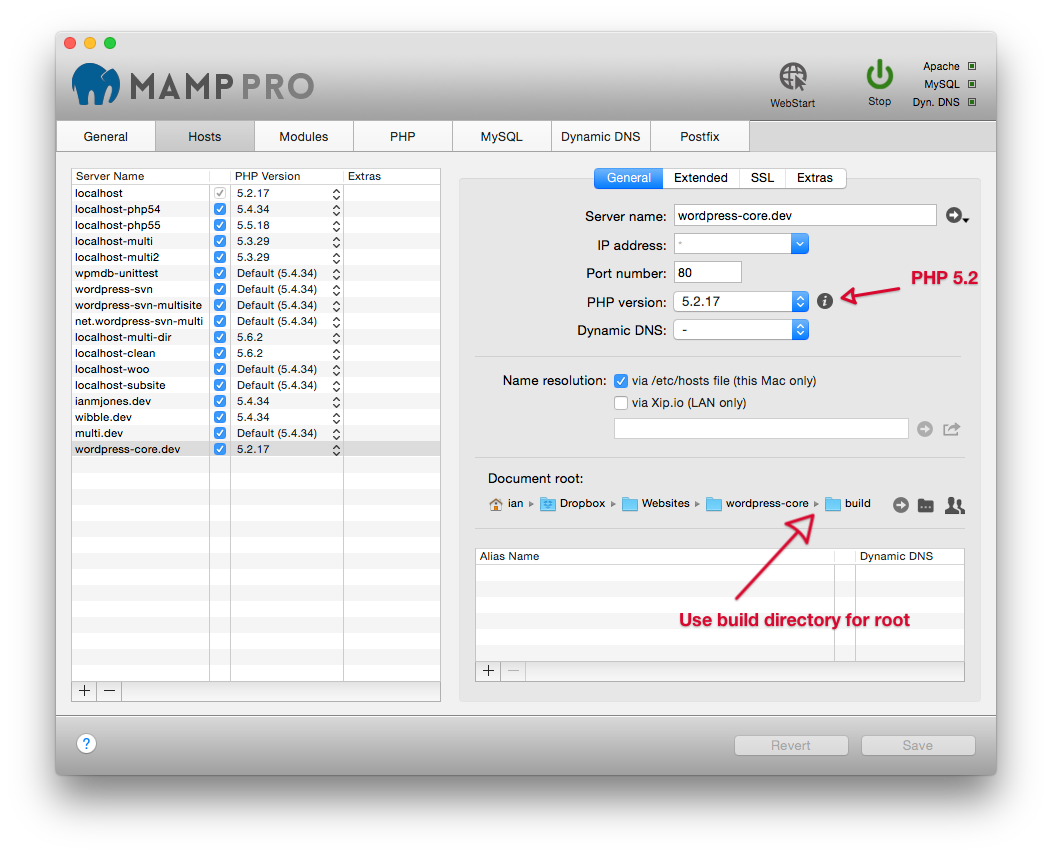
Now that you have a wp-config.php for your development site, it’s time to set up a website such as http://wordpress-core.dev that uses the build directory as its document root. I use MAMP Pro for its simplicity and flexibility, but you should use whatever you’re most comfortable with. Ideally use PHP 5.2.x in your development as this is the minimum supported version of PHP for WordPress. Developing with it will prevent you from using features from later versions of PHP that don’t work with PHP 5.2.
Give It a Spin
The moment of truth. Make sure you can connect to your new WordPress development site and set it up.
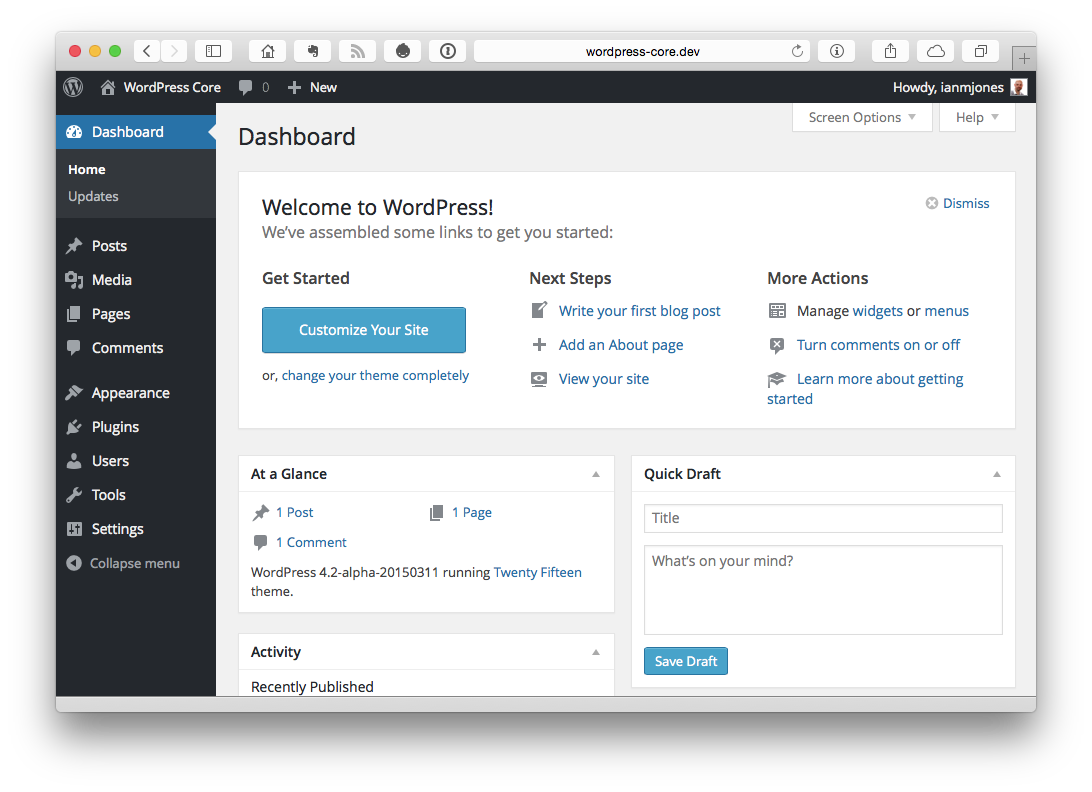
You should also consider using something like WP Test to populate your nice new WordPress with some test data.
Run The Unit Tests
It’s a very good idea to run the unit tests just to be sure all is well in your development site and that any changes you make later don’t break anything.
From the root of the checked out source…
$ phpunit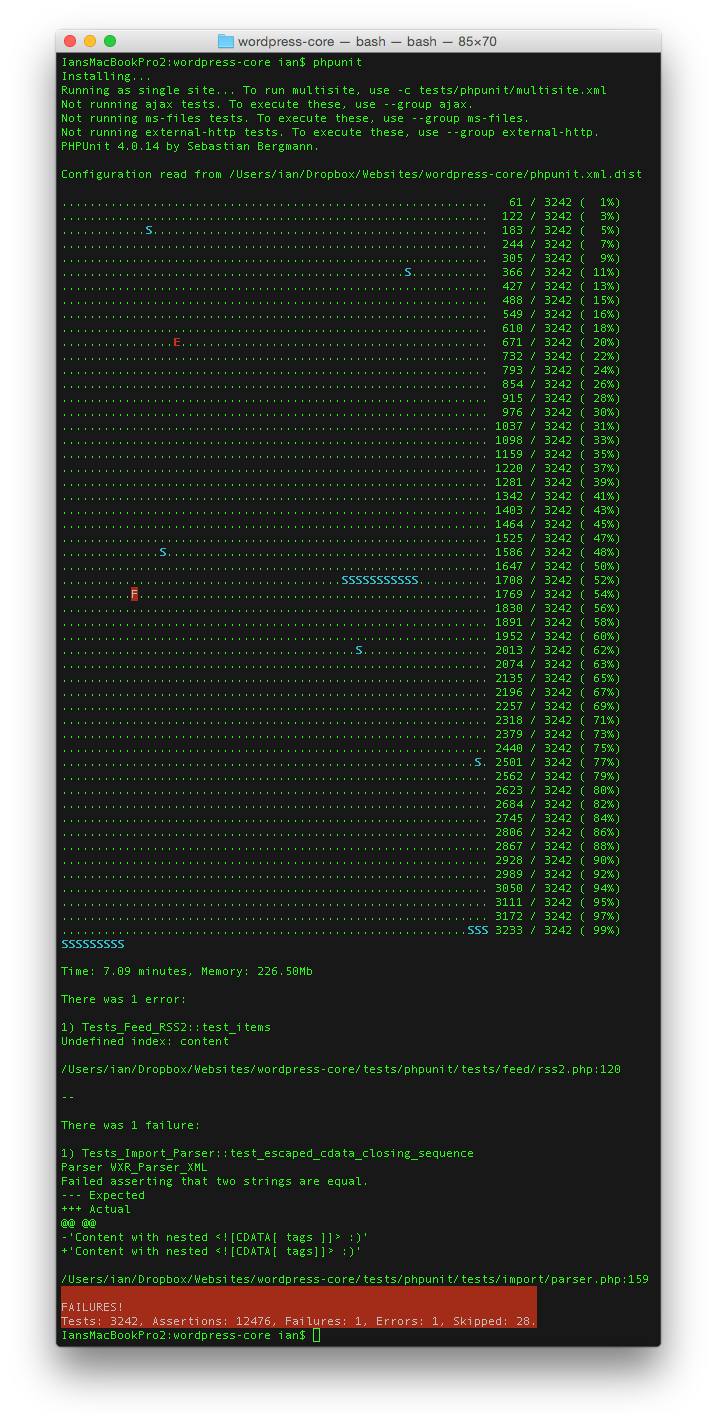
Don’t be surprised if you see a failure or two in the unit tests. When working in trunk there are often some. (Maybe you could fix them?) At least you know where the problems exist and so when you make your changes you can tell whether you made things better, worse, or at least didn’t affect them!
Development
You’re now all set up to develop on WordPress Core, keep your repository up to date with svn up and rebuild your WordPress Core site with grunt as required or through a watch process.
Let’s assume you’re starting off your WordPress Core contributions by refreshing a patch. This entails downloading the patch file from a ticket, applying it to your checked out source, checking that it still applies correctly and does what is expected, recreating the patch, and attaching it to the ticket with an updated name and updated keywords.
Keep It Clean
Before you apply a patch, be absolutely sure that your checked out source and build are “clean”. There is nothing worse than working on something only to find that you can’t create a clean patch because you have some previous code changes from another ticket polluting your code base.
$ svn diff
If svn diff returns anything, maybe because you’ve already worked on a patch, revert the changes.
$ svn revert path/to/changed/file
And then double check again with svn diff.
When there are no changes in your checkout, make sure you’re up to date with other changes that have been committed to the repository.
$ svn up
Now ensure your cleaned up repository builds, and then Give It a Spin.
$ grunt
Applying a Patch
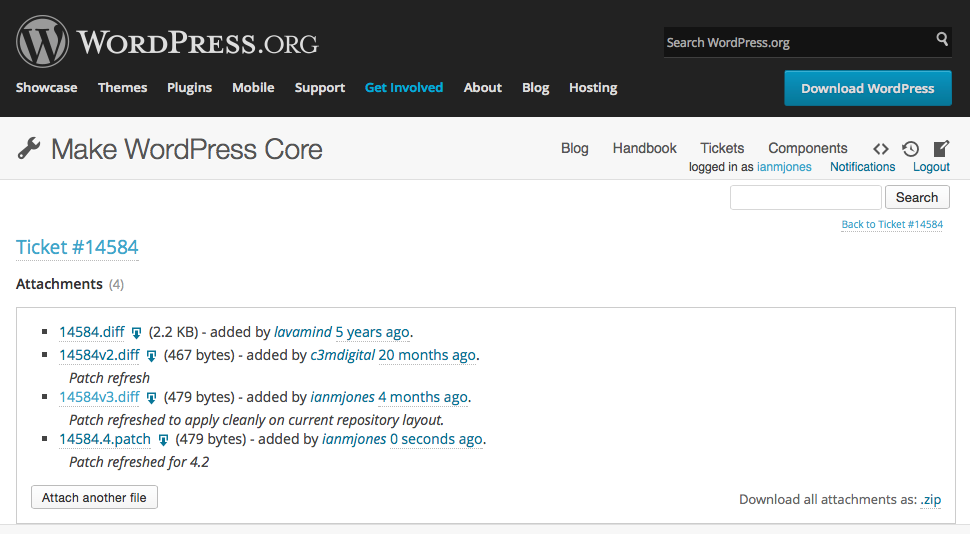
Download the latest patch file from the ticket. It should be named something like 14584.3.patch, where 14584 is the ticket number and .3 is an optional patch version number incremented with each new patch for a ticket. The first patch file for ticket 14584 would have been named 14584.patch. If you’re refreshing the patch for an older ticket you might find that the patch name is more like 14584v3.diff.
The file should be copied to your root directory and applied from there with patch:
$ patch -p0 < 14584.3.patch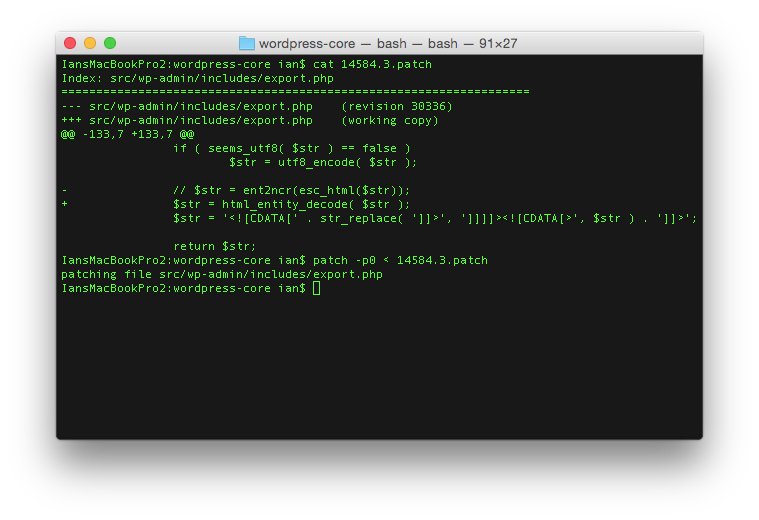
Patches are always created and applied from the root of the code base, so you should generally see src/... or tests/... in the file names being patched.
Hopefully the patch applied as expected. If not (maybe that’s why you’re refreshing it) then you may need to revert anything that partially applied with svn revert <filename>.
Because I use the awesome PhpStorm for all my PHP development, I can easily find all the changes the patch applied.
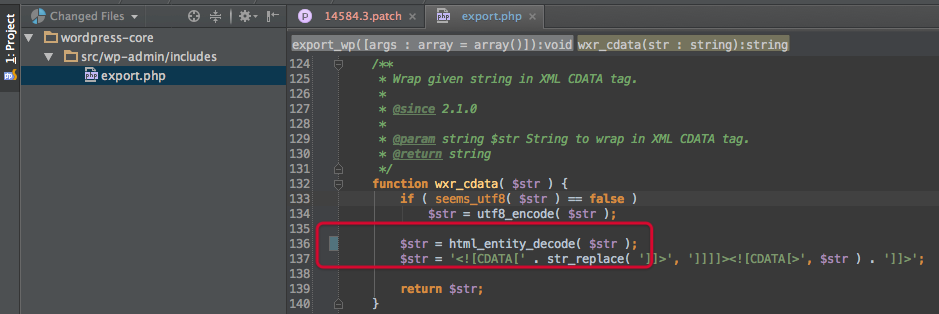
However, another way to double check that the patch applied correctly is to use the same method you would use in Creating a Patch.
Develop And Test
When it comes to making code changes, make sure you develop your changes in the src directory of the checked out source and be sure to stick to the WordPress Coding Standards. Check out the WordPress Codebase article if you are unsure where new code should be placed in the codebase.
As you make your changes, use grunt to refresh the build directory so that you can test your changes as you go along.
If at all possible, please add unit tests or update the unit tests in the tests directory that help ensure your code integrates well. Be sure to Run The Unit Tests every now and then. And definitely run them when you think you are finished with your development and testing before creating a patch.
Creating a Patch
You’ve developed and tested your changes and are now ready to pass your changes back to the WordPress Core team for reviewing and testing. How do you do that?
It so happens that if you run the following, you’ll get exactly what is needed to patch another checkout of the repository:
$ svn diff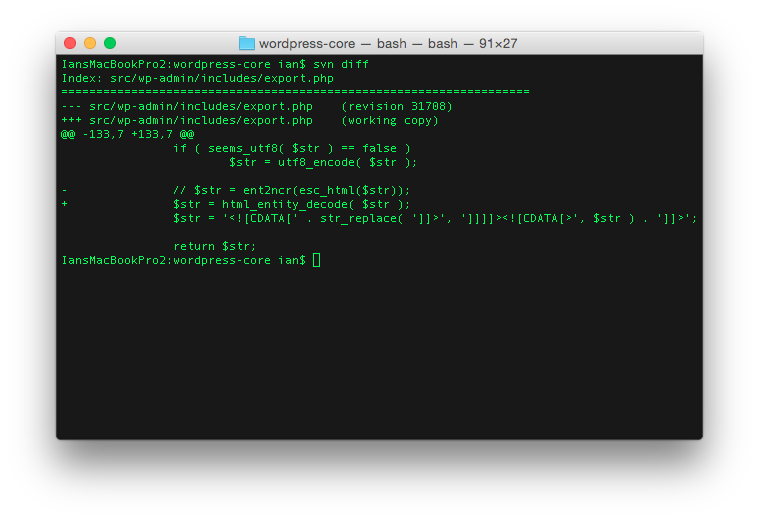
So to create your patch file, simply redirect the output of svn diff to a file:
$ svn diff > 14584.4.patch
It’s important to note that we’re creating a file with an incremented version number here. Even though on the surface nothing has changed in this example, we have generated this from a much later version of the repository, and so should increase the version number if we’re refreshing and re-submitting the patch for the ticket.
Submit The Patch
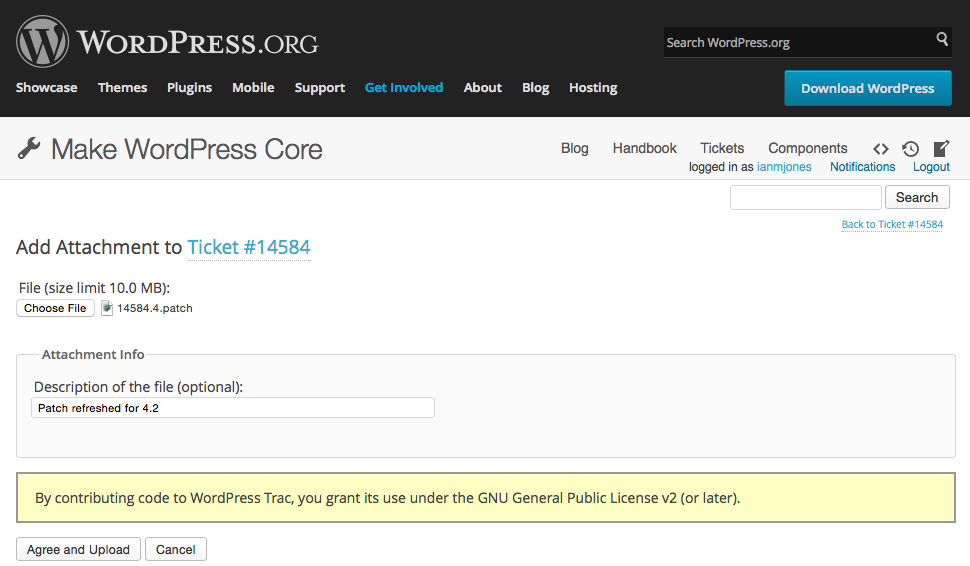
Submitting the patch file is relatively simple. Make sure you’re logged in to wordpress.org, navigate to the ticket in question and you should find an Attachments block nestled between the main description block and the Change History.

In the Attachments block there is an “Attach file” button which leads you to a page where you can choose your file to upload and give a brief description.
Modify The Ticket
Near the bottom of the WordPress Core ticket you’ve been working on, you should see a Modify Ticket block.
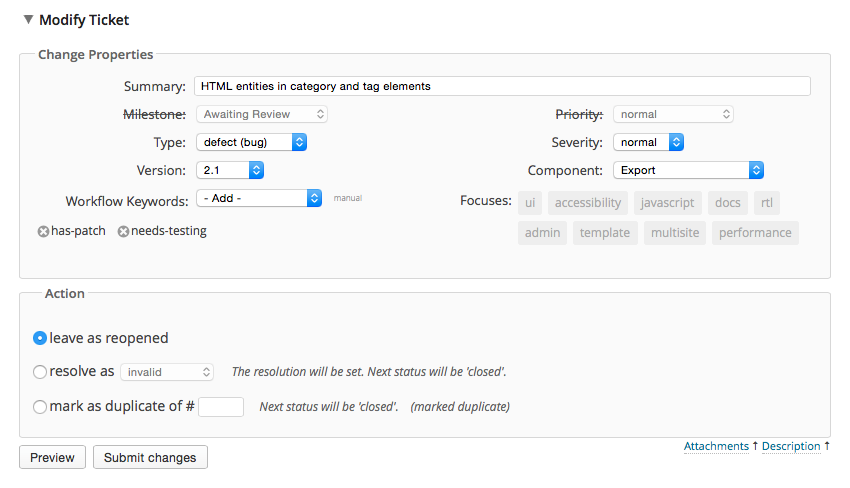
Depending on what you have done or found, you may need to alter some of the Workflow Keywords within the Change Properties section.
In most cases you’ll be removing things like the “needs-patch” or “needs-refresh” keywords and adding the “has-patch” and “needs-testing” keyword. Once done, this will move the ticket into someone’s keyword-based report as something to review and test. If in doubt about changing the keywords, check out the official article about using the bug tracker.
You’re very unlikely to need to change anything within the Action section. I mistakenly changed some items there once and won’t be doing that again in a hurry! This section is basically for closing a case, either because it has been completed and merged into the repository or because it has been found to be invalid for one reason or another (e.g. a duplicate). It’s probably best to leave this section alone unless you’re on the WordPress Core team or have been assigned to review the ticket’s validity.
Get Clean Again
Now that you’ve submitted your patch and are ready to move on to your next ticket, ensure that your repository checkout is ready for fresh development (see Keep It Clean).
While leaving the patch file you created in the root directory should not interfere with any new development (it should be automatically excluded from any diffs), it’s best to remove it. You can always re-download your submitted patch file from the ticket.
Keeping On Top Of Your Tickets
Even though you’ve submitted the best patch in the history of WordPress development, it doesn’t mean you’re done. For any number of reasons your patch might not get reviewed, tested and committed through to trunk. You should keep tabs on your tickets. Every now and then, you should ensure your patches still apply against trunk and if not, refresh them.
Email Notifications
There’s a good chance that you’ll get a few notifications by email when things change on the tickets you’ve worked on. Make sure you read these as there may be things you need to do in response, such as re-work your patch or reply to a comment to clarify something.
The best kind of notification is a commit notification, or what I call a “props” email. These are awesome. It’s great to see your username given some props when a ticket is closed as complete. Take a moment and pat yourself on the back, you earned it!
My Patches
https://core.trac.wordpress.org/my-patches
Use this Trac report now and then to review the status of tickets you’ve submitted patches to but for some reason they have not yet been accepted, reviewed, tested or committed through to trunk.
Tickets I’ve Participated In
https://core.trac.wordpress.org/my-comments
This is a slightly different report to the My Patches report in that it includes tickets you’ve commented on. Maybe you’ve been reviewing or testing a patch.
Timeline
https://core.trac.wordpress.org/timeline
This is more for self congratulating or just finding that ticket you remember doing something on but might be closed now.

By default this report shows all ticket events you’ve been involved in up to 90 days back. If you want to look a little further back, there is a control panel in the top right you can use to set the start date further back, or you can use the “Previous Period” and “Next Period” links to step backwards and forwards through your timeline.
Get Involved!
We’ve enjoyed sharing what we’ve worked on with each other, our successes and failures, and genuinely found it to be rewarding. With each little contribution we’re helping to nudge WordPress forward a tiny bit.
The more people that do just a tiny bit when they can, the faster WordPress can evolve and improve. It all adds up. Get involved, help push WordPress forward!