


WordPress Multisite is a powerful tool, highly useful for things like client sites managed by an agency, school or university departments, or large corporate structures where many related sites are needed. However, moving existing standalone sites into that network can be a real headache, with tricky database merges and file juggling.
In this article, we look at two ways to approach this migration: the manual way with a bit of assistance from WP Migrate Lite, and the practically automatic way with WP Migrate.
What is WordPress Multisite?
Multisite is a WordPress feature that allows you to run multiple independent WordPress websites from a single WordPress installation. It allows you to:
- Manage everything centrally: Handle core updates, themes, and plugins for your entire network from one admin dashboard.
- Share resources: Themes and plugins can be installed once and activated across multiple sites within the network.
- Streamline user management: Users can often have accounts across different sites in the network.
Subdomains vs. Subdirectories
A critical choice you’ll make when setting up your multisite network is how the URLs for your individual subsites will be structured.
Subdomains: Your subsites will appear as subdomains of your main network domain (e.g., site1.yourdomain.com, site2.yourdomain.com). This often requires your web host to support “wildcard subdomains” and can involve specific DNS configurations.
Subdirectories: Your subsites will appear as subfolders of your main network domain (e.g., yourdomain.com/site1, yourdomain.com/site2). This typically relies more on .htaccess rules and is often simpler to set up initially on shared hosting.
This decision is made early in the Multisite setup process and is generally very difficult to change later, so choose wisely based on your hosting capabilities and desired URL structure.
Why Converting to Multisite Can Be Complex
Bringing existing single WordPress sites into the multisite fold isn’t a simple drag-and-drop. The biggest challenges are merging database tables, file organizations, and making sure URLs and serialized strings aren’t broken.
- Database Structure: Single sites use a straightforward set of database tables (e.g.,
wp_posts,wp_options). Multisite, however, uses global tables (likewp_usersandwp_usermetafor the entire network) alongside site-specific tables, each with a unique prefix (e.g.,wp_2_posts,wp_3_options). Merging these correctly without data corruption is the biggest hurdle. - File Organization: Media uploads in a single site live in a simple
wp-content/uploads/folder. In a multisite, each subsite gets its own dedicated folder, typicallywp-content/uploads/sites/[site_ID]/. - URLs and Serialized Data: A single site’s database contains its old URL everywhere. When you move it to a multisite subsite, the URL changes. WordPress also stores complex data (like widget settings, theme options) in a serialized format. A simple find-and-replace on these strings can break them, leading to broken functionality.
Setting Up WordPress Multisite
The first thing you need is a functional WordPress Multisite network. We recommend testing everything on a staging site or in local development before rolling it out to production. Creating a [WordPress Multisite in Local(https://localwp.com/help-docs/advanced/wordpress-multisite-with-local/#Creating-a-new-Multisite-in-Local) is one way to get up and running quickly. Local also integrates with WP Migrate, the tool we’re going to use to transfer our database and files.
Next, create complete backups of all your sites, the single sites you plan to migrate and your fresh WordPress install that will become the multisite network. You never know when you’ll need a backup.
Migrating a Single Site to Multisite the Hard Way
This section outlines the process of converting a single WordPress site into a multisite subsite with a heavy reliance on manual effort. While WP Migrate Lite can help with providing a raw database export, the vast majority of the complex, multisite-specific adjustments will fall squarely on your shoulders.
Preparing the Source Site
Before you begin extracting data, it’s always a good practice to prepare your source site. A clean database will make things slightly less chaotic down the line. We recommend first taking the time to clean up your database by deleting unnecessary data like spam comments, old post revisions, expired transients, and any unused themes or plugins. This can be done directly in your database via a tool like phpMyAdmin or by using a dedicated cleanup plugin.
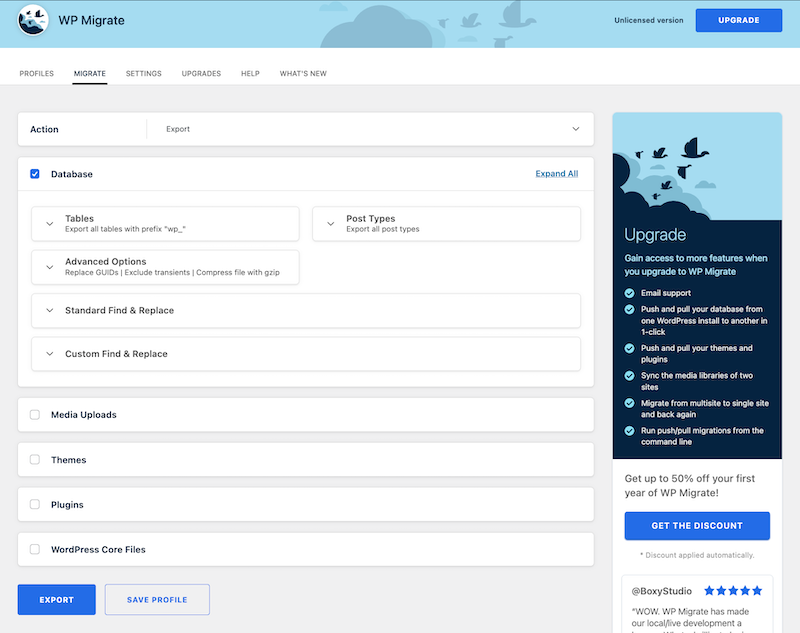
Once your database is tidied up, you’ll need to export its contents. Install and activate WP Migrate Lite on your single WordPress site, navigate to Tools > WP Migrate, and then click on the Migrate tab. Next, click on Export. From there, you have options to export just the database, or perform a “Full-Site Export” which bundles your database, media uploads, themes, plugins, and other wp-content files into a downloadable ZIP archive.
While WP Migrate Lite does offer a “Find & Replace” feature that can safely handle serialized data for general site moves (e.g., changing http://olddomain.com to http://newdomain.com when moving a single site to a new domain), for this specific Multisite scenario, you’ll ultimately need to access the raw .sql file for intricate manual editing. Whether you export just the database or a full site ZIP, you’ll then proceed to the next, most challenging step.
Manual Database Transformation
This is where the real challenge begins, and where even a single misstep can lead to a completely broken site. You’ll be working directly with the raw SQL file that contains your site’s database, so it’s absolutely crucial to have a fresh backup of that file before you start. For this intricate process, you’ll need a powerful text editor, like VS Code, Sublime Text, or Notepad++, that can handle large files and perform advanced find-and-replace operations.
The first major task involves manually adjusting your database table prefixes. Your single site’s database tables likely started with wp_ (for example, wp_posts, wp_options). In a Multisite environment, each subsite needs a unique prefix, typically wp_[subsite_ID]_ (such as wp_2_posts or wp_3_options). You must go into your database’s .sql file and meticulously perform a global find-and-replace for every instance of your old table prefix, replacing it with the new subsite’s prefix.
Now, here’s the huge, critical risk: while WP Migrate Lite’s built-in find-and-replace can handle serialized data safely when you’re just changing URLs within a single site context, it is not designed to automatically adapt serialized data for the complex table prefix changes required when moving a single site into a multisite subsite. WordPress stores complex data, like widget settings, plugin options, and various array data, in a serialized format. If you perform a simple text replacement on a serialized string that changes its length, you will corrupt that data. This often results in broken widgets, non-functional plugins, and missing settings on your new subsite, as standard text editors don’t understand the intricacies of serialized data lengths.
Following the prefix changes, you’ll face a similar challenge with URLs and paths. Your exported database is littered with references to your old single site’s URL. You’ll need to perform another series of global find-and-replace operations to update all these instances to reflect your new subsite’s URL (like http://multisite.com/subsite1 or http://subsite1.multisite.com). Be sure your target URL matches your multisite’s chosen structure, whether it’s http://multisite.com/subsite1 for subdirectories or http://subsite1.multisite.com for subdomains.
Once more, the danger of corrupting serialized data that contains these URLs looms large if you’re not using a specialized tool designed for these complex, length-sensitive replacements across various database structures within a multisite context.
Next comes the particularly thorny issue of user data merging. Multisite utilizes global wp_users and wp_usermeta tables, meaning all users across the entire network share these two tables. Your single site, of course, has its own dedicated wp_users and wp_usermeta tables. You absolutely cannot just import these directly.
Instead, you’ll need to carefully export only the user tables from your single site. Then, you must manually review them. If any user IDs from your single site conflict with existing user IDs on your multisite network, you’ll have to manually reassign new, unique IDs to the single site’s users within their wp_users and wp_usermeta rows. After that, these modified user rows must be meticulously merged into the Multisite’s global wp_users and wp_usermeta tables.
Finally, and this is a step that often requires writing complex custom SQL queries, you’ll need to update the post_author fields in your newly prefixed wp_X_posts table to ensure they correctly reference the new user IDs in the Multisite’s global wp_users table. Beyond these major structural changes, you might also find yourself manually adjusting site_id values in certain option tables to ensure everything correctly points to the new subsite.
Importing the Modified Database
Once you’ve painstakingly edited your SQL file, and double-checked (and triple-checked!) your work, it’s time to import it. It’s important to note that WP Migrate Lite does not provide an in-dashboard import feature for arbitrary SQL files or full-site ZIP archives back into a live WordPress site; its export is designed to be imported using external tools (or specifically into Local). Therefore, you’ll typically use a database management tool like phpMyAdmin. Log in, select the database associated with your multisite installation, and then use the “Import” function to upload your manually edited SQL file. This is often the moment of truth, where you’ll be hoping no errors appear.
Manual File Transfer and Reorganization
With the database n place, your next major task is to sort out the files. Even if you generated a full-site export ZIP with WP Migrate Lite, the manual database edits mean you’ll likely still be managing files externally.
First, connect to your multisite via FTP/SFTP. Navigate to the wp-content/uploads/ directory. You’ll notice a sites/ folder there, and inside sites/, you’ll find folders named after your subsite IDs (e.g., 2/, 3/). You’ll then take all the media files from your single site’s wp-content/uploads/ folder and manually upload them into the correct subsite’s designated directory (e.g., wp-content/uploads/sites/[subsite_ID]/). Even after moving the files, they might not immediately appear in your subsite’s media library. You might need to activate a specific plugin on the subsite to rescan and register these files in its database.
Beyond media, you’ll also need to manually upload any specific themes or plugins that your old single site used, if they aren’t already available network-wide on your multisite. Once uploaded, you’ll then activate the necessary themes and plugins for your new subsite from its dashboard.
Post-Migration Cleanup and Testing
Even if you’ve done everything perfectly, you need to thoroughly check the newly migrated subsite. Begin by clearing any caching plugins on your multisite, as well as any server-side or CDN caches. After that, go to the new subsite’s dashboard, navigate to Settings > Permalinks, and click Save Changes. This can often help re-write the permalink rules for the subsite and resolve potential routing issues.
Now comes the most critical part: extensive testing. Do not assume everything works just because the site loads. You must systematically visit all pages and posts to check that content displays correctly, images load, and all internal links function. Test any forms present on the site, verify that widgets and customizer settings are as expected, and ensure all plugins are functioning without errors. Crucially, test user logins and permissions on the new subsite, and double-check that all media links are correct and images display properly.
As you can see, performing this migration manually is a monumental undertaking. Even with a tool like WP Migrate Lite assisting with the initial database export and its general serialized data handling, the lack of specific multisite integration means you’re left with immensely complex manual tasks. It demands deep technical expertise, meticulous attention to detail, and a significant time investment for each and every site you plan to migrate. The risk of data corruption, especially with serialized data after table prefix and URL changes, and the complexities of merging user tables, remains extremely high. While it’s technically possible, it’s impractical for most, and certainly not scalable if you have more than one or two sites to migrate.
Simplify Your Life: Migrating a Single Site to Multisite with WP Migrate
This method leverages WP Migrate’s powerful premium features, specifically its “Multisite Tools” addon, to automate the most complex and error-prone aspects of migrating a single site into a multisite network. You’ll quickly see a dramatic reduction in the time, effort, and technical expertise required.
Install WP Migrate
The first thing you’ll need is a “Plus” or “Premier” license for WP Migrate, as these licenses include Multisite Tools.
Once you have your license, install and activate the WP Migrate plugin on both your source single WordPress site and your destination Multisite network. This dual installation allows the plugin to establish a secure connection between the two sites, enabling direct data transfer.
Prepare Your Source Site
Compared to the arduous manual method, source site preparation here is significantly simpler. While a general cleanup (like deleting spam comments or old revisions) is always good practice for a leaner migration, WP Migrate’s robust capabilities mean you don’t need to manually export databases or files. The plugin intelligently handles the find-and-replace for URLs and file paths, safely managing all serialized data without corruption.
Prepare the Destination Multisite
The foundational steps of setting up your WordPress Multisite network are still essential. You’ll need to have your multisite environment properly configured and running. Additionally, just as with the manual method, you’ll need to create a new, empty subsite within your multisite network that will serve as the destination for your incoming single site. This provides WP Migrate with the designated slot to pull your site’s data into.
Perform the Automated Pull Migration
This is where WP Migrate truly shines, automating tasks that were previously hours of painstaking manual labor. From your Multisite Network Admin dashboard:
- Navigate to the WP Migrate plugin interface.
- Select the “Pull” option. This tells the plugin you want to pull data from a remote site to your current multisite network.
- You’ll then be prompted to connect to your remote source site (your original single WordPress installation). Once connected, WP Migrate will intelligently detect your multisite setup.
- The plugin will offer you precise options for the migration. You’ll be able to select the specific single site you want to pull from, choose the newly created subsite on your multisite network as the exact destination for this migration, and select which components you wish to migrate: the database, media files, themes, and plugins.
- With your selections made, you’ll initiate the migration. WP Migrate then takes over, performing a series of automated, complex tasks. It intelligently handles the find-and-replace for URLs and file paths, safely managing all serialized data without corruption. The plugin also correctly adjusts all database table prefixes from your single site to match the unique prefix of the target subsite (e.g.,
wp_becomeswp_2_). It also merges your single site’s user data into the multisite’s globalwp_usersandwp_usermetatables, correctly handling user ID assignments and references. Media files directly to the correct subsite-specificwp-content/uploads/sites/[subsite_ID]/directory, and it even transfers your selected themes and plugins, making them available for activation on your new subsite. - You can monitor the progress of the migration directly within the WP Migrate interface, which provides clear feedback as it processes your data.
Post-Migration Testing is Still Important
Even with the automation provided by WP Migrate, thorough testing remains a critical step. While the likelihood of fundamental errors is drastically reduced, it’s always wise to verify everything works as expected.
- Clear Caches: As always, clear any caching plugins on your Multisite, along with server-side and CDN caches.
- Resave Permalinks: Navigate to your new subsite’s dashboard (Settings > Permalinks) and click Save Changes. This helps ensure the permalink structure is correctly refreshed within the multisite environment.
- Comprehensive Testing: Systematically check all aspects of your newly migrated subsite. Visit all pages and posts, verify images and media links, test forms, ensure widgets and customizer settings are correct, and confirm that all plugins are functioning as intended.
Comparing Methods
The contrast between the two methods is stark. The second way, powered by WP Migrate, transforms a labor-intensive, technically precarious process into a few clicks. What could take hours or even days of manual debugging and highly specialized knowledge is condensed into minutes, with a dramatically lower risk of error and data corruption. This powerful automation means less stress, more reliability, and ultimately, a much more efficient use of your time.
Wrapping Up
We’ve explored two distinct paths for migrating a single WordPress site into a multisite network. On one hand, the meticulous manual approach demands deep technical knowledge and carries a high risk of data corruption. On the other, a specialized tool transforms this complex process into an efficient and reliable operation.
The difference in effort and risk is striking. What could be a multi-day debugging nightmare becomes a matter of a few clicks, drastically reducing your time and stress.
This contrast clearly highlights a choice: tackle an incredibly intricate task with painstaking manual effort, or leverage automation designed to handle its complexities safely. For most, the investment in a solution that provides such efficiency, reliability, and peace of mind is invaluable.