DigitalOcean Spaces CDN Setup
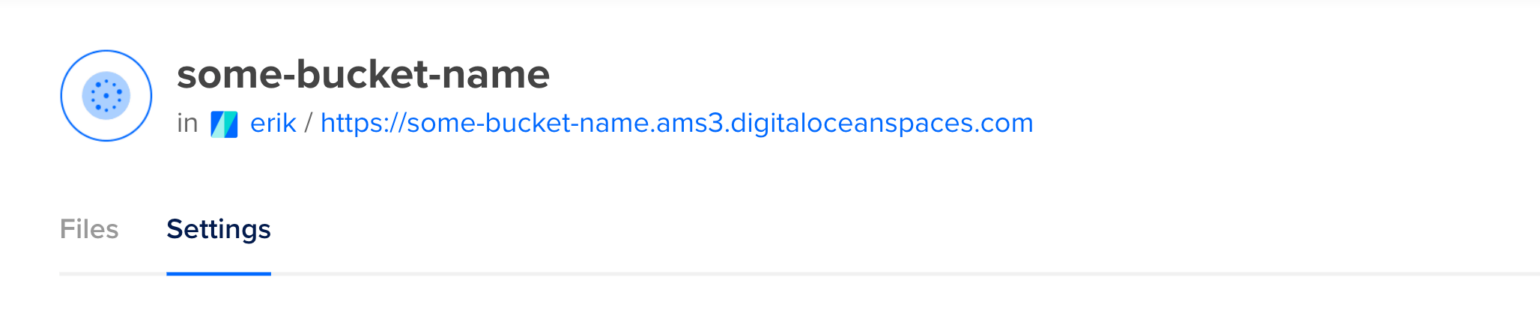
This article assumes that you’ve already set up a DigitalOcean Spaces bucket (Space) and followed the steps within our DigitalOcean Spaces Quick Start Guide.
Your DigitalOcean Spaces bucket can be set up to also act as a CDN for no extra cost.
It does however have a couple of shortcomings at the moment, you can only have one custom subdomain per Space, and to use the free Let’s Encrypt certificates for HTTPS you need to manage the primary domain via DigitalOcean’s DNS service.
Want to use more than one custom domain with your media on DigitalOcean Spaces? Check out our guide for using KeyCDN.
However, if that’s not a concern, it’s just a few steps to enable the built in Spaces CDN and switch WP Offload Media to use it.
Move Domain to DigitalOcean
In this guide we’re going to set up our CDN to use a free Let’s Encrypt certificate, so first we need to move our domain to DigitalOcean.
If you’re not bothered about using a custom subdomain for the CDN, are providing your own HTTPS certificate, or have already moved your domain to DigitalOcean’s DNS service, please skip ahead to the Enable CDN on Space section.
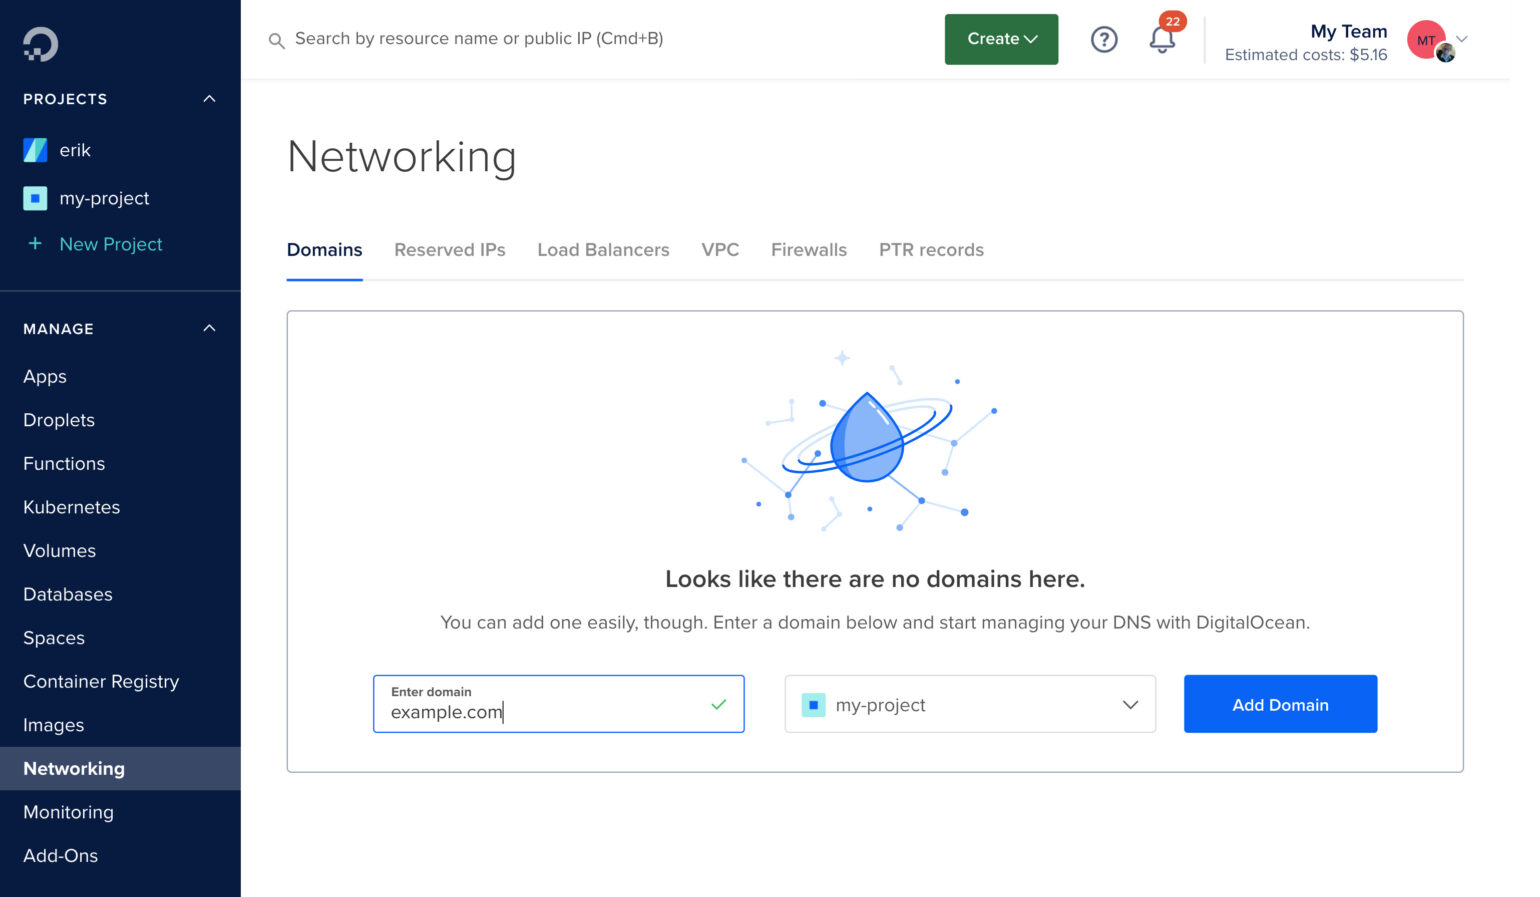
Go to the Domains tab of the Networking section in the DigitalOcean Control Panel.
Here you can add your domain to the Enter domain box, select the project it’s part of if using projects, and then click the Add Domain button.
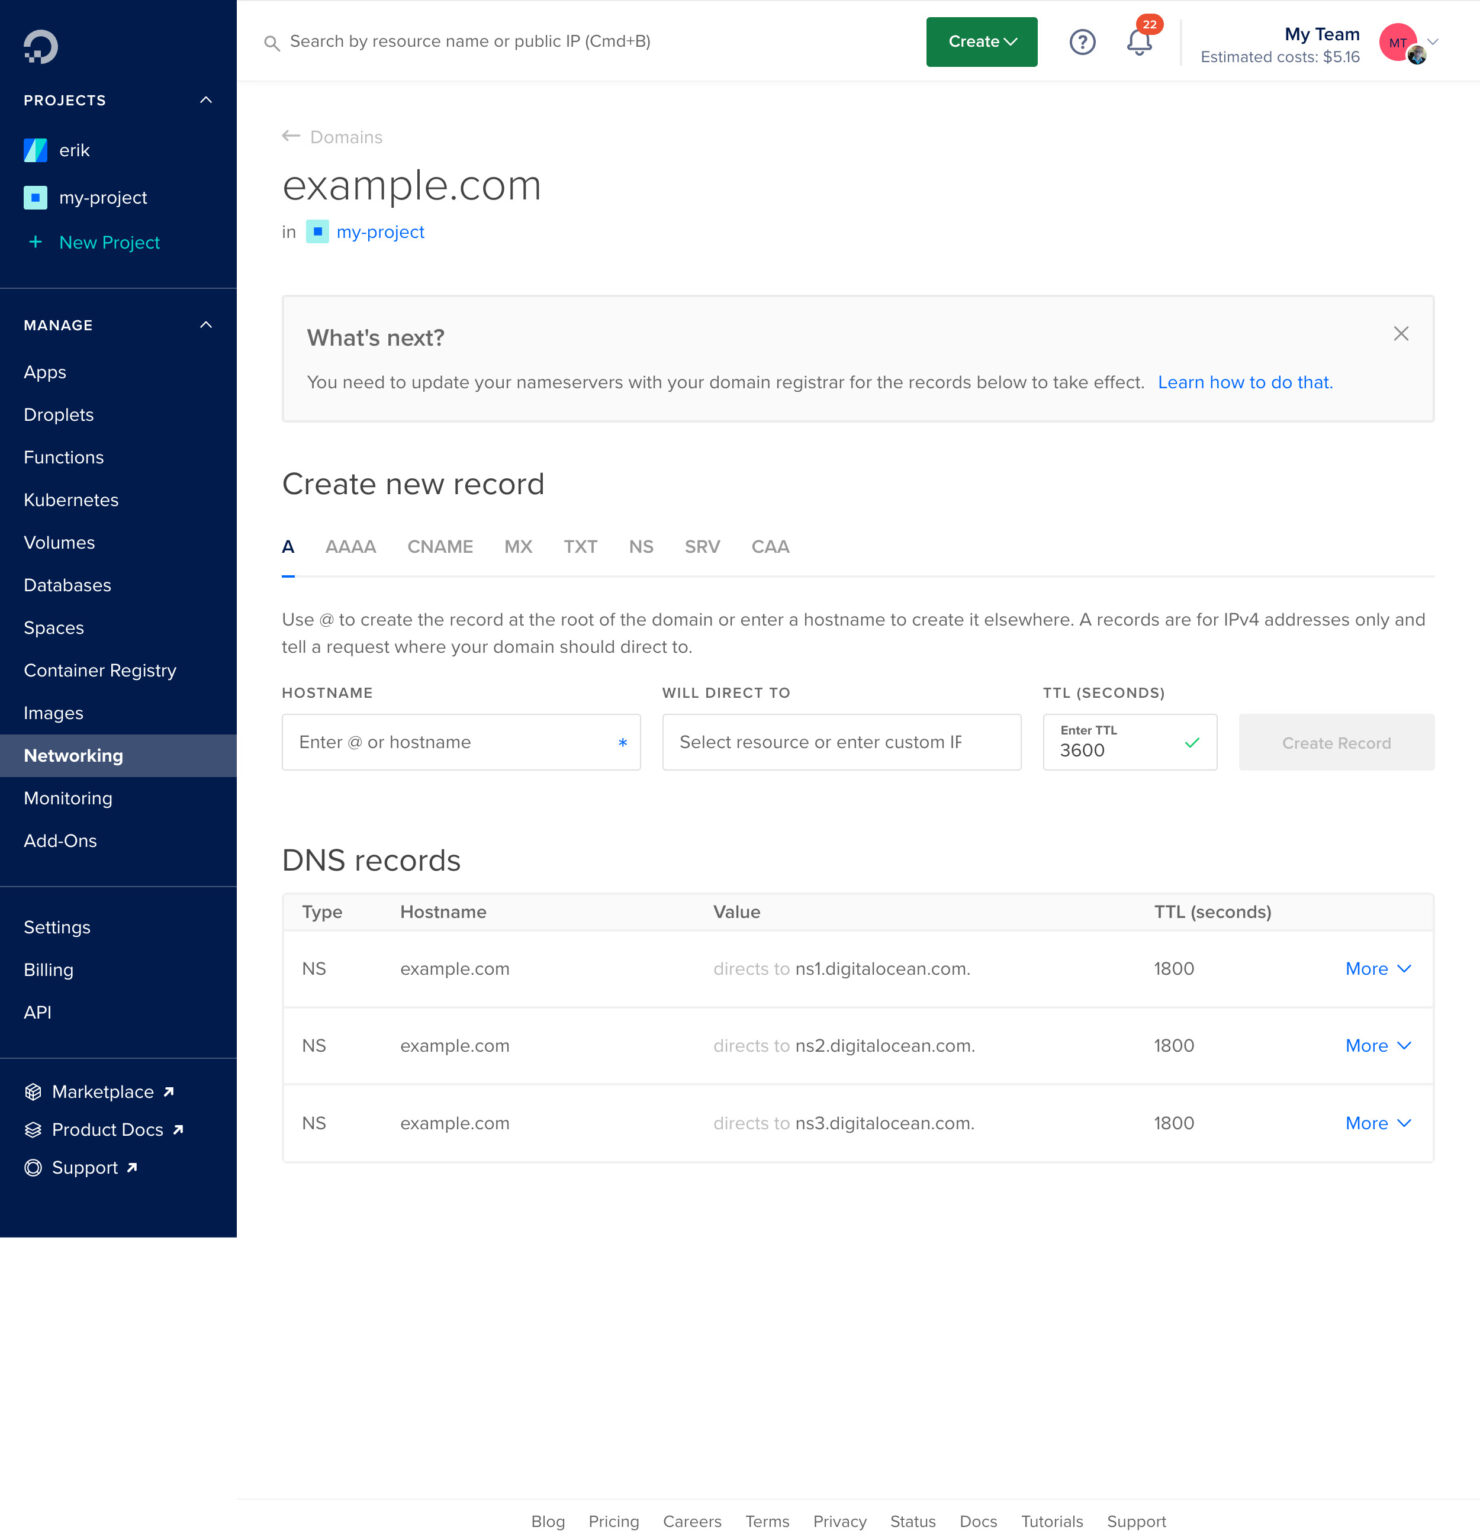
You can now see the DigitalOcean DNS name servers you need to use at your domain registrar.
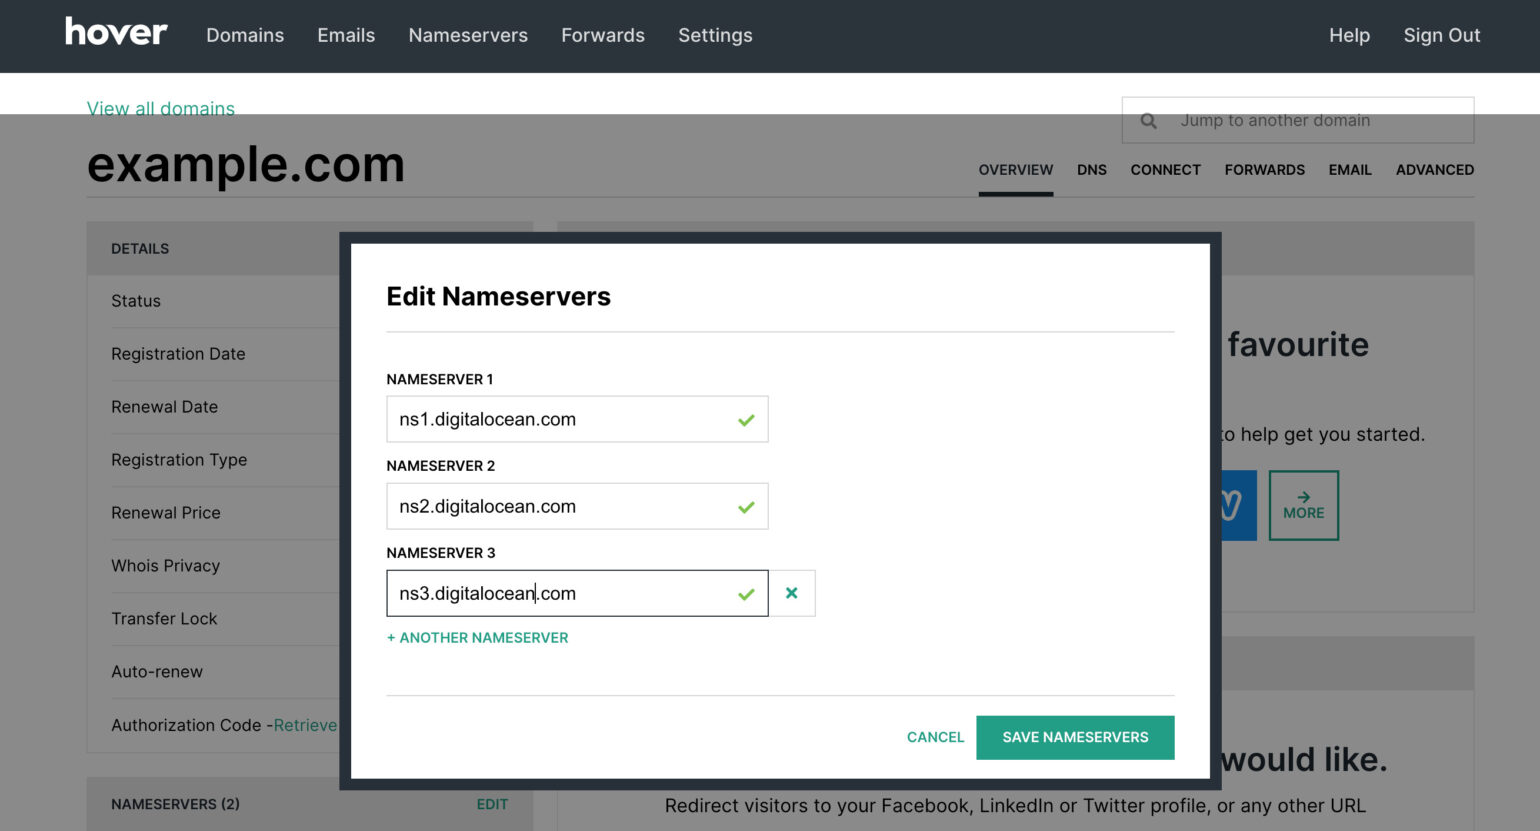
Login to your domain registrar and update your domain name with the name servers that DigitalOcean gave you. DigitalOcean has an excellent guide for how to do that at a variety of popular domain registrars, but here’s what it would look like for example.com, registered via Hover.com.
Please note that when moving a domain to another DNS provider, you must also re-create any DNS entries at the new provider (in this case, DigitalOcean). For example, I created an “A” record for example.com as well as a “CNAME” for www.example.com.

Enable CDN on Space
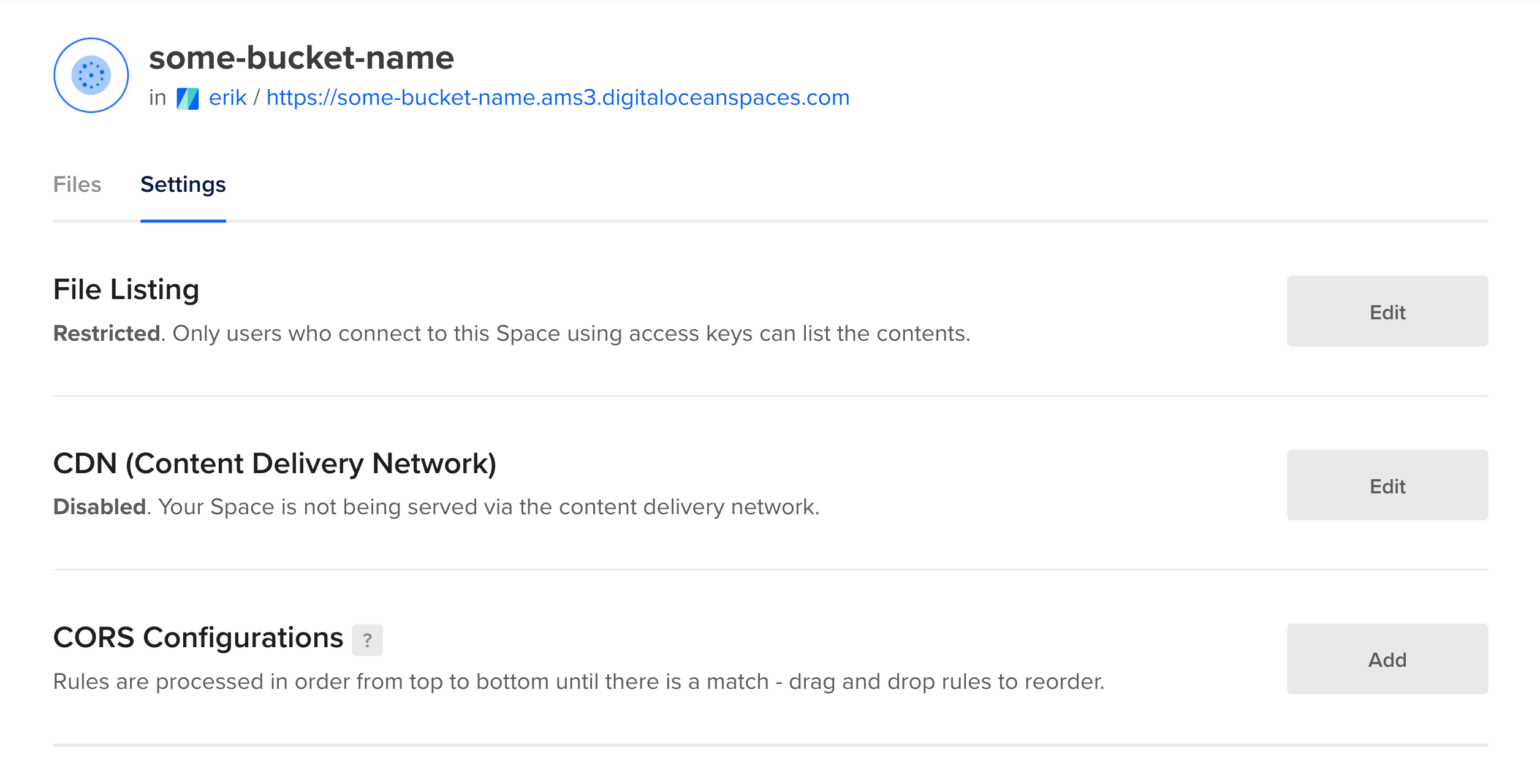
Go to the Settings for the bucket inside your DigitalOcean account, found under the bucket’s More dropdown link in the Control Panel’s Spaces page.
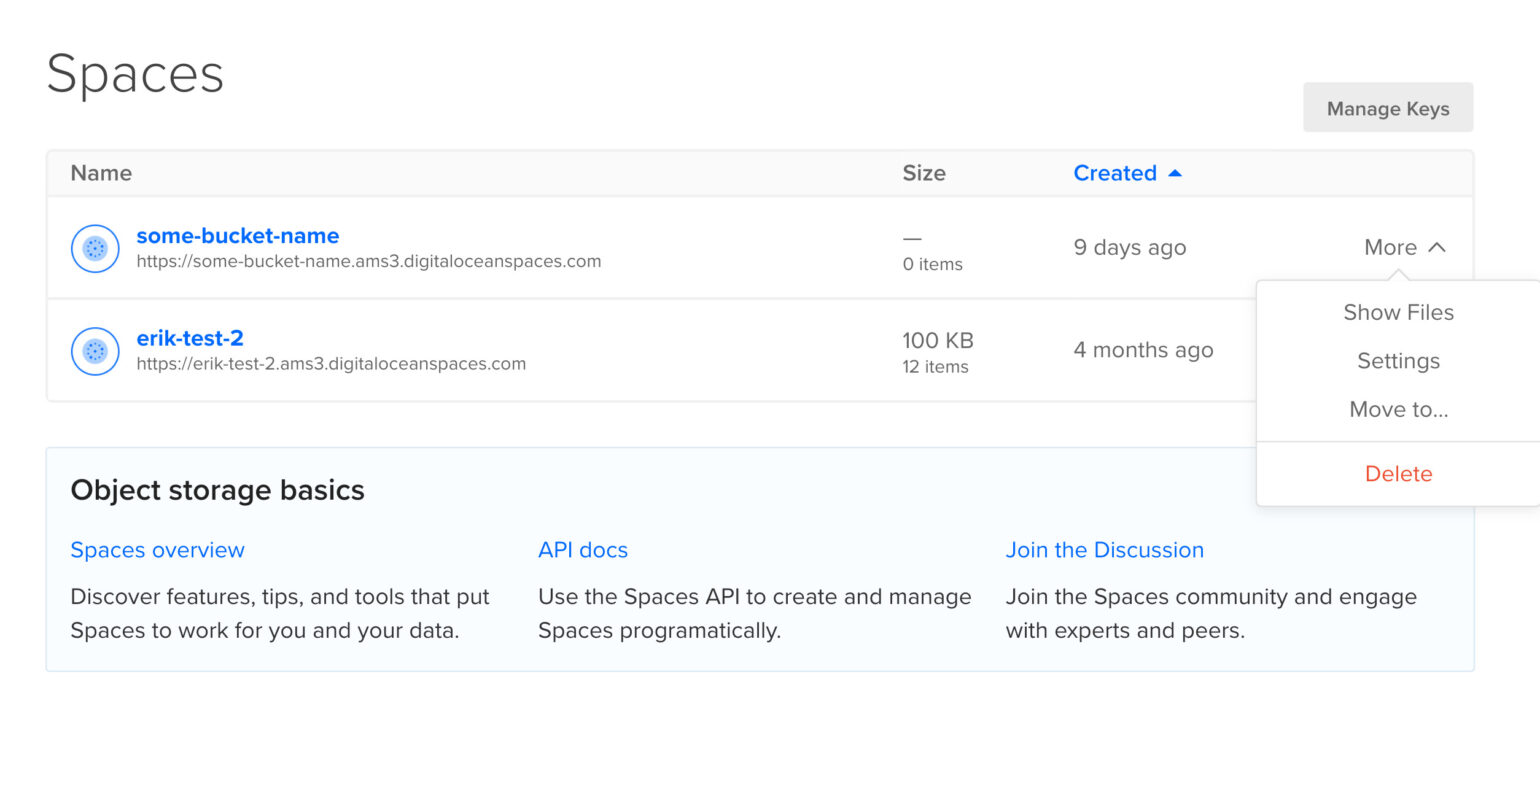
You can also access a Space’s settings while browsing its files.
Click the Edit button alongside the CDN (Content Delivery Network) setting.
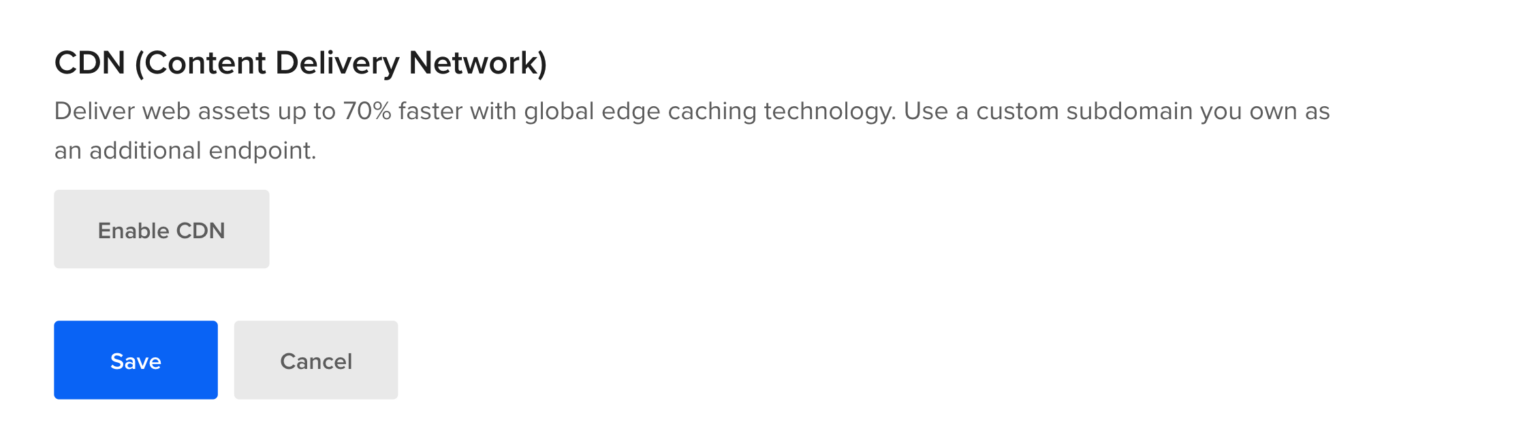
Enable the CDN with the Enable CDN button.
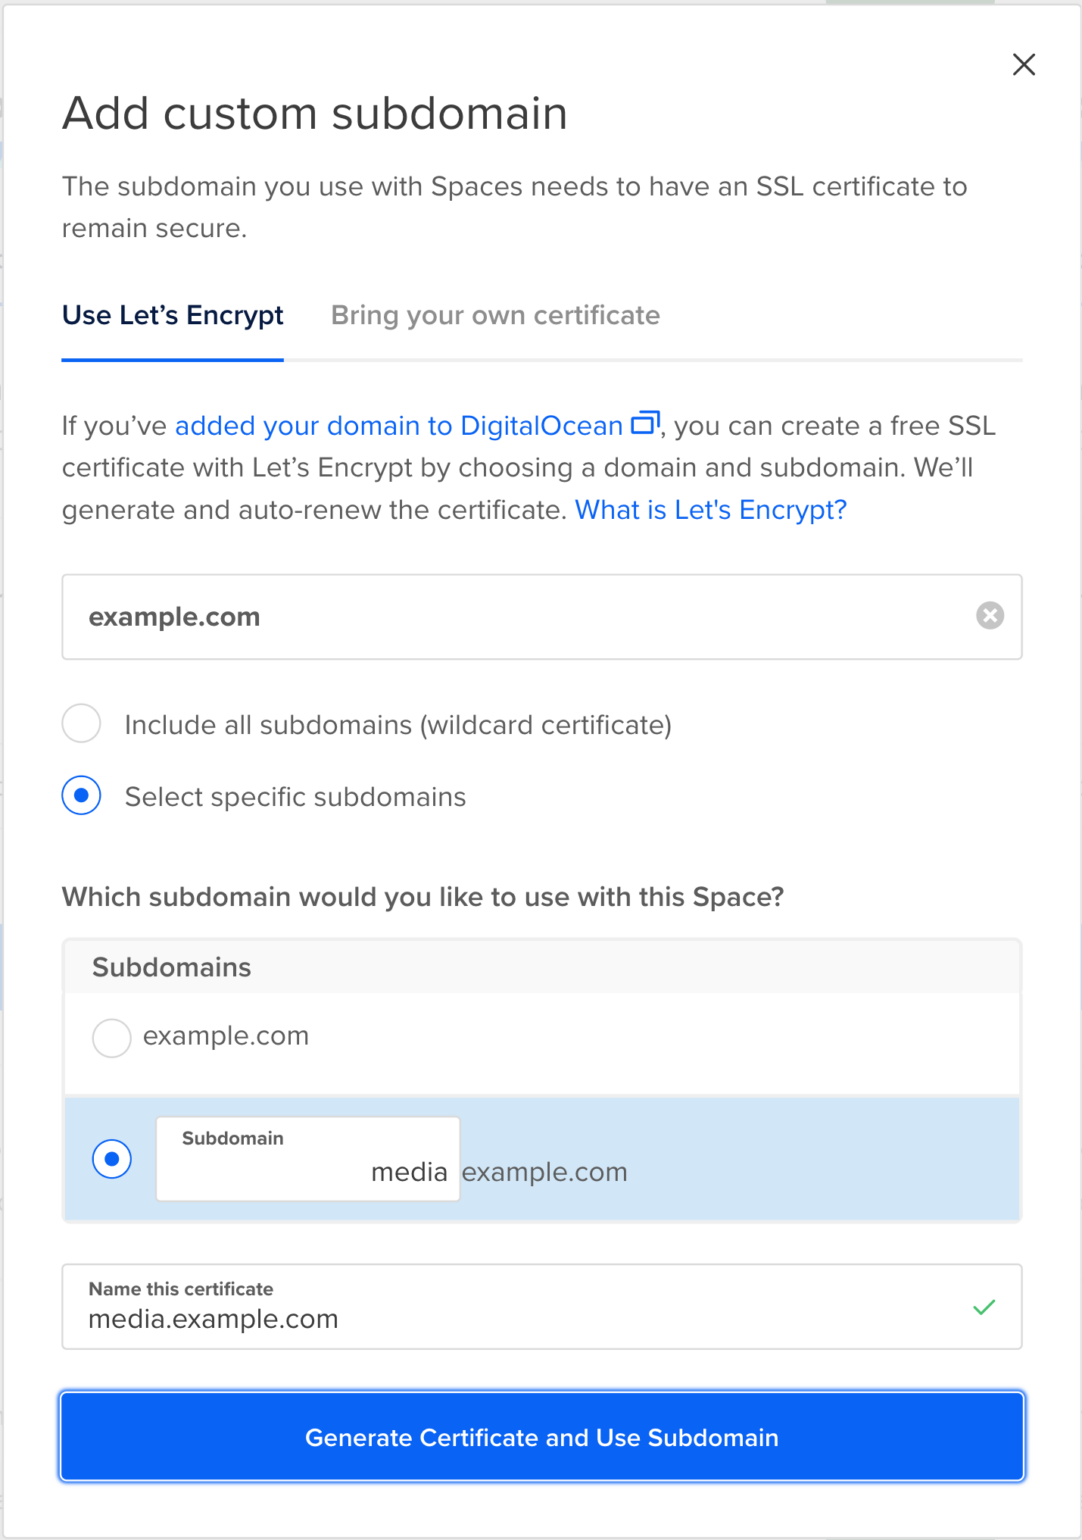
At this point you can optionally select an existing subdomain for the CDN, or add a new certificate and subdomain. We haven’t set up any certificates yet, so we’re going to pick + Add a new subdomain certificate.
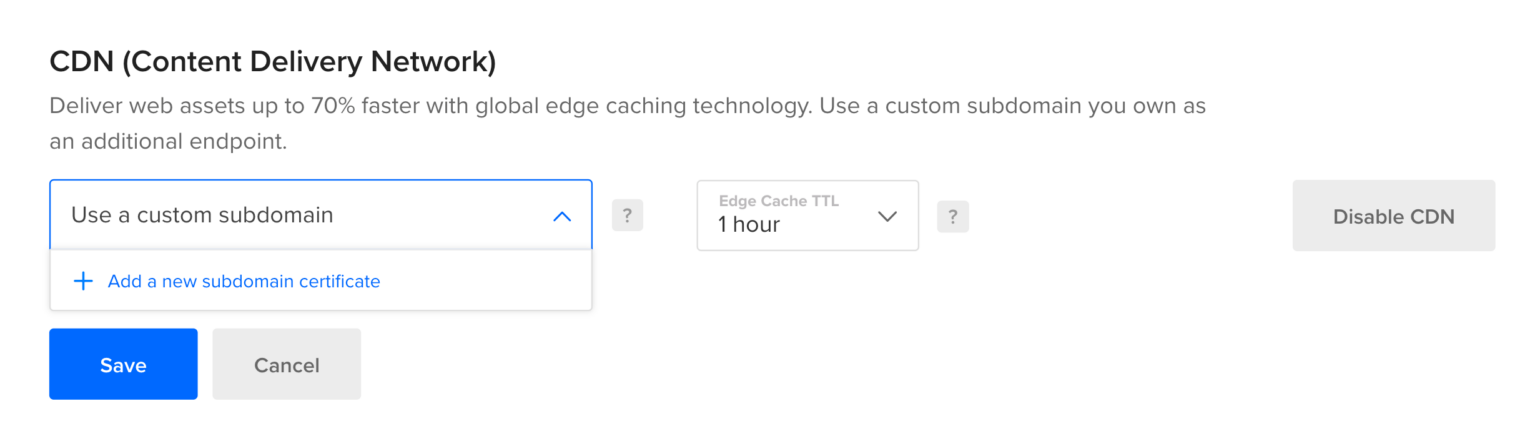
We can now generate a certificate for the subdomain we want to use for the CDN, with DigitalOcean taking care of creating the necessary DNS entries too.
- Select the primary domain that is being managed with DigitalOcean’s DNS service.
- Select an existing subdomain or enter the new one (just the first bit of the name is needed without a “.”).
- Enter a simple name for the certificate in case you need to use it elsewhere in DigitalOcean.
- Click the Generate Certificate and Use Subdomain button.
Then make sure to Save.

You’re now finished with DigitalOcean’s Control Panel.
Update WP Offload Media’s Settings
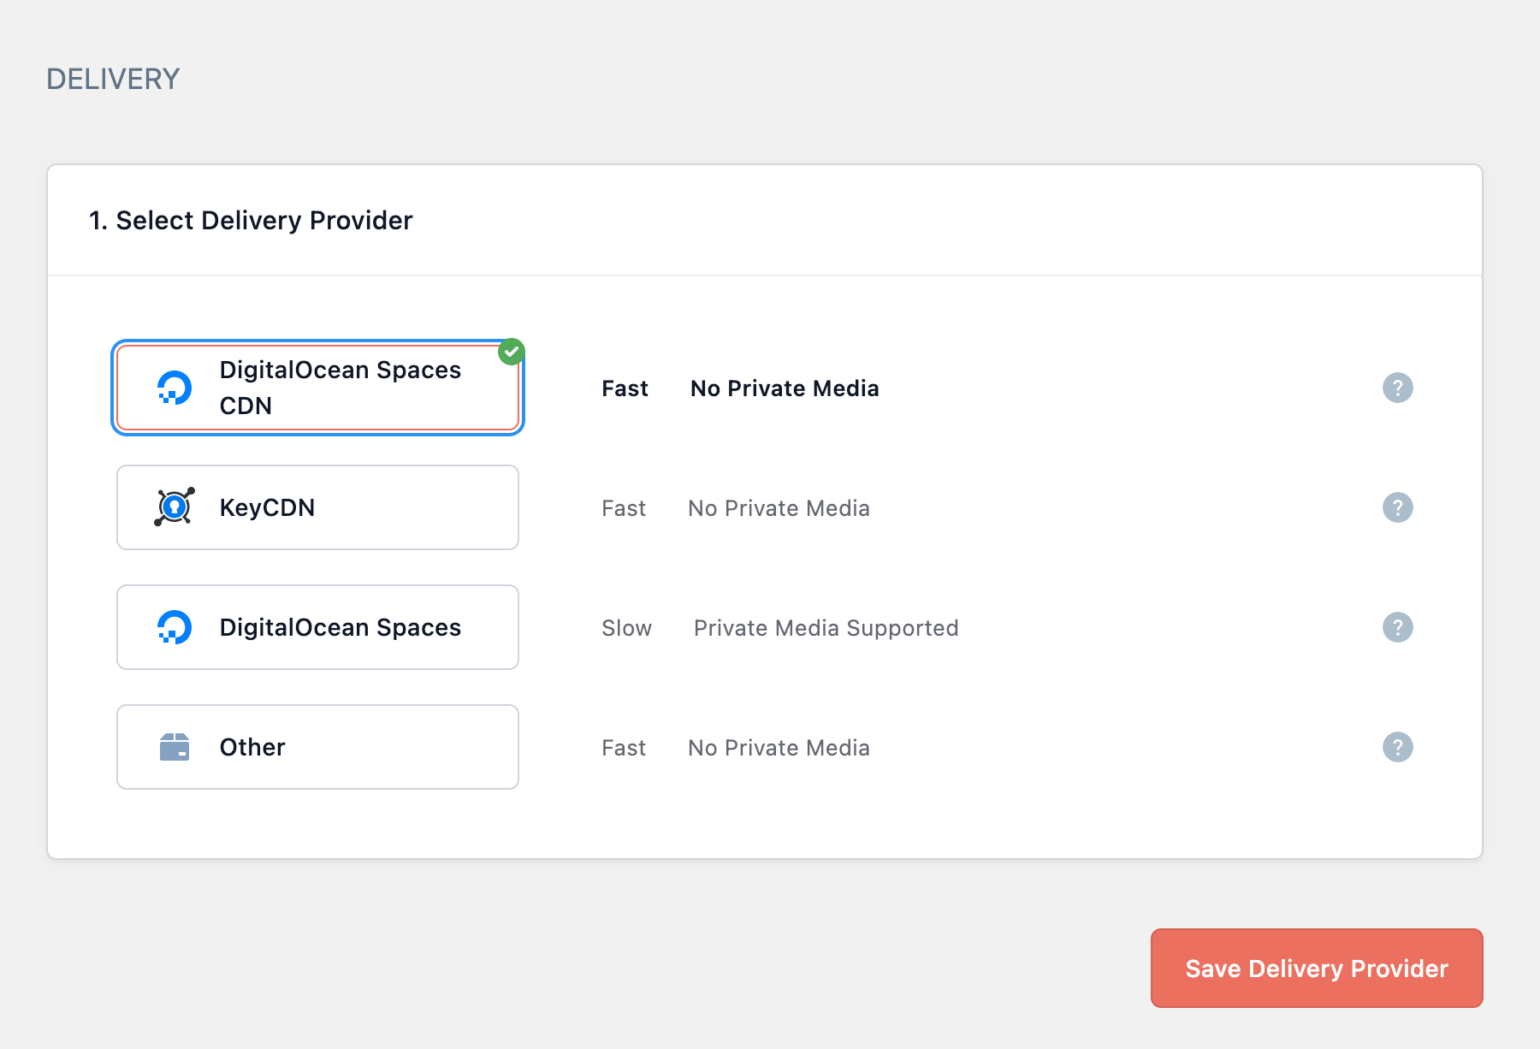
Now that you have a working CDN for your Space, switch over to WP Offload Media’s settings, and click the Edit button link in the delivery section that should say “DigitalOcean Spaces”.
From the list of Delivery Providers, select DigitalOcean Spaces CDN, then click the Save Delivery Provider button.
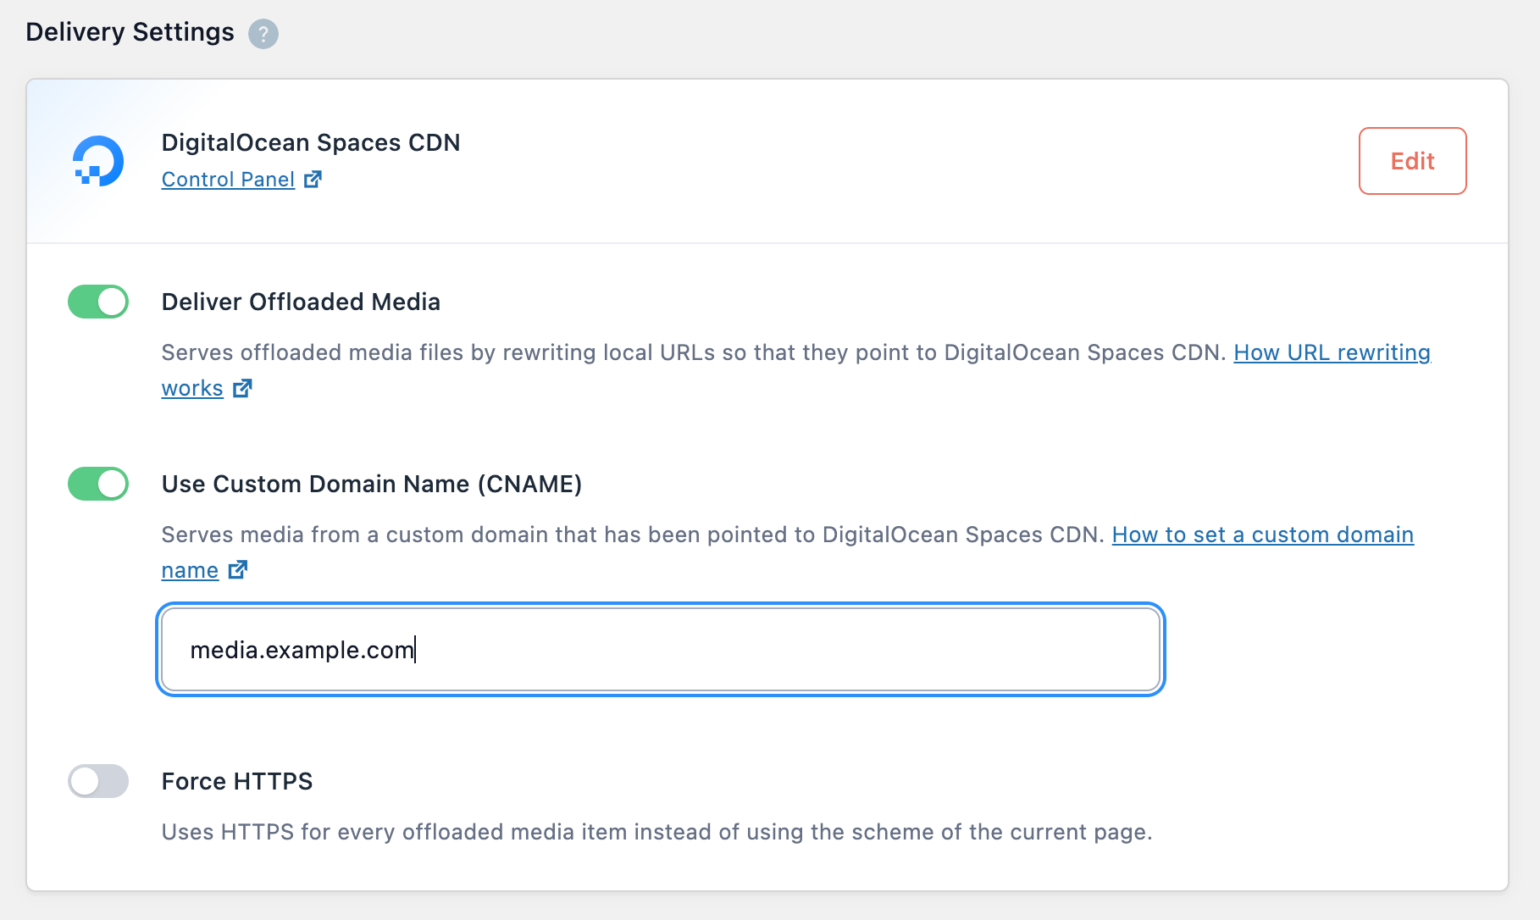
Turn on the Custom Domain (CNAME) setting and enter the custom subdomain.
The Custom Domain (CNAME) field doesn’t take full URLs, it just needs the domain name.
Once you click WP Offload Media’s “Save Changes” button your site will start using the DigitalOcean Spaces CDN for serving your media.