StackPath Setup for Amazon S3
This article assumes that you’ve already set up an Amazon S3 bucket and followed the steps within our Amazon S3 Quick Start Guide. You will also need an account with StackPath.
StackPath Setup
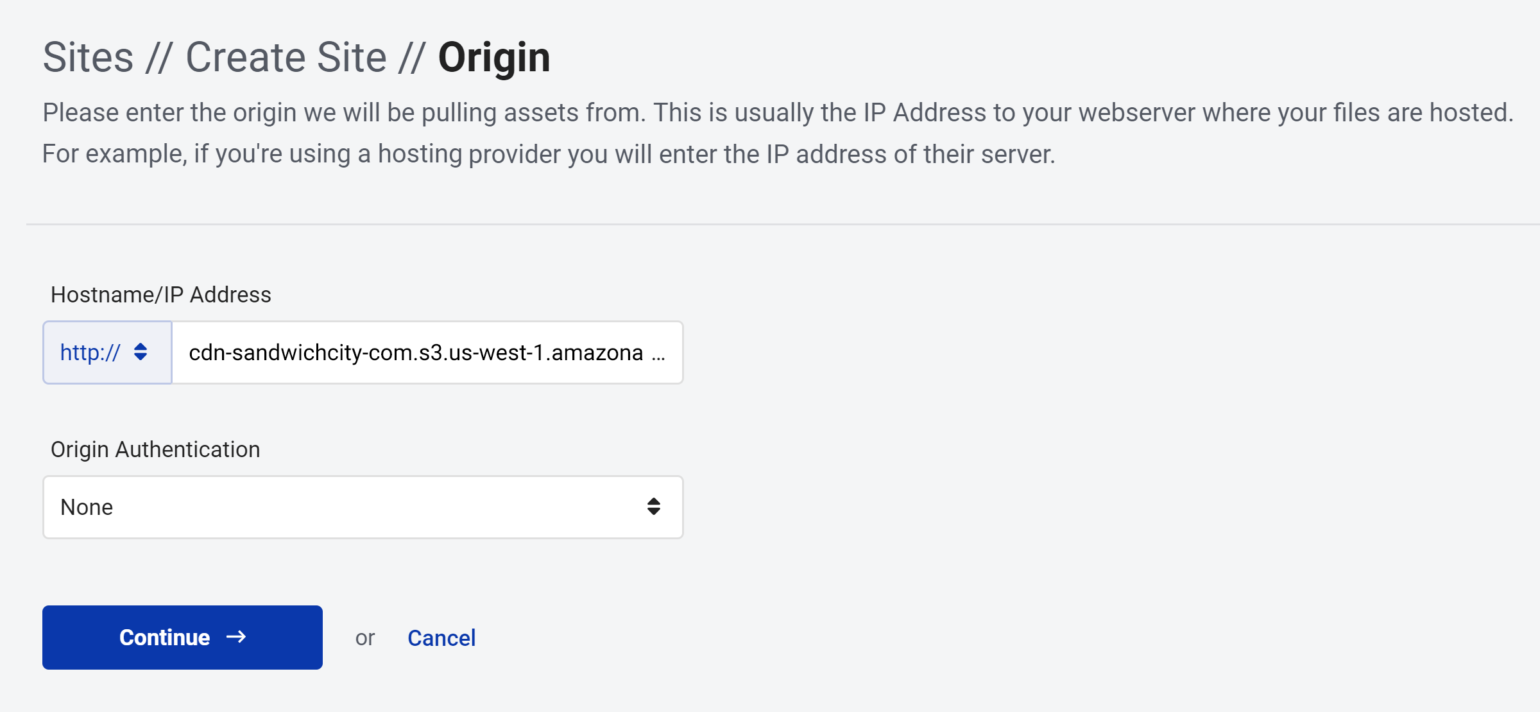
Once the above steps are taken care of, you will need to determine your S3 bucket URL. To do this, prepend your bucket name to “.s3.”, then your S3 region and finally append “.amazonaws.com”. In our example we created a bucket named “cdn-sandwichcity-com” on the S3 region “us-west-1”, so the S3 Bucket URL would be:
cdn-sandwichcity-com.s3.us-west-1.amazonaws.com
Next, login into your StackPath control panel and create a new site. Enter the custom subdomain you’d like to use for delivering the offloaded media into the Domain Name field, for this setup guide, we will be using “cdn.sandwichcity.com”.
Select “CDN” as the Available Services and click the Continue button.

Enter the S3 bucket URL on the Hostname/IP Address, set the Origin Authentication to “None” and hit Continue.
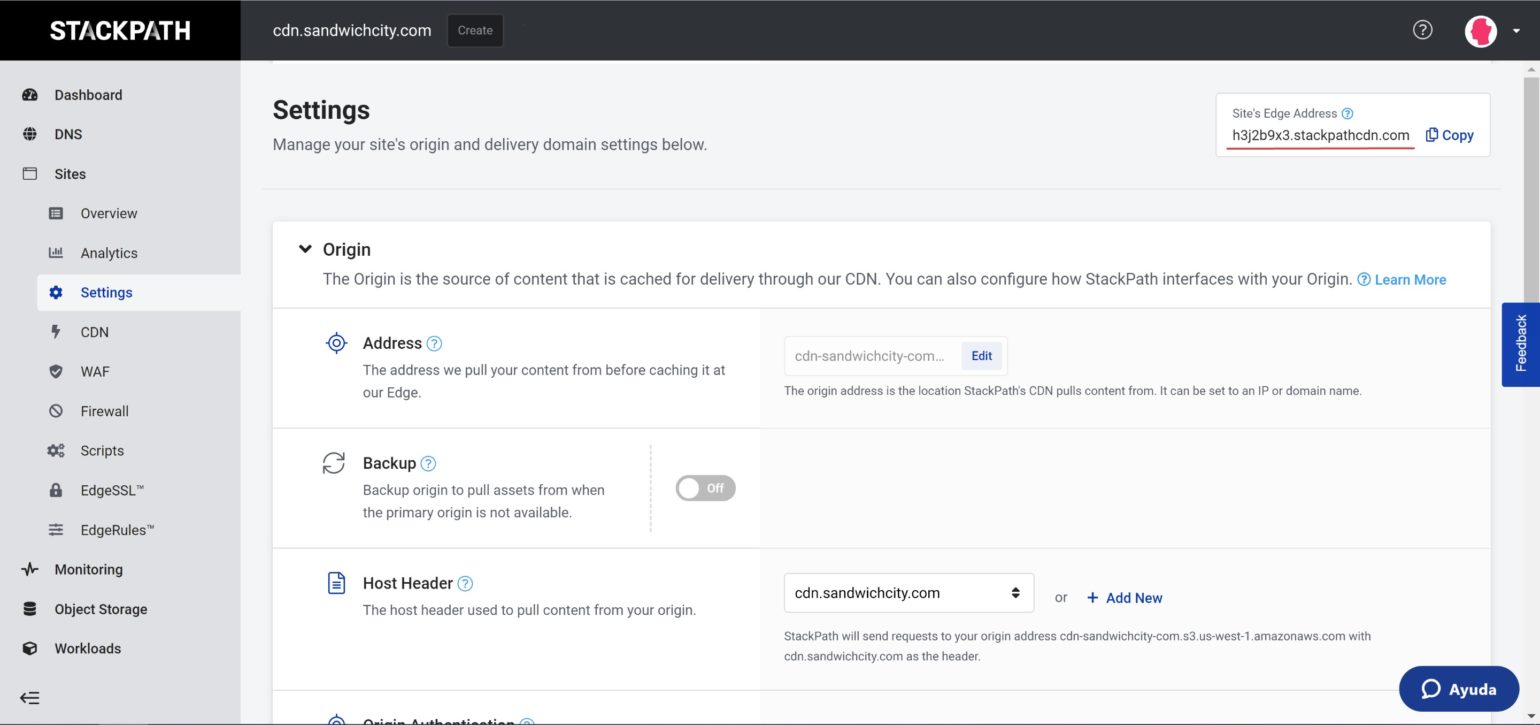
On success, you will be redirected to the new site overview page. Please take note of the Site’s Edge Address URL on the top right corner as you will need it later on.
With StackPath configured, let’s move onto domain configuration.
Add your Custom Domain (CNAME)
Go to your DNS provider’s control panel (e.g., Hover, GoDaddy) and create a new CNAME entry for the chosen subdomain. This record must be pointed to the StackPath Site’s Edge Address we’ve mentioned before.

Create an SSL certificate
After allowing ample time for the DNS changes to propagate, you should also complete the validation process for a free SSL certificate. Navigate to the StackPath site sidebar and look for EdgeSSL, then click on Create Certificate located in the panel Custom Delivery Certificate.
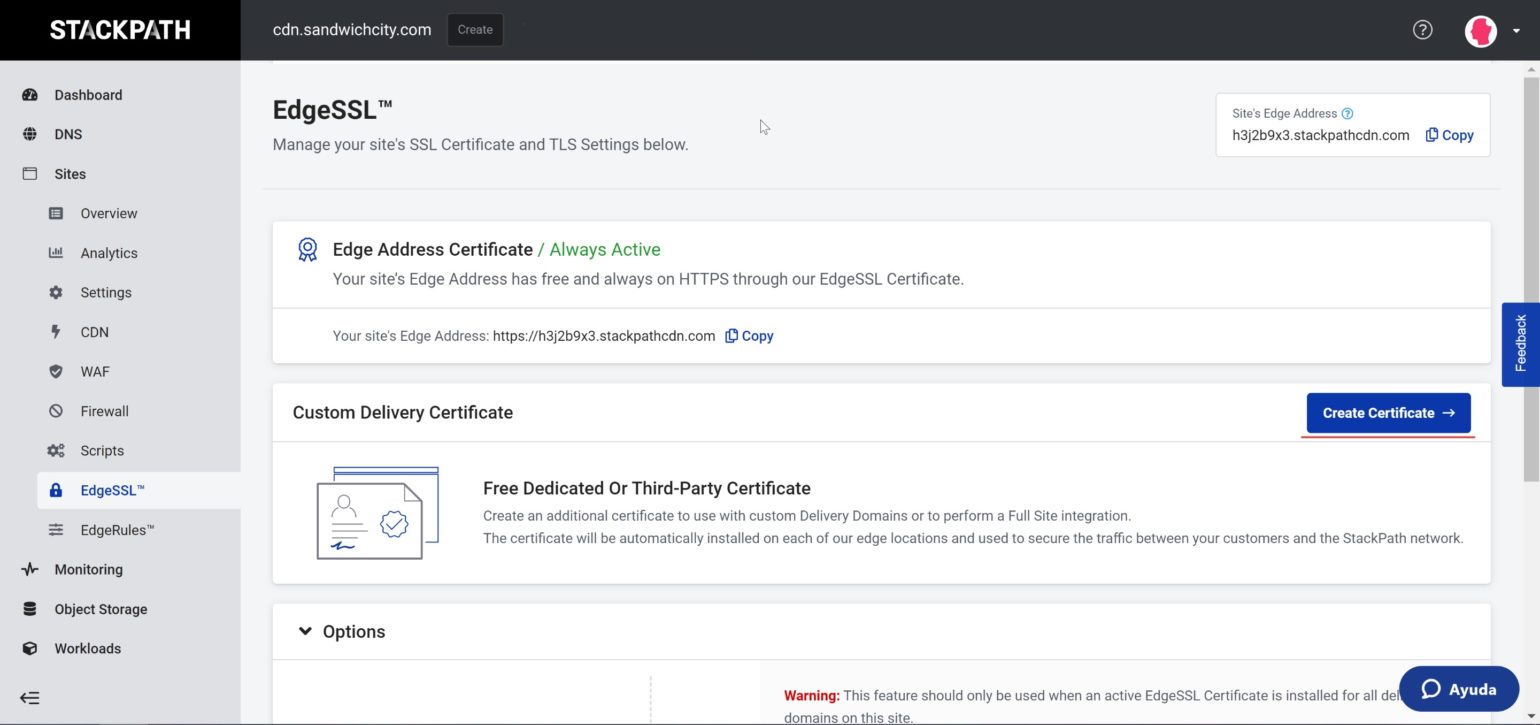
Next, click the Generate button in the Free Dedicated by Sectigo dialog. You can also upload your own certificate if you have one already by clicking Upload instead.

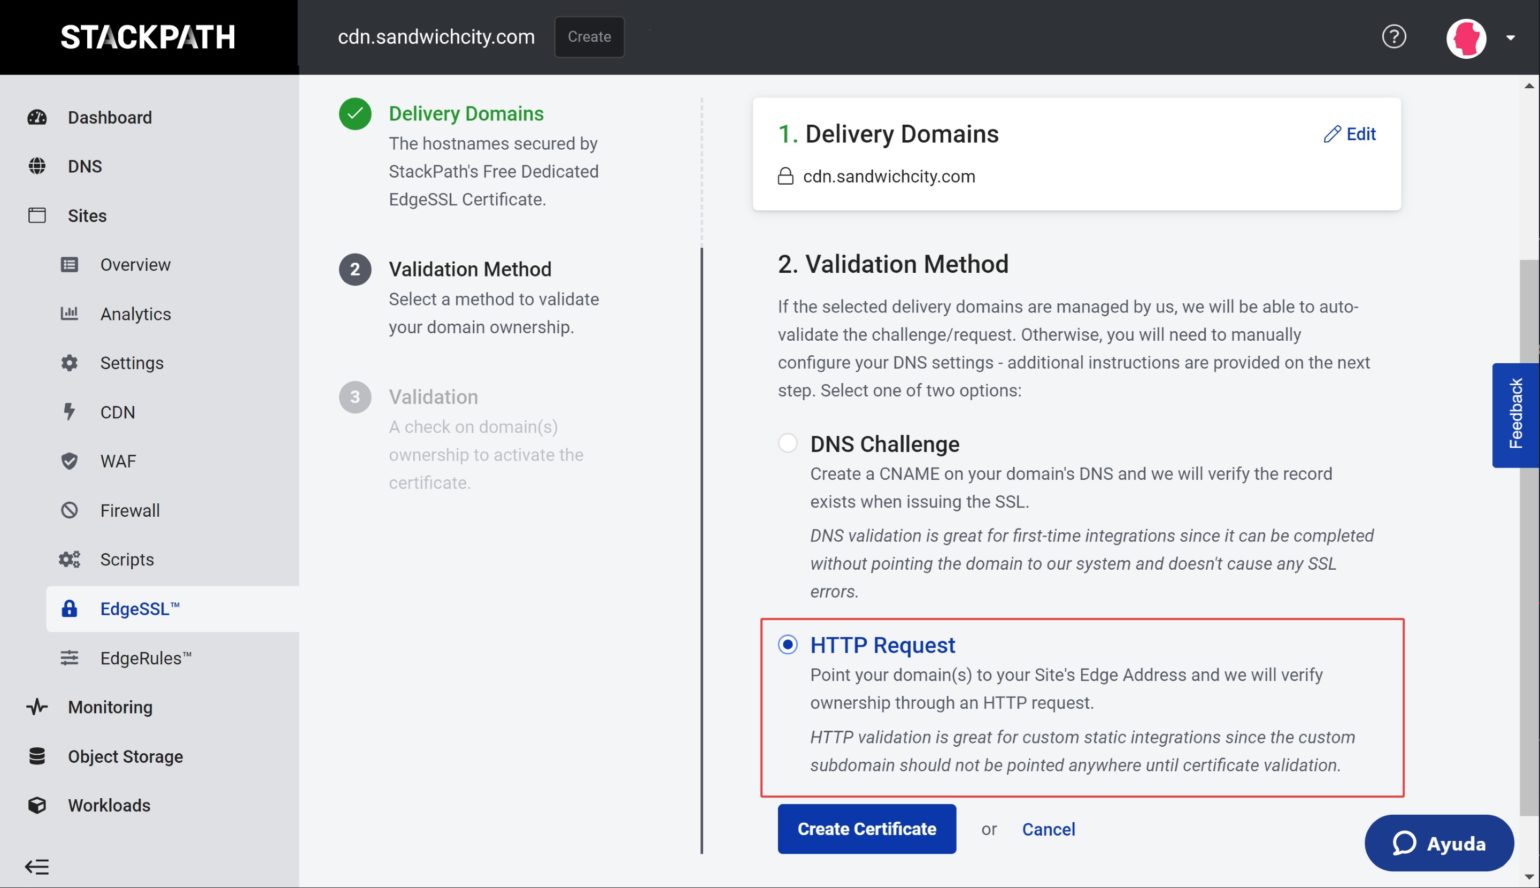
In the new screen presented, select your custom domain in the Delivery Domains section and click on Continue to Validation.

Select HTTP Request as your validation method and finally click on Create Certificate. Bear in mind that this process should only be started if you have created the CNAME record for your custom domain.
StackPath will work with both HTTP and HTTPS requests as it makes the requests to the Origin with the protocol specified by the end-user. But if you want to modify that, you can by going to your site settings page and change it under the Pull Protocol option.
Configure WP Offload Media
Once your certificate is validated, log in to your WordPress dashboard and go to the Offload Media settings page. Scroll down to the Provider option under the Delivery section and click on Change. On the new page, select Another CDN and then StackPath as your new delivery provider and save the changes.
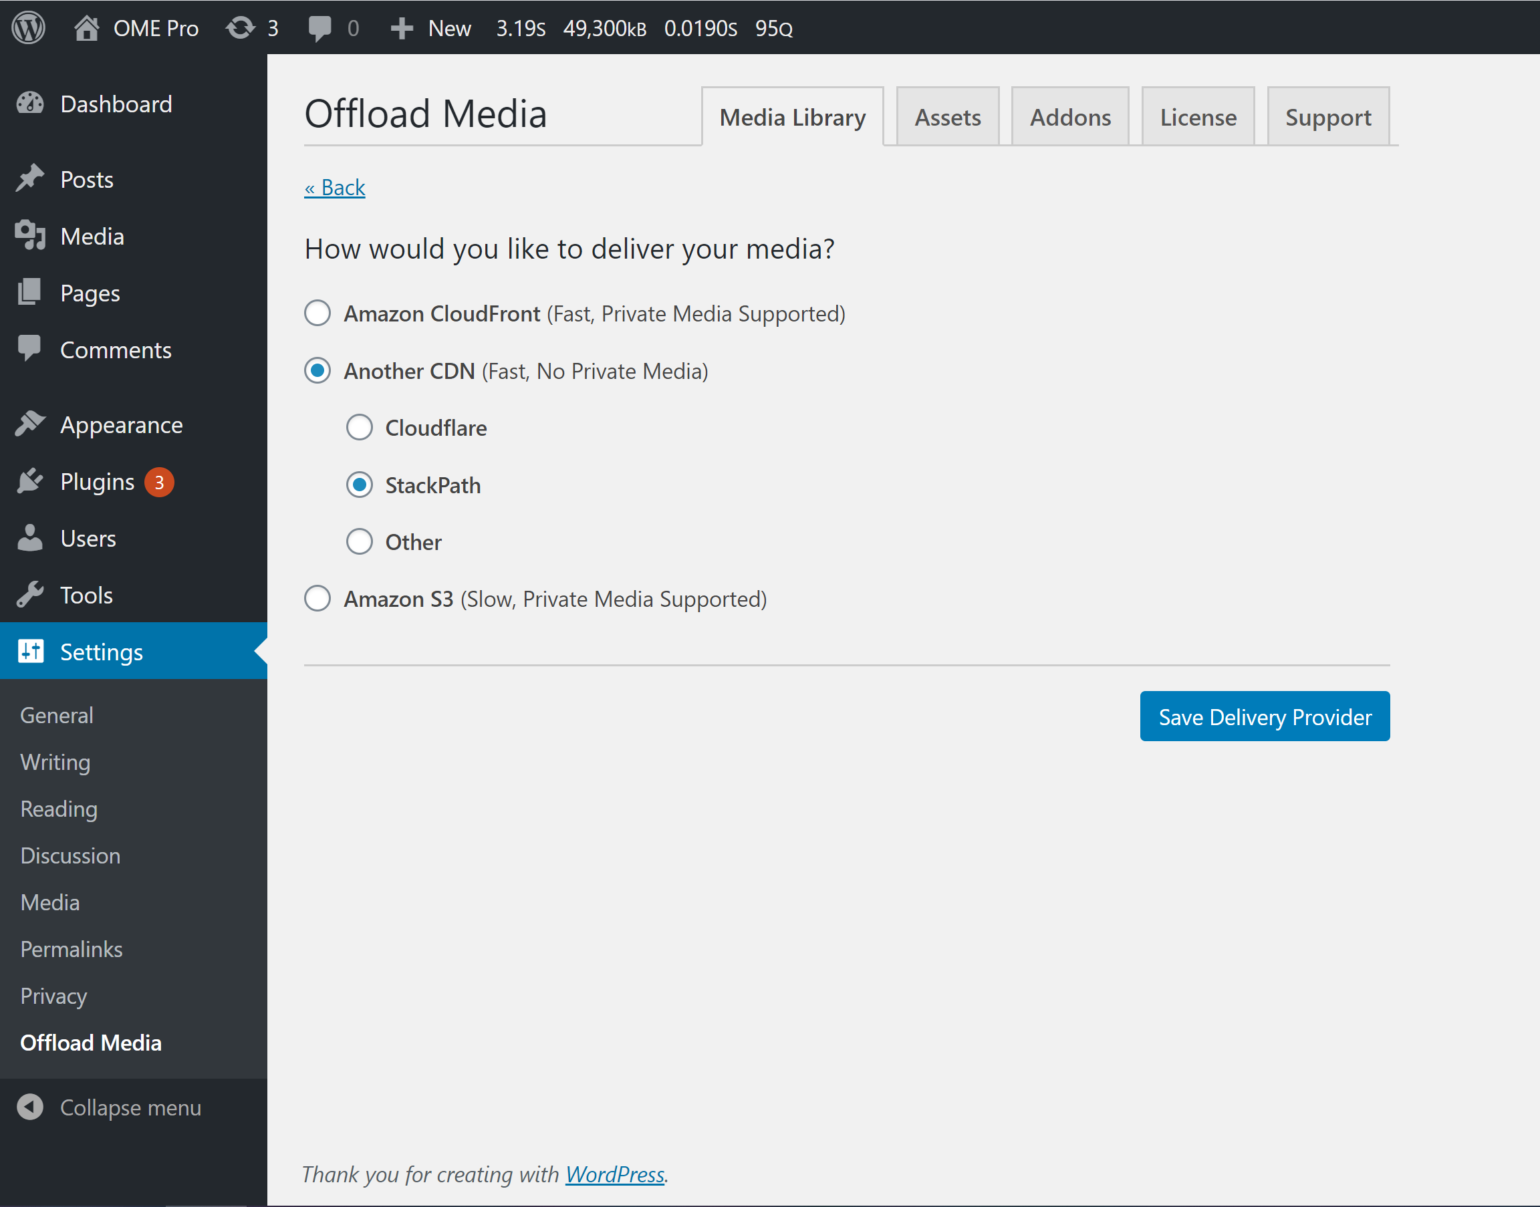
Back on the Offload Media settings page, go to the Custom Domain (CNAME) option, turn it on, and enter the domain name.

Save the changes and clear your page cache if you have one enabled.
Testing Everything Works
At this point, it would be a good idea to check that all is in order and that StackPath is serving the Media Library items properly. Hop on over to the site’s Media Library and upload a new image. Then go to that image on the front-end of your website and open the Developer Tools (CMD+ALT+I macOS / CTRL+SHIFT+I elsewhere). You should see that the image URL is now pointed to your custom domain. You could also navigate to the Network tab and check the response headers, which should now contain a “X-HW” header.

If those values match, your content is now successfully being served from StackPath. If not, please go back and check through the previous steps.