Should your WordPress sites use Google’s Accelerated Mobile Pages (AMP)? It’s a simple question with a complicated answer. In this article, we’ll cover how AMP works, how to use both the official AMP plugin and AMP for WP, as well as a method to boost your site speed for all users without using AMP at all, instead relying on WP Offload Media and WP Engine’s caching.
- What is AMP?
- AMP and WordPress
- Using the AMP Plugin
- Using the AMP for WP Plugin
- Boosting Speed with WP Offload Media and WP Engine
- Wrapping Up
What is AMP?
An AMP page is a special version of a regular site page, built using AMP HTML. This is a subset of standard HTML with a few tags replaced with AMP-specific counterparts like <amp-img>. Google also requires AMP pages to include the AMP JS library which performs optimizations on your page.
Initially, there were two reasons to use AMP pages on your WordPress sites: the idea that they would load faster for mobile users and to get preferential treatment in Google’s Top Stories carousel.
The second reason hasn’t applied since 2021, when Google announced that they were discontinuing this practice, instead relying on a site’s Core Web Vitals.
When it was announced in 2015, Google billed the AMP Project as a way to improve the performance of mobile pages, and the experience for users on mobile devices. Automattic announced that it would support AMP in October of the same year. An AMP plugin was soon made available in the WordPress Plugin Repository which allowed you to add AMP support to your WordPress site. The original plugin was a pretty spartan affair, but substantial development has taken place over the intervening years.
AMP has been dogged by controversy from the beginning. Criticisms leveled at the Google-developed standard include that “it’s bad for how the web is built”, that it “keeps users within Google’s domain and diverts traffic away from other websites”, and that “Google has forced websites…to create AMP versions of their articles”. Even Google’s move to an open governance model failed to silence critics.
More recently, the US Justice department argued in a January 2023 lawsuit that the way AMP pages prioritize Google’s ad trackers constitutes “an effort to push parts of the open web into a Google-controlled walled garden, one where Google could dictate more directly how digital advertising space could be sold.”
AMP and WordPress
Automattic, well-known WordPress agency XWP, and Google have been involved in developing the official AMP plugin since 2017. Version 1.0 of the plugin was officially released at WordCamp US in 2018. One of the most prominent features of that release was an integration with the block editor to ensure AMP-compatibility of all core blocks.
AMP and WordPress Themes and Plugins
This wasn’t the case when it first launched, but the official AMP plugin now serves pages identical to non-AMP pages…as long as you’re using an AMP-enabled theme. Broadly speaking, AMP doesn’t play well with JavaScript. For example, AMP only allows <script> tags if they’re used for loading AMP components, which are added automatically.
When this occurs, the plugin gives you a choice to remove the <script> tags loaded by the theme and serve the page as AMP, or to remove them and serve it as a non-AMP page. Removing them requires careful consideration and an awareness of exactly what the theme’s JavaScript is doing. For example, if your theme loads custom JavaScript to power its navigation menus, removing it might cause your frontend navigation to break.
This aspect of AMP isn’t limited to themes. It may also interfere with other components that rely on JavaScript, such as forms.
 Instead, you can use AMP components and functionality such as
 amp-bind and actions and events (as opposed to JS event handler attributes like onclick). Some custom JS can be added if encapsulated in the amp-script.
These components allow you to add custom tags to your AMP-enabled pages. The amp-bind component comes into play as a response to changes in the data or actions taken by the user on your WordPress site. The amp-script component is used to run custom JavaScript in a web worker. Note that some restrictions may still apply to exactly which scripts you can run this way.
Using the AMP Plugin
You can install the AMP plugin the same way you would any other plugin available from the WordPress.org repository. Just type “AMP” into your search bar and it should be the first thing you see
Next, install and activate the plugin, and then navigate to AMP > Settings in the WordPress admin. You’re presented with “AMP Settings”, “Template Mode”, and “Advanced Settings”. The “AMP Settings” include “Configure AMP”, “Site Scan”, and “Review”. Click Open Wizard under “AMP Settings” to continue setup.
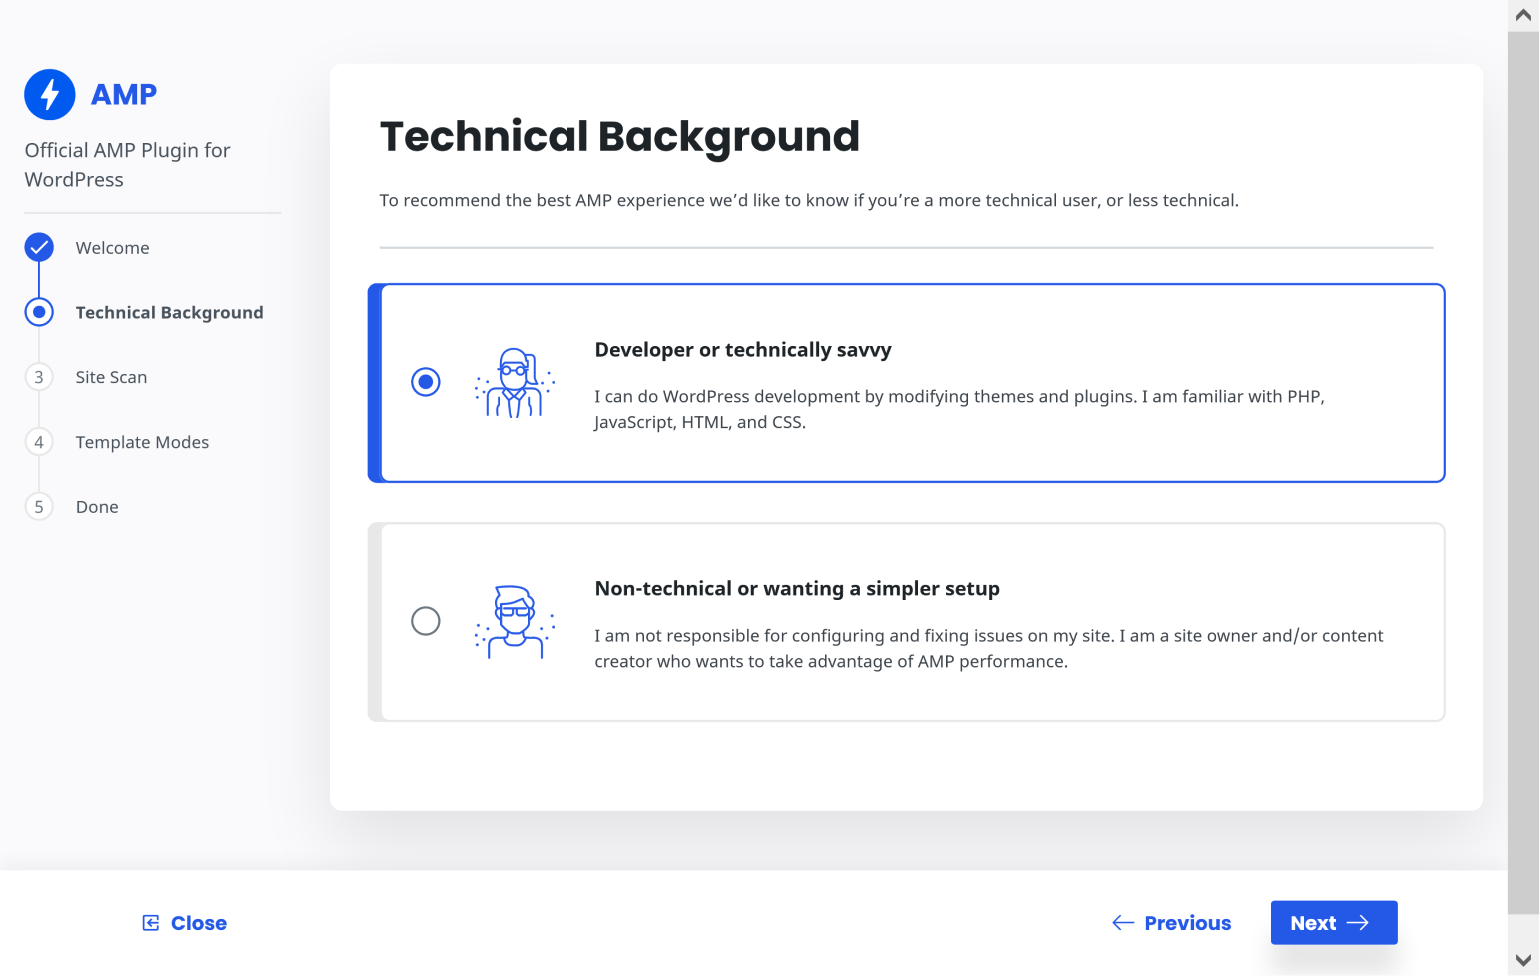
The wizard takes you to a brief welcome screen, and then gives you options for “Developer or technically savvy” and a simpler setup for “Not technically savvy.” The only difference is in the modes recommended by the plugin. This is entirely up to you, but you’ll probably want to click Developer or technically savvy as it gives you more options. Click Next once you’ve made your selection.
The wizard then scans your WordPress site to check for incompatible themes and plugins. The scan can provide you with two possible results. If your site has no incompatible plugins and themes, click Next to proceed to the next step.
It may turn out that your site does have incompatible themes or plugins…in which case you click Next to proceed to the next step and fix it.
Now the onboarding wizard offers you three template options: “Reader”,”Transitional”, and “Standard.”
Reader: You still have AMP and non-AMP versions of your site with this choice, but each version uses its own theme. This setting is for when you are using a theme that has significant incompatibilities with AMP. The AMP documentation recommends this setting for those who aren’t “technically savvy, or simply do not want to deal with the incompatibilities.”
Transitional: This gives your site both AMP and non-AMP versions, with both using the same theme. You can use this mode if your WordPress site uses a theme that isn’t fully compatible with AMP, but you’re okay with the differences between the two versions. Users on mobile devices are served the AMP version, while those accessing your site from desktops see the non-AMP version.
Standard: This setting means that every post and page will be rendered as AMP. You can still opt-out of AMP for specific parts of the site, but otherwise non-AMP versions of your content will not exist. Make sure your site is using AMP-compatible themes and plugins before selecting this option. The plugin will typically recommend this option if you have an AMP-compatible theme and none of your active plugins cause issues.
The plugin will recommend a setting for you based on the results of your site scan. Regardless of your choice, click Next to proceed to the last stage of setup.
The plugin gives you a preview window to see how your site will look served as AMP pages. Choosing Reader or Transitional template modes in the previous step gives you a toggle switch that allows you to switch between AMP and non-AMP views. Choosing Standard omits this toggle, but it is otherwise identical.
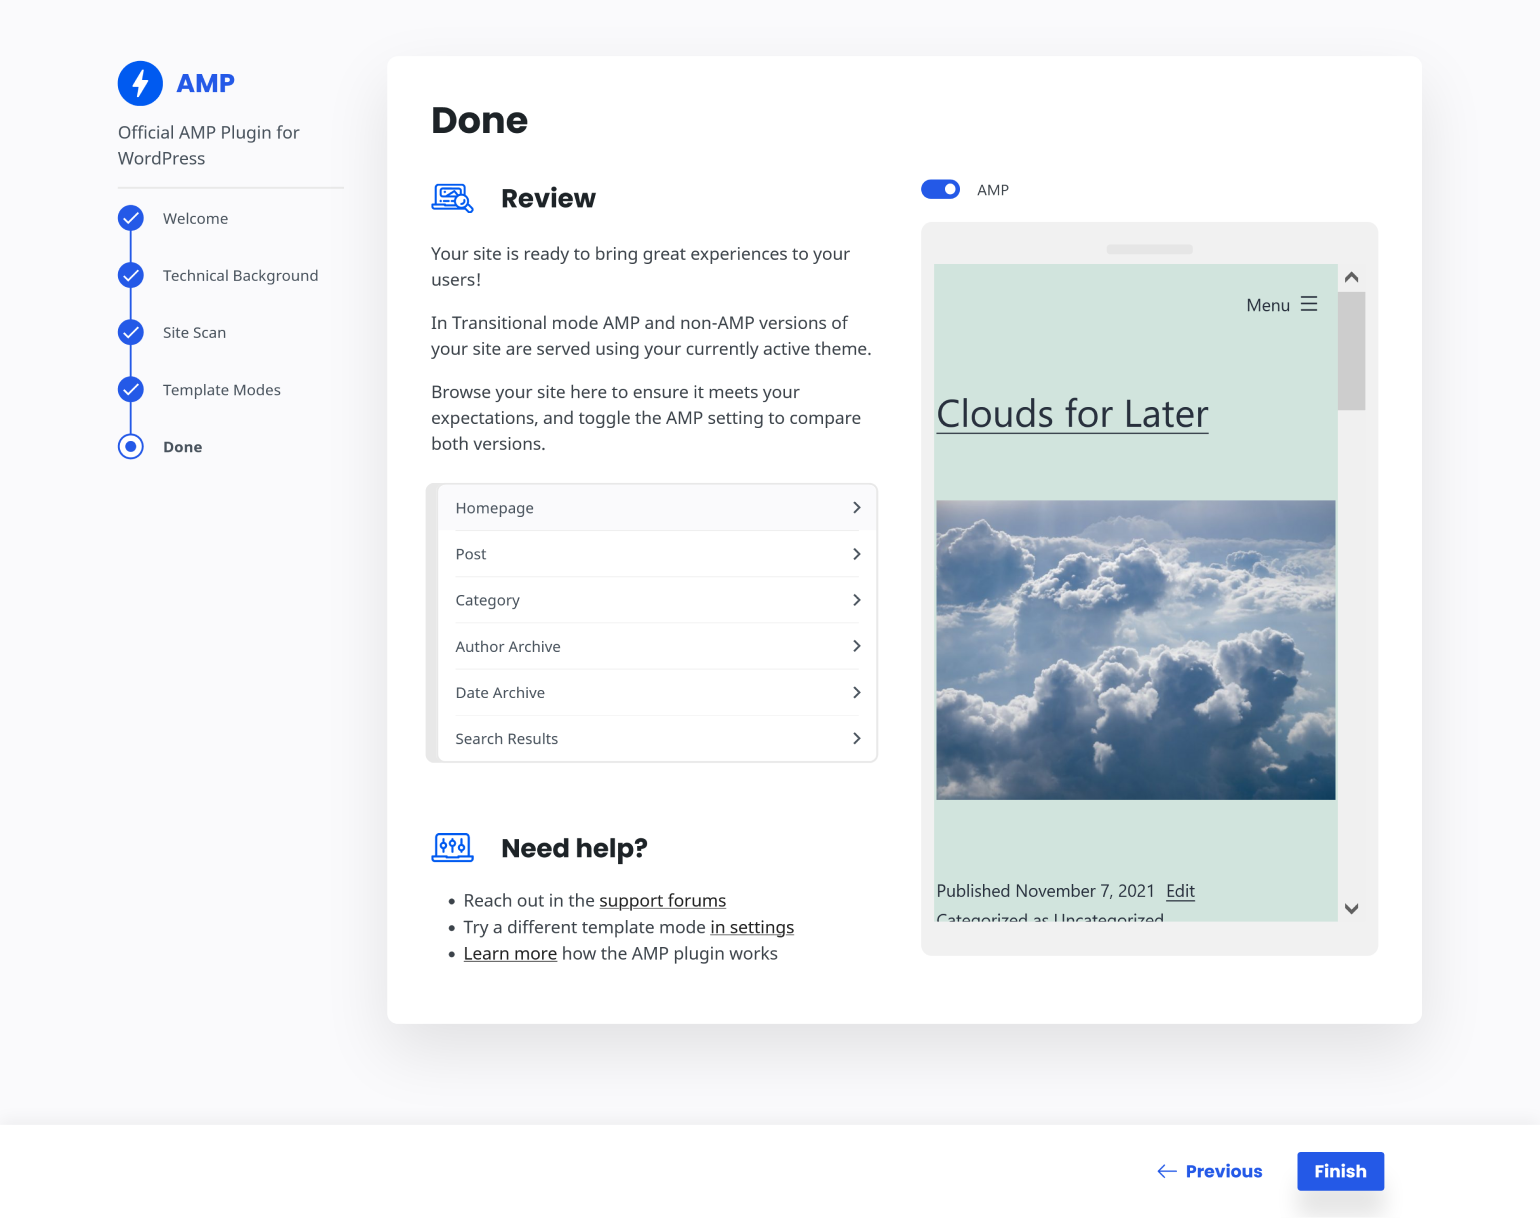
Take some time to review your site and make sure everything looks as it should. If something’s off, you might need to select a different template mode. After you’ve finished reviewing, click Finish to return to the AMP settings page.
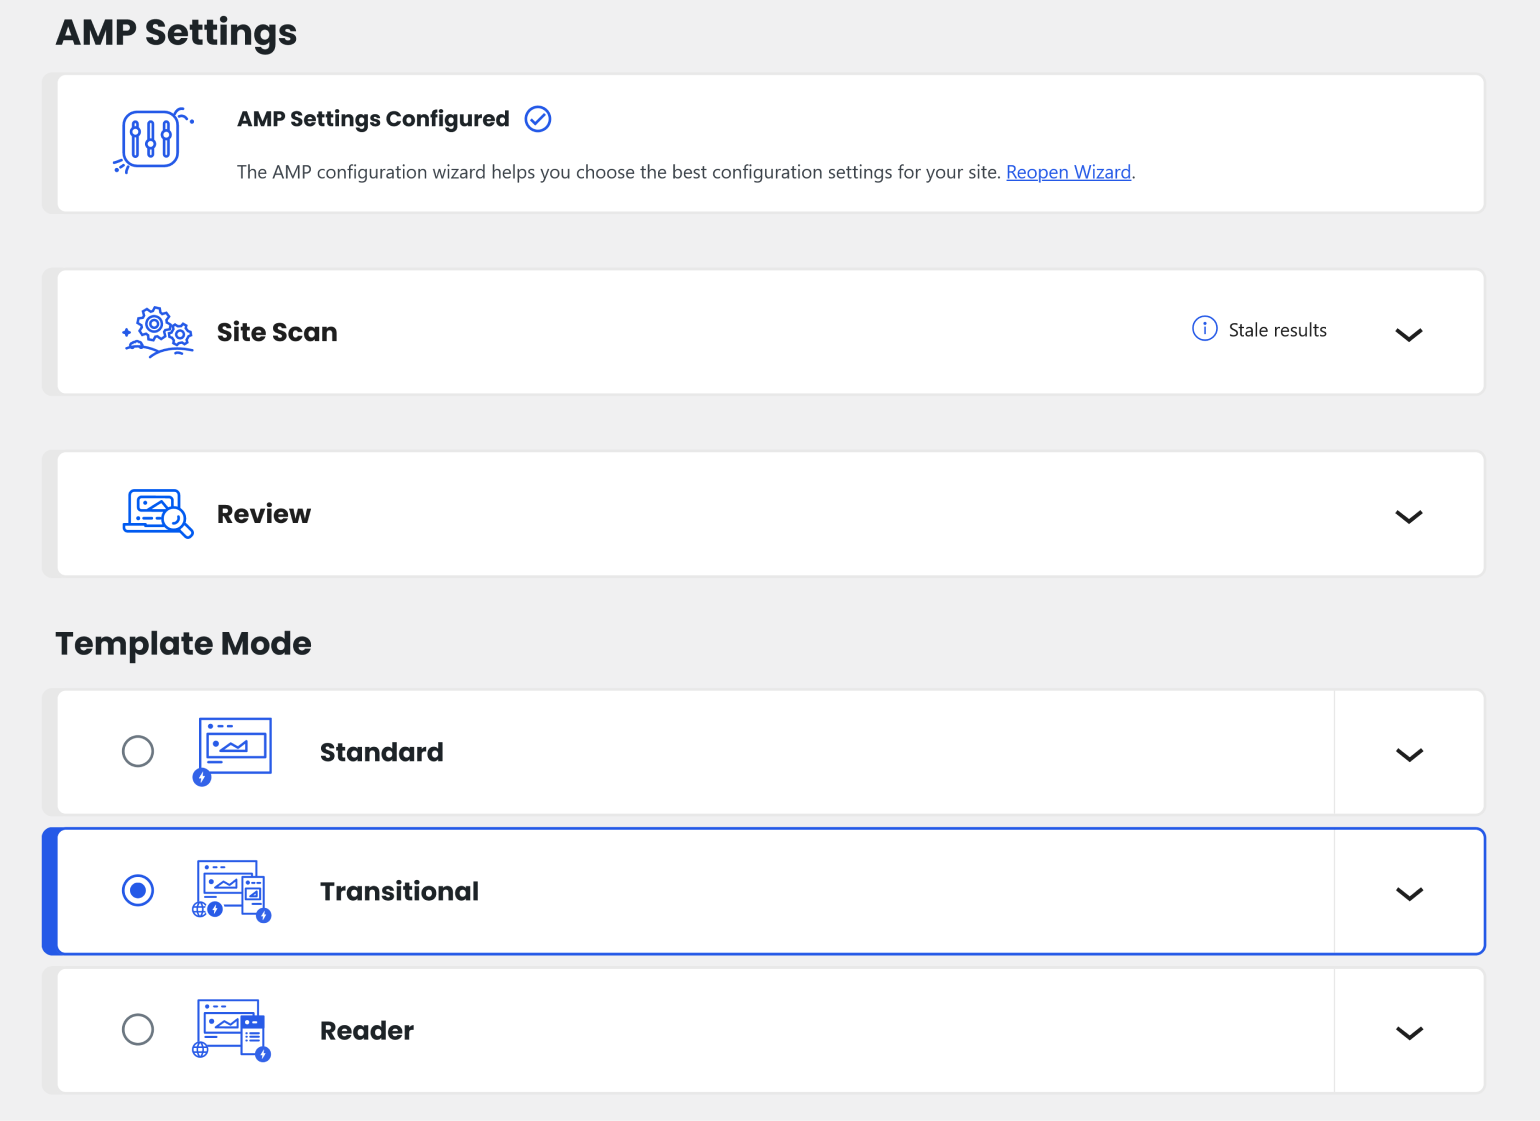
From here, you can reopen the wizard or switch directly between “Standard,” “Reader,” and “Transitional” modes. Scrolling down will reveal the AMP plugin’s more advanced settings, which you can see below. We’ll discuss these next.

Supported Templates: This allows you to choose which content types are enabled for AMP, including posts, pages, and media. There’s also a toggle switch that allows you to serve all templates as AMP. This is selected by default.
Plugin Suppression: Using this setting, you can see which plugins are causing AMP validation errors, and switch them from Active to Suppressed. Suppressing plugins prevents them from running on your AMP pages, while leaving them active on the rest of your site.
Analytics: This setting controls analytics configurations, allowing you to capture analytics for your AMP pages. Each configuration takes the form of a JSON object and you must have Google Analytics set up on your site for any configuration to work. We recommend reading the amp-analytics documentation and the Analytics documentation before making any changes to this setting.
Sandboxing (Experimental): This setting allows you to generate AMP components without requiring AMP validity. You indicate the minimum degree of sanitization by selecting a sandbox level: “Loose” doesn’t remove AMP-invalid markup by default, “Moderate” removes invalid AMP except for POST forms, excessive CSS, and other PX-verified markup, and “Strict” will require valid AMP and remove any markup, aside from excessive CSS, that causes validation errors.
Paired URL Structure: This setting only applies to Transitional and Reader modes. Standard mode only serves AMP pages, so paired URLs aren’t necessary. In Transitional and Reader modes, canonical URLs remain non-AMP, while the AMP versions have AMP-specific URLs. Changing the paired URL structures can result in 404s until the site is re-indexed. AMP recommends leaving this setting alone unless you’re migrating from another AMP plugin with a different structure. There are four different structures for paired URLs, with examples shown at the preceding link.
Other: This setting consists of four toggle switches, three of which are enabled by default. The first allows you to disable mobile redirection. Leaving it enabled ensures mobile visitors see the AMP version of your pages. The second switch enables AMP developer tools to surface validation errors when editing posts and viewing the site. The third switch enables the native HTML img tag, allowing you to use it instead of amp-img. Note that if you CSS specifically targeting amp-img tags, you’ll need to update those tags if you switch this on. The fourth and final toggle switch determines whether plugin data will be deleted if you uninstall the plugin at some point.
Using the AMP for WP Plugin
The official plugin isn’t your only choice if you want to serve AMP pages. AMP for WP is popular and has a lot of extensions available. ,
I wanted to see how it worked compared to the official plugin, so the first step was to deactivate the AMP plugin I’ve currently got on my site. The next step was to install and activate the plugin. After activation, AMP for WP gives you two options to proceed with setup: Basic and Advance.
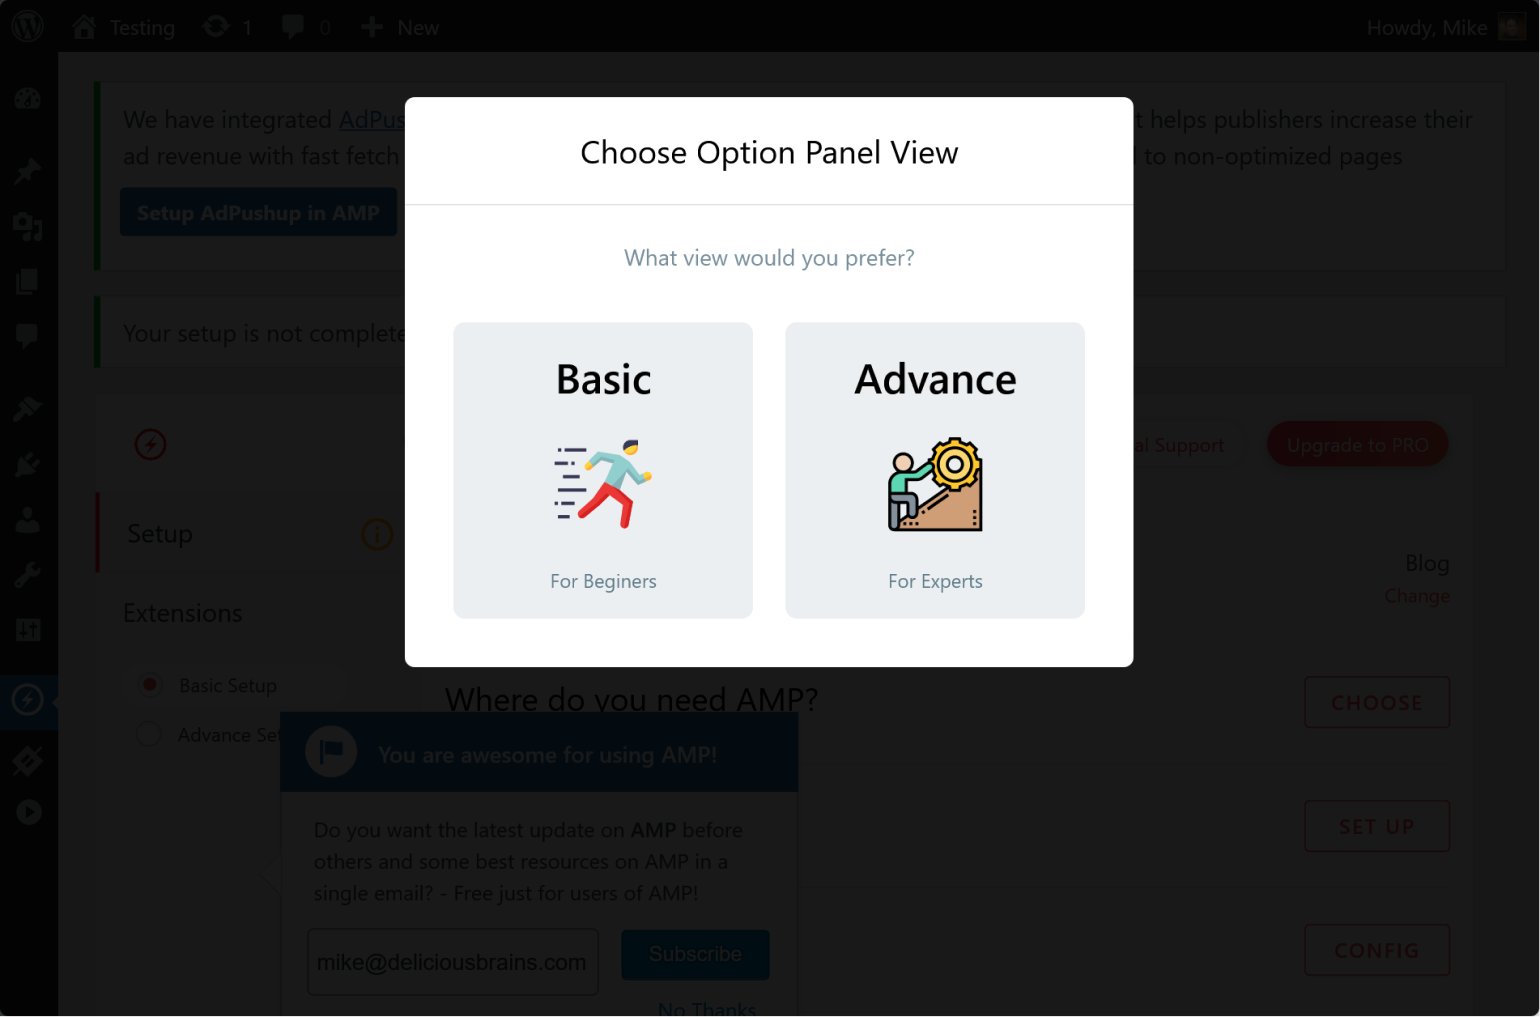
Advance gives you access to Setup, Settings, Design, and Extensions. Basic pares this down to Setup and Extensions. You can switch back and forth between the two at any time.
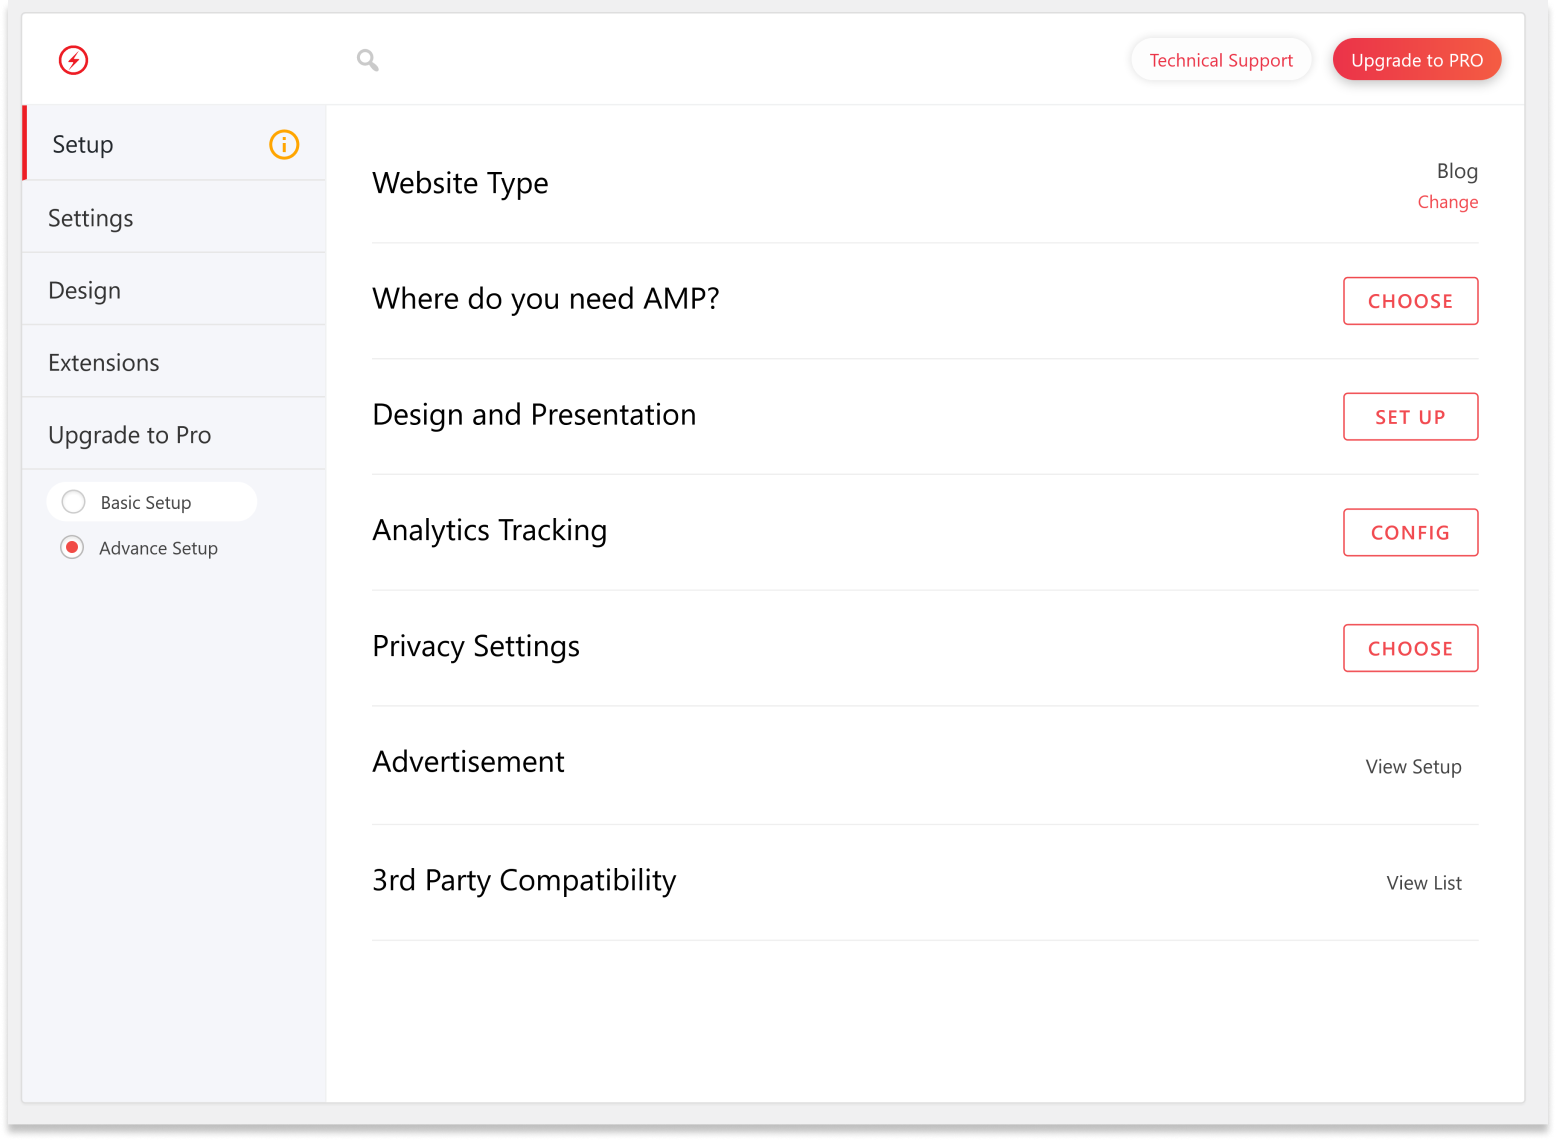
The Setup tab allows you to change your website type, select which parts of your site need AMP, setup design choices, configure analytics tracking, and toggle privacy settings related to GDPR. This tab also includes setup for advertising, and a list of which 3rd party plugins are compatible with AMP for WP.
The Settings tab offers a wealth of options for how your site serves AMP pages. There are frankly too many to go into detail here, but it seems to cover most situations at a fairly granular level, including ecommerce, translations, analytics, and structured data.
The Design tab is relatively simple in comparison. It shows you AMP-compatible themes, as well as giving you access to the precise look and feel of your AMP pages created through this plugin.
Finally, the Extensions tab shows you the list of premium extensions available for AMP for WP.
Based on the Settings and Design tab alone, AMP for WP gives you more fine-tuned control over your AMP pages than the official plugin does. You can always customize your site and your AMP pages, but those customizations may require you to dip into code if you’re using the official plugin. AMP for WP appears to offer similar functionality through the usual WordPress backend. There is also a PRO version of AMP for WP available that offers discounts on themes and extensions, as well as features that aren’t available in the free version.
The first step of setting up AMP for WP is to select the type of site. It defaults to “Blog”. To change this, click on Change and select from “Blog”, “News”, “Local Business”, “Ecommerce” and “Other.”
The next step is to choose where you want to use AMP. Click CHOOSE next to “Where do you need AMP?”. You can choose from “Homepage”, “Posts”, “Pages”, and “Archives”, or any combination thereof.
Next, Click SET UP next to “Design and Presentation” to choose a logo and global color scheme.
The next stage is to set up analytics tracking, and this is one area where AMP for WP really shines. Click CONFIG next to “Analytics Tracking” to open a modal where you can input a Google Analytics tracking ID. You can also add different types of analytics here, with 18 different types to choose from.
Click CHOOSE next to “Privacy Settings” to access two toggle switches: “Cookie Notice Bar”, which informs site visitors that your site uses cookies, and “GDPR”, to ensure you’re complying with European privacy regulations.
To set up advertising on your AMP pages, click View Setup next to “Advertisement”. The plugin allows you to place ads in six different positions, with options for each.

The last setting is “3rd Party Compatibility”, which you access by clicking View List. This setting allows you to configure compatibility with other plugins, such as Yoast and All in One SEO.
Boosting Speed with WP Offload Media and WP Engine
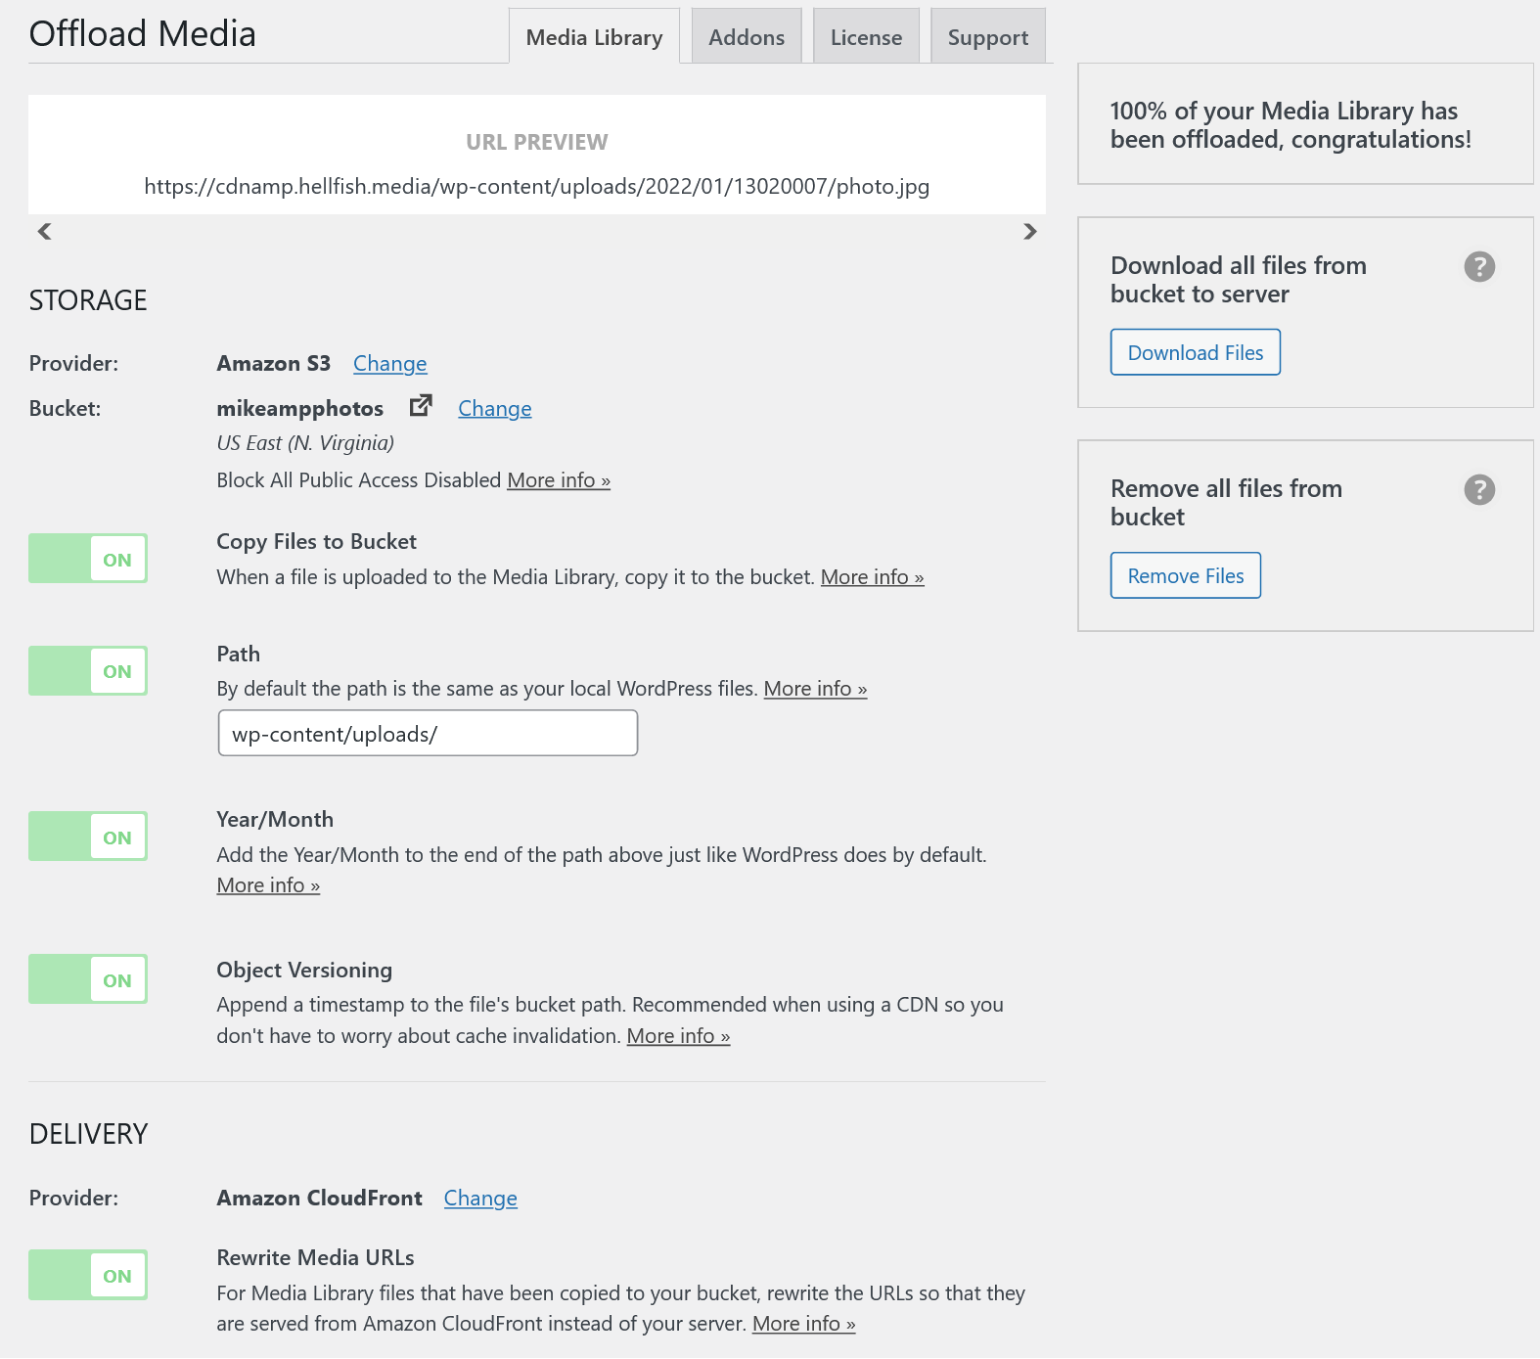
AMP-enabled pages do load quickly, but there are other ways to improve your load times. These include offloading your media through a plugin like WP Offload Media and using a content delivery network (CDN). WP Offload Media helps to improve the load times of every page, mobile or not. There are other steps you can take to boost your page speed in addition to serving your media through a CDN, such as page caching. One of the advantages of these methods is you never have to worry about conflicts with your theme or any JavaScript elements on your WordPress site.
We cover how to set up WP Offload Media in our documentation, as well as how to set up a CDN. We also have guides on configuring storage spaces to handle the offloaded media, including guides for Amazon S3, DigitalOcean Spaces, and Google Cloud Storage.
WP Engine Caching
If your WordPress site is hosted on WP Engine’s servers, then it’s almost certainly employing extensive caching already.
WP Engine offers various kinds of caching to optimize the performance of WordPress websites. These include:
Page Cache: This type of caching stores the dynamically generated version of a page for a specified period. By default, WP Engine’s Page Cache has a 10-minute cache expiration.
Object Cache: This caching method stores the results of queries to reduce the time it takes to access the database. Object caching is disabled by default and must be enabled manually.
Browser Cache: WP Engine serves all static assets with a 365-day cache expiration by default. However, this can be adjusted through cache headers.
Network Caches: This includes Content Delivery Network (CDN) and Advanced Network caches. The CDN cache stores static assets on various global servers, and it is a free optional feature provided by WP Engine.
Powered by Cloudflare CDN, WP Engine’s CDN is included with every hosting plan. If you’ve configured your domain to use Advanced Network or Global Edge Security, there’s no additional changes needed to enable the CDN.
Wrapping Up
One of the primary drivers for the use of AMP was to get your pages into Google’s Top Stories carousel, but that stopped being relevant in June of 2021 when Google switched to evaluating your Core Web Vitals instead. As long as your site offers fast load times, not using AMP shouldn’t hold you back. Improving low Core Web Vitals scores is likely a better use of your time than implementing AMP, and improved Core Web Vitals provide a better user experience overall.
What’s your take on AMP? Do you use AMP pages on your WordPress site, and if so, which plugin do you use? Let us know in the comments!