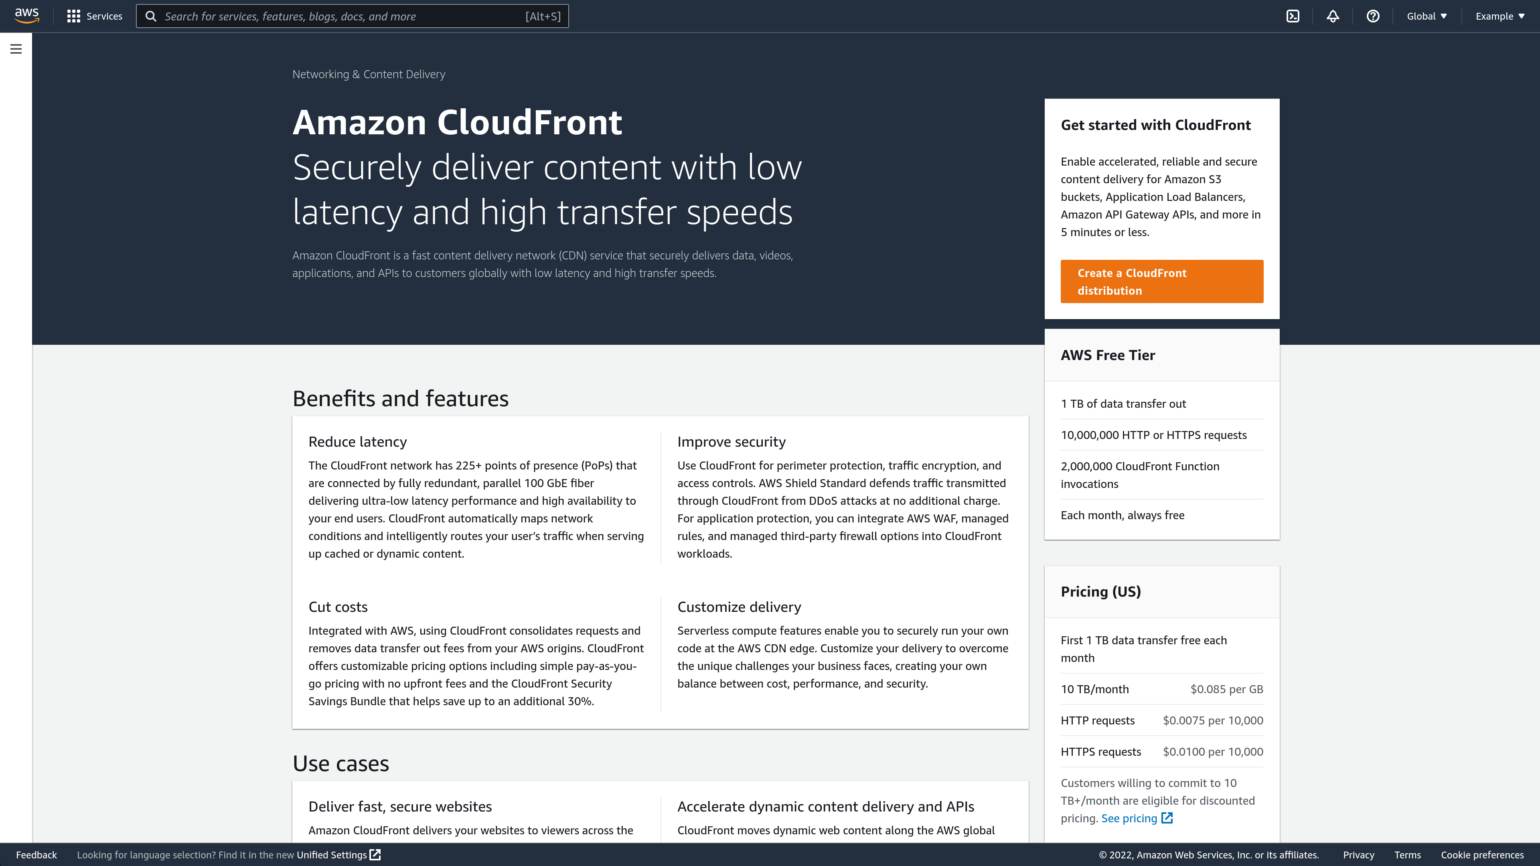
CloudFront Setup for Media Offloaded to Amazon S3
This doc aims to help you start delivering your WordPress Media Library items via Amazon CloudFront as quickly as possible.
It is assumed that you’ve already set up an Amazon S3 bucket and followed the steps within our Amazon S3 Quick Start Guide.
This article covers the following steps:
- Create an Amazon CloudFront distribution
- Configure WP Offload Media to use Amazon CloudFront
- Add a Custom Domain Name (CNAME) to the distribution
- Block All Public Access to the Bucket
- Next Steps: Deliver private media via Amazon CloudFront
For improved SEO and more professional private media URLs when using Amazon CloudFront, we recommend following the entire doc and using a subdomain of your site’s domain for the distribution. Finishing off by securing your bucket to block any public access is also recommended.
However, after creating the CloudFront distribution and configuring WP Offload Media to use its default domain name generated by AWS, you will have a perfectly fine CDN setup swiftly delivering your media to your site visitors. You can always come back later and finish off the guide to add a custom domain name to the CloudFront distribution and lock down the bucket.
Create an Amazon CloudFront distribution
Log into the AWS console and ensure you’re in the “Distributions” section of the AWS Console’s CloudFront page.
If you have never created a distribution on your Amazon AWS account, you may be presented with a landing page explaining what CloudFront is. Click the orange Create a CloudFront distribution.
If you instead open the 3 bar “burger menu” to the left and click the Distributions link, you will be presented with an empty Distributions list, which has an orange Create distribution button on the top right you can use to get started.
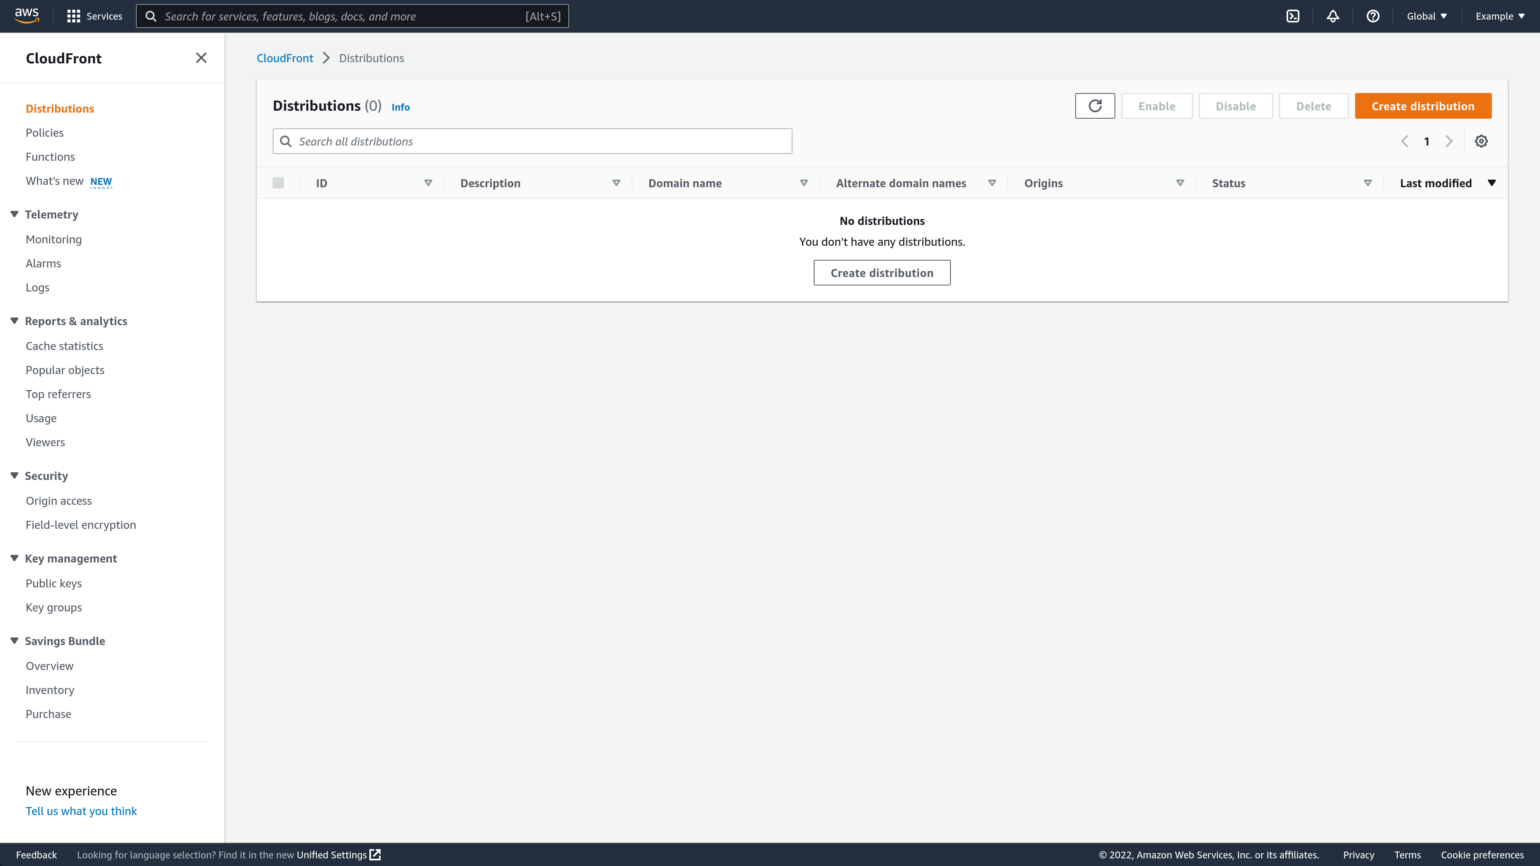
If you already have distributions, click the orange Create distribution button at the top right of the Distributions list to get started.
You should be taken to the “Create distribution” page, and see a panel with the name “Origin”.

In the “Origin” section of the “Create Distribution” page, populate Origin domain by selecting the Amazon S3 bucket you’ve already set up WP Offload Media to offload to. When you click into that Origin domain field you should get a list of all your buckets, typing the first few characters of the bucket’s name will help you find it if you have a few.
And that is it, once you have selected the bucket you should see the Name field populated with an automatically generated name that is usually the same as the fully qualified bucket name you selected, all other settings in all the other panels can be left with their default values.
We’ll come back later to update some settings once we’ve tested the new distribution, but for now, scroll down to the bottom of the page and click the orange Create distribution button.
Amazon CloudFront will begin deploying the new distribution configuration to its edge servers. This can take a while.

Once the Distribution has finished deploying and the “Last modified date” shows a date rather than status of “Deploying”, take a note of the dXXXXXXXXXXX.cloudfront.net style domain name you see under the “Distribution domain name”. You will need this domain when configuring WP Offload Media.
If you return to the Distributions list you should see the new CloudFront distribution at the top of the list with a status of “Enabled”.

Configure WP Offload Media to use Amazon CloudFront
Now that you have a deployed Amazon CloudFront distribution that uses your bucket as its origin, you can configure WP Offload Media to start delivering the site’s offloaded media via the distribution’s domain name.
Head over to your WordPress site. Visit the WP Offload Media settings page (Settings → WP Offload Media), and in the “Delivery Settings” panel, click the Edit button to the right of the Delivery Provider’s name, which should currently say “Amazon S3”.

Pick Amazon CloudFront as the new Delivery Provider, then click the Save Delivery Provider button to save your changes.

In the Delivery Settings panel of WP Offload Media’s settings page you should now see “Amazon CloudFront” as the Delivery Provider, and a new Use Custom Domain Name (CNAME) option, which is turned off by default. Toggle that switch on.

You now have a text box where you should enter the dXXXXXXXXXXX.cloudfront.net style distribution domain name that was generated for the Amazon CloudFront distribution.
Please note, if you use the little copy button in the AWS Console to copy the CloudFront distribution’s domain name to your clipboard, it includes https:// at the beginning. Please delete the https:// bit after pasting it into the Use Custom Domain Name (CNAME) field, only the domain name should be entered.

You’ll also see a new Serve Private Media from CloudFront option. Leave that turned off for the moment. Later you can use our Private Media doc to configure signed CloudFront URLs for any private media or downloads you wish to serve to customers.
Click the Save Changes button to start serving your offloaded Media Library items via Amazon CloudFront. The URL Preview at the bottom of the settings page shows you an example of the kinds of URLs that the site’s offloaded media will use.

It’s a good idea to quickly check that all is in order, and an offloaded Media Library item is being served by Amazon CloudFront. Hop on over to the site’s Media Library and find an offloaded image, click on it to view its details.
If you used grid mode for viewing the Media Library, then you should see something like below, with the image displayed, and File URL near the bottom of the right-hand sidebar showing the expected CloudFront domain.

If you used list mode for viewing the Media Library, then you should see something like below, with the image displayed, and File URL near the top of the right-hand sidebar showing the expected CloudFront domain.

Congratulations, your site is now serving media offloaded to an Amazon S3 bucket via an Amazon CloudFront CDN distribution! 🎉
Add a Custom Domain Name (CNAME) to the distribution
Now that you have created and tested an Amazon CloudFront distribution that serves the media WP Offload Media has offloaded to an Amazon S3 bucket, it’s time to switch from using the generated domain name to a custom domain name of your choosing.
For best results you should pick a subdomain name of your site’s base (otherwise known as “apex”) domain name. For example, if your site is at www.example.com or example.com, a good custom domain name for the CloudFront distribution might be media.example.com or cdn.example.com.
Once you have chosen your custom domain name, log into your DNS provider’s control panel and create a new CNAME entry for the chosen subdomain that points to the distribution domain name generated by CloudFront.
In most DNS providers you would enter the first part of your chosen domain name as the Name as the DNS provider already knows the rest of the domain name. For the Target you enter the dXXXXXXXXXXX.cloudfront.net style distribution domain name that was assigned to your new Amazon CloudFront distribution.
Please note, if you use the little copy button in the AWS Console to copy the CloudFront distribution’s domain name to your clipboard, it includes https:// at the beginning. Please delete the https:// bit after pasting it into the CNAME entry’s Target field, only the domain name should be entered.

If you’re using Cloudflare, before saving the new CNAME entry make sure to turn off the proxy cache by clicking the toggle switch so the orange cloud image changes to gray, and the Proxy status changes from Proxied to DNS only.
Create a Free HTTPS Certificate
It’s important that your media be served over a secure HTTP connection to avoid site visitors seeing warnings, especially if your site is also served via HTTPS. You can create a free HTTPS certificate in the AWS Certificate Manager for your custom domain name and then tell the CloudFront distribution to use it at the same time that the new custom domain name is set.
Log into the AWS Console and visit the AWS Certificate Manager page.
Because your new certificate is to be used with the “global” Amazon CloudFront service, you must create the certificate in the default us-east-1 (N. Virginia) region. To ensure you are working in the default us-east-1 (N. Virginia) region, pick it from the top-right menu.

If you have never provisioned a certificate on your Amazon AWS account, you’ll be presented with a landing page that explains what the AWS Certificate Manager is for. Click the orange Request a certificate button to get started.

If you already have provisioned certificates, or clicked the List certificates option from the left hand “burger menu”, click the Request button at the top right of the list of certificates.

You’ll be given the choice of creating a public or private certificate, choose Request a public certificate and then click Next.

It’s now time to configure the domain name for the certificate, validation method, and any tags.
We strongly recommend using a wildcard certificate that is able to protect multiple subdomains of your site’s primary (often called Apex) domain name. For example, if the site is hosted at www.example.com, you should enter the domain *.example.com so that the certificate can automatically protect the domain media.example.com, but also assets.example.com or any other subdomain of example.com that you might want to later use with an Amazon AWS service.
If you do not wish to have the flexibility of being able to use any subdomain with other Amazon CloudFront distributions or AWS services, then you can enter the full subdomain you wish to use for the distribution, e.g. media.example.com.
You can also have a certificate cover more than one domain by clicking the Add another name to this certificate button.
In the “Select validation method” panel you’re given the choice of using either DNS Validation or Email Validation. Pick DNS validation – recommended.
You’re also given the opportunity to add tags. Adding tags is purely optional, if you’re a heavy user of AWS you may have a reason to add tags here to help with management tasks, but otherwise they can be left out.
Once you’ve made your choices, click the Request button to request the certificate.

AWS will create the certificate request, and you will need to validate the domain to complete the request. Click on the View Certificate button in the notification message at the top of the screen to view the status of the certificate request.

On the “Certificate Status” page you should see that the status for your chosen domain is “Pending validation” as you have not created the relevant DNS record.
If you didn’t take our recommendation to use DNS validation and instead picked the Email validation method, please go check your email and click a link in one of the emails you just got from Amazon AWS (you may get duplicate emails to various domain admin addresses, just use one of them).
If you took our recommendation and picked DNS validation, you need to copy the CNAME name and CNAME value fields, to create the CNAME entry with your DNS provider. You can click on the copy icon just above each value to copy them to your clipboard.

Open a new browser tab and log into the control panel of the DNS provider for your site’s domain. Every DNS provider has different setups, but you should be able to create a new CNAME record for your domain and enter the Name specified by Amazon along with the Value as the alias or target.
For most DNS providers you only need to enter the first part of the name specified by Amazon as the provider already knows the rest of the name. You usually need to enter the full Value, but often the full stop (period) at the end isn’t required.

If you’re using Cloudflare, before saving the new CNAME entry make sure to turn off the proxy cache by clicking the toggle switch so the orange cloud image changes to gray, and the Proxy status changes from Proxied to DNS only.
Once you’ve added the CNAME record to your DNS or clicked the link in the validation email, switch back to the AWS Console and refresh the “Certificate Status” page. With luck, your certificate will already be validated and shows a validation status of “Success”, but it can take a few minutes for DNS changes to propagate and for AWS to see them.
Add Alternate Domain Name to CloudFront Distribution
Now that you have a subdomain pointed to the CloudFront distribution, and have created an HTTPS certificate that can be used for that subdomain, it’s time to update the CloudFront distribution to use them.
Log into the AWS console and ensure you’re in the “Distributions” section of the AWS Console’s CloudFront page.
From the list of distributions, find the CloudFront distribution that your site is using to serve offloaded media, and click the ID to see its details.

From the General tab of the distribution’s details page, click the Edit button in the top right of the “Settings” panel.

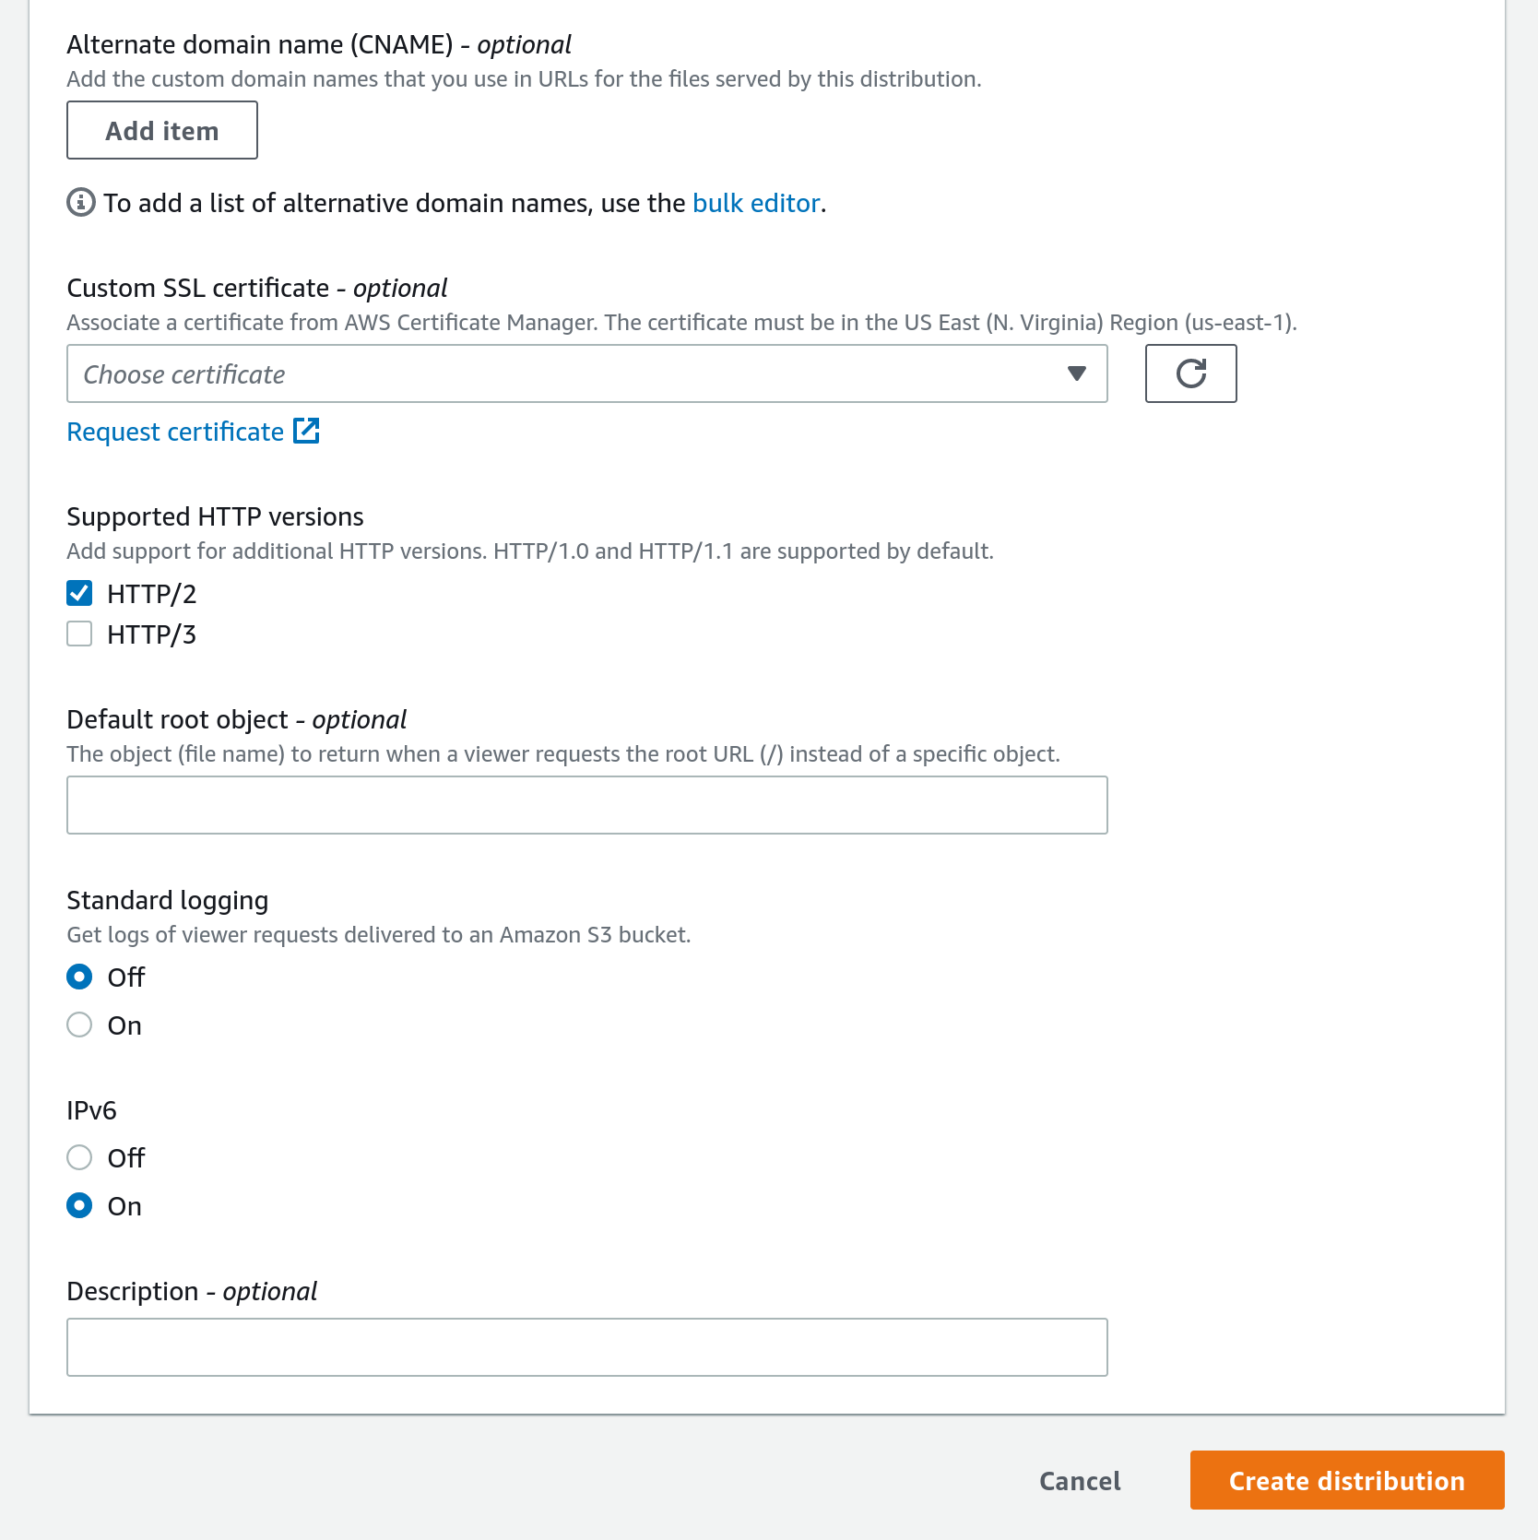
In the Edit Settings page for the CloudFront distribution, click the Add item button under the “Alternate domain name (CNAME) – optional” heading to reveal an input field. Enter your chosen custom domain name for the distribution to use, e.g. media.example.com.
Under the next “Custom SSL certificate – optional” header, click into the dropdown field and select the wildcard certificate that covers the custom domain name that you created earlier, e.g. *.example.com.
That’s it, all you need to do now is scroll down to the bottom of the page and click the orange Save changes button.

The updated CloudFront distribution will start deploying to the edge servers.

It may take a few minutes, but once the “Last modified date” changes from “Deploying” to an actual date and time, you can proceed to the next step, configuring WP Offload Media to use the custom domain name.
Configure WP Offload Media to Deliver Media via Custom Domain Name
Back in the WP Offload Media settings page of your site, enter the custom domain name into the Use Custom Domain Name (CNAME) setting, replacing the CloudFront generated domain name. Then click the Save Changes button.

Congratulations, your site is now serving media offloaded to an Amazon S3 bucket via an Amazon CloudFront CDN distribution that has a custom domain name! 🎉
Block All Public Access to Bucket
Now that your Media Library is being served via Amazon CloudFront, you can now lock down the bucket so that no one can access its files directly. Blocking all public access to the bucket improves security, but also ensures no one accidentally uses the slower direct S3 URLs that also incur charges per request.
This of course means that if you are aware of any external links to your offloaded media that use the default raw S3 URL format (e.g. https://media-example-com.s3.eu-west-2.amazonaws.com/…), you should not enable Block All Public Access. If there are raw S3 links on other sites other than the site that offloaded the media, but you do not care about breaking those links or explicitly want to break those links because their unauthorized use is costing you money, then by all means carry on and enable Block All Public Access to the bucket.
Create an Amazon CloudFront Origin Access Identity
Before blocking all public access to the bucket, we must ensure our Amazon CloudFront distribution has access to the bucket by creating an Origin Access Identity. We’ll then add a policy to the bucket that allows that Origin Access Identity to read from the bucket, even though all means of public access to the bucket will be blocked.
Log into the AWS console and visit the Origin access under the “Security” sub-section of the CloudFront page. Then select the Identities (legacy) tab.
Click the orange Create origin access identity button at the top right of the list.

Enter a clear and concise name for your new identity that reflects which site or bucket you intend to use it with. Click the Create button to save your new Origin Access Identity.

Once saved, you should see your new Origin Access Identity in the list.

Add Origin Access Identity to CloudFront Distribution
From the list of distributions, find the CloudFront distribution that your site is using to serve offloaded media, and click the ID to see its details.

Now select the Origins tab to see the distribution’s Amazon S3 bucket origin, and select its radio button on the left. Then click the Edit button at the top right of the list.

In the Edit origin page, select the Legacy access identities option from within the “Origin access” section, and then pick your newly created Origin Access Identity from the dropdown list under Origin access identity.
To automatically update the bucket to allow this Origin Access Identity to have access, select the Yes, update the bucket policy from under the “Bucket policy” section. Then scroll down to the bottom of the page and click the orange Save changes button.

Check the Bucket Policy Was Applied
Before we turn on Block All Public Access for the bucket, let’s double-check that when we set up the Amazon CloudFront distribution and told it to update the Origin bucket’s policy to specifically grant the distribution’s Origin Access Identity permission, that it actually did so.
Visit the AWS Console’s S3 page and click on the name of the bucket your site is offloading to, and then click on the Permissions tab, and scroll down to the “Bucket policy” section.
You should see a policy that includes a “Principal” element with a reference to a CloudFront Origin Access Identity.

If you do not see something similar in the bucket’s policy, please return to the CloudFront section of the AWS Console, edit the CloudFront distribution’s Origin, and re-select Yes, Update Bucket Policy again before saving it. There’s further details in our Block All Public Access to Bucket doc.
Enable Block All Public Access for Bucket via WP Offload Media
To turn on Block All Public Access to Bucket and ensure WP Offload Media knows about it, switch back to WP Offload Media’s settings page and click the Edit button to the right of “Amazon S3” in the Storage Settings panel’s header.

In the Storage sub page, skip to the “Security” page by clicking Security in the sub navigation.

You’re now given the opportunity to change the bucket’s Block All Public Access setting. Toggle the switch “on” in the “Block All Public Access” panel’s header, and then check the box to confirm that you’ve set up the Origin Access Identity and have a correct bucket policy. If you wish, you can also enforce Object Ownership in the bucket too, that is discussed in our Amazon S3 Bucket Object Ownership doc. Click the Update Bucket Security button to apply the changes.

WP Offload Media will now update the bucket’s Block All Public Access setting to fully enable it. You should be returned to WP Offload Media’s settings page.
At this point it’s probably a good idea to visit your Media Library and add a new image to confirm that it is correctly offloaded to the Amazon S3 bucket and delivered via Amazon CloudFront. If there are any errors please review the instructions above and check that the bucket and distribution are set up correctly.
Next Steps: Deliver private media via Amazon CloudFront
Now that your WordPress site is offloading its Media Library items to a protected Amazon S3 bucket, and delivering that media via an Amazon CloudFront distribution, you may also want to serve private files via signed CloudFront URLs that expire after a few seconds. Offering WooCommerce or Easy Digital Downloads product files is a good example of this.
By default WP Offload Media creates signed expiring URLs that use the raw S3 URL format (e.g. https://media-example-com.s3.eu-west-2.amazonaws.com/…), this will continue to work even if Block All Public Access has been enabled. However, wouldn’t it be nice to serve those product downloads via Amazon CloudFront for improved speed, reduced costs, and better branded URLs?
Hop on over to our How to Serve Private Media via Signed Amazon CloudFront URLs doc to configure WP Offload Media’s “Private Media” setting.